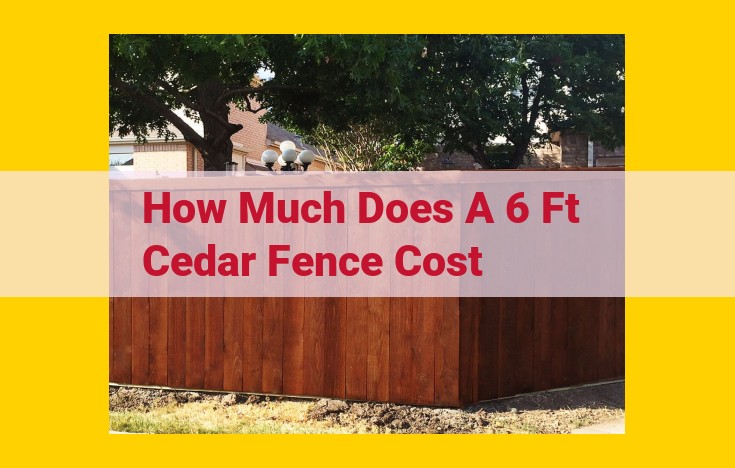
The cost of a 6 ft cedar fence varies depending on factors such as materials, labor, and complexity. Essential materials include cedar pickets, posts, rails, nails/screws, and concrete. Planning involves determining fence type, style, and privacy needs. Ground preparation consists of excavation, leveling, and drainage. Posts are securely installed, panels assembled and attached, and gates/privacy screens added. Finishing touches may include painting or staining. Maintenance involves regular inspection, cleaning, and repairs to ensure longevity.
Materials You’ll Need
Building a fence requires the right tools and materials to ensure its durability and aesthetic appeal. Gather the following essential items before you embark on your fencing adventure:
1. Fence Posts:
- Pressure-treated lumber: Resists rot and decay, making it ideal for fence posts. Choose posts that are long enough to extend at least 24 inches below ground for stability.
- Concrete or gravel: To secure the posts firmly in the ground.
2. Fence Panels:
- Prefabricated fence panels: Available in a variety of materials and styles, these panels make installation a breeze.
- Materials for custom-built panels: If you prefer to build your own panels, you’ll need rails, pickets, and fasteners. Consider using weather-resistant materials like cedar or redwood.
3. Gates:
- Pre-hung gates: Convenient and easy to install, these gates come with hinges and a latch already attached.
- Materials for custom-built gates: You can craft your own gates using the same materials as the fence panels.
4. Privacy Screens:
- Lattice panels: Provide privacy while allowing sunlight to filter through.
- Solid panels: Offer complete visual privacy but can block sunlight.
5. Hardware:
- Nails, screws, or bolts: To attach the panels to the posts.
- Hinges and latches: For gates.
- Post caps: Protect the tops of the posts from moisture and decay.
By gathering the necessary materials before you start, you’ll set yourself up for a successful fence-building project.
Planning and Designing the Perfect Fence for Your Needs
When it comes to home improvement projects, a well-planned fence can not only enhance your property’s curb appeal but also provide security, privacy, and increased functionality. Before you embark on this exciting endeavor, it’s crucial to take the time to carefully plan and design the fence that will best meet your specific needs.
Consider the type of fence that suits your aesthetics and functional requirements. Will it be a privacy fence to shield your yard from prying eyes, a picket fence for a classic touch, or a chain-link fence for durability and security?
Next, determine the height of your fence. A higher fence will provide greater privacy, but it’s essential to consider local regulations and the impact it may have on your neighbors’ views.
The length of the fence will depend on the perimeter of your property and the areas you wish to enclose. Take accurate measurements to ensure you order the correct amount of materials.
Don’t overlook the style of your fence. It should complement your home’s architectural features while reflecting your personal preferences. Choose from various designs, from traditional to contemporary, to create a cohesive outdoor aesthetic.
Finally, consider your privacy needs. If privacy is a top priority, opt for solid or densely packed fences that effectively block out unwanted sights and sounds.
Preparing the Groundwork for a Secure Fence
The foundation of a sturdy fence lies in the meticulous preparation of the ground where the posts will stand tall. Embarking on this essential step ensures that your fence will withstand the test of time and the elements.
Excavation: A Precise Beginning
To begin, you’ll need to carefully excavate the ground where each post will be planted. Digging holes that are slightly wider and deeper than the diameter and length of the posts provides ample space for setting them and backfilling. Remember to maintain a consistent depth for all holes to ensure an even fence line.
Leveling the Ground: A Level Playing Field
Once the holes are dug, it’s crucial to level the surrounding ground. This step ensures that the fence posts stand perfectly upright, preventing any unsightly leaning or instability. Use a leveling tool to create a flat surface, gently sloping away from the fence to promote proper drainage.
Ensuring Proper Drainage: A Dry Foundation
Water accumulation around fence posts can lead to rot and instability. To prevent this, it’s essential to incorporate proper drainage into your ground preparation. Create a slight slope away from the fence to allow water to drain freely. Additionally, consider lining the bottom of the holes with gravel or crushed stone to improve drainage and prevent water from seeping in.
By following these steps diligently, you’ll create a solid foundation for your fence, ensuring it stands strong and secure for years to come. Remember, a well-prepared ground is the cornerstone of a sturdy and durable fence.
Installing the Fence Posts: A Solid Foundation for Your Barrier
When constructing a fence, installing the fence posts is a crucial step that sets the stage for a sturdy and durable structure. It’s like building the backbone of your fence, ensuring its ability to withstand weather conditions and everyday use.
Digging Holes: Prepare the Ground for Strength
Start by digging holes deep enough to provide adequate support for the fence posts. The depth will vary depending on the height and weight of your fence. As a general rule of thumb, aim for holes that are one-third to one-half the height of the posts. Make sure the holes are also wide enough to allow for backfilling around the posts.
Setting the Posts: Anchor Them Firmly
Carefully place the fence posts in the holes and make sure they’re perfectly vertical. Use a level to check and ensure that they’re aligned correctly. If the ground is unstable, you may need to tamp down the soil around the posts to provide additional support.
Backfilling: Secure the Posts in Place
Once the posts are set, backfill the holes with concrete or gravel. Concrete provides maximum strength and stability, while gravel allows for drainage and prevents water from accumulating around the posts. Fill the holes firmly and tamp down the backfill material to create a solid base.
Curing: Allow the Base to Harden
For concrete backfill, allow the concrete to cure for at least 24 hours before attaching the fence panels. This will give the concrete enough time to set and reach its full strength. Gravel backfill does not require curing time.
Tips for a Strong Post Installation:
- Use high-quality posts: Choose posts that are rot-resistant and durable. Cedar, redwood, or pressure-treated pine are excellent options.
- Set the posts deep enough: Ensure that the posts are embedded at least one-third to one-half their height in the ground.
- Backfill carefully: Tamp down the backfill material thoroughly to eliminate air pockets and ensure stability.
- Allow for drainage: If using gravel backfill, make sure there’s a slight slope around the posts to allow water to drain away from them.
Assembling the Fence Panels: A Step-by-Step Guide
Embarking on the Fence Panel Adventure
As you transition from the foundational posts to the intricate tapestry of your fence, the assembly of the panels awaits. This crucial step will transform the individual components into a cohesive and sturdy structure. Prepare your tools and materials, for it’s time to bring your fence to life!
Attaching the Rails: The Backbone of the Fence
The rails serve as the backbone of your fence, providing support and stability. Measure and cut the rails to the appropriate length, ensuring they fit snugly between the posts. Use galvanized bolts to secure the rails to the posts, ensuring a firm connection that will withstand the test of time.
Fitting the Pickets: The Aesthetic Appeal
Next, it’s time to add the pickets, the elements that give your fence its unique character. Measure the space between the rails and cut the pickets accordingly. Space the pickets evenly for a uniform look and to prevent gaps that could compromise privacy or security.
Secure the Pickets: Nail or Screw?
To attach the pickets, you can use either nails or screws. Nails provide a quick and economical option, while screws offer greater strength and durability. Drive the nails or screws through the pickets and into the rails at an angle to maximize hold.
Additional Considerations for Panel Assembly
Depending on the design of your fence, you may need to include diagonal braces or latticework for added support and visual appeal. Use galvanized hardware for all connections to resist rust and ensure longevity.
Finishing Touches: Enhancing the Look
Once the panels are assembled, sand any rough edges to create a smooth and refined surface. Apply paint or stain to protect the wood and enhance its appearance. Consider adding decorative elements such as finials or trim to give your fence a personal touch.
Now, the panels are complete, ready to be attached to the posts and complete the transformation of your outdoor space. Embrace the satisfaction of having assembled a fence with your own hands, a testament to your skill and dedication.
Attaching the Panels to the Posts: A Secure Fit for Your Fence
The installation of fence panels is a crucial step that ensures the stability and longevity of your fence. Once your posts are securely in place, it’s time to connect the panels to them, forming the physical boundary of your outdoor space.
Choosing the Right Fasteners
The choice of fasteners depends on the type of fence panels and the material they are made from. Nails, screws, and bolts are common options, each with its advantages and disadvantages.
Nails are a quick and easy solution that works well for wood fence panels. Screws provide a more secure hold, especially for heavy panels or those made from metal or vinyl. Bolts offer the strongest connection and are typically used for larger, more complex fence installations.
Secure Attachment Techniques
The specific method of attachment will vary depending on the fastener you choose. Here are some general guidelines to follow:
- For nails: Drive them in straight at a slight angle to the surface of the panel, sinking them flush into the wood. Space nails evenly along the length of the panel.
- For screws: Use a drill to pre-drill holes before inserting the screws. This prevents the wood from splitting and ensures a tight fit. Screw in straight until the head is flush with the surface.
- For bolts: Align the panel with the post and insert the bolts through the appropriate holes. Use washers to distribute the load and tighten the nuts securely using a wrench.
Tips for a Perfect Fit
- Measure twice, cut once: Ensure accurate measurements before cutting the panels to size.
- Use a level: Check the alignment of the panels regularly to prevent uneven spacing or sagging.
- Countersink fasteners: Sink the heads of nails or screws below the surface of the wood to create a smooth finish.
- Caulk around posts: Apply caulk around the base of the posts where they meet the panels to seal out moisture and prevent rot.
By following these steps, you can securely attach your fence panels to the posts, ensuring a sturdy and long-lasting fence that will protect and enhance your outdoor space for years to come.
Installing Gates and Privacy Screens: Enhancing Privacy and Access
In this crucial step of fence building, we venture into the world of gates and privacy screens. These components elevate your fence’s functionality and aesthetics, transforming it from a mere barrier into a welcoming portal or a secluded sanctuary.
Types of Gates
Gates are essential for providing access to your property while maintaining its safety. Choose from a variety of options, including single-swing, double-swing, or sliding gates. Consider their size, style, and material to complement your fence’s character.
Installing Gates
- Mark the gate location: Determine the exact position for the gate opening.
- Install gate posts: Bury two sturdy posts at the gate’s edges, ensuring they are plumb and level.
- Hang the gate: Attach the gate hinges to the posts and the gate frame. Lubricate the hinges for smooth operation.
- Secure the gate: Install a latch or lock to keep the gate securely closed.
Privacy Screens
Privacy screens offer respite from prying eyes and enhance the fence’s aesthetic appeal. They come in various forms:
- Vertical pickets: Extend the fence’s pickets to create a solid barrier.
- Horizontal boards: Overlap horizontal boards for a more rustic look.
- Latticework: Intricate lattice patterns create an elegant and airy enclosure.
Installing Privacy Screens
- Attach framing: Secure horizontal rails to the fence posts to support the screens.
- Install screen panels: Position the privacy screen panels on the rails and nail or screw them securely.
- Finishing touches: Paint or stain the screens to match your fence and surroundings.
By integrating gates and privacy screens, you create a fence that not only protects your property but also provides convenient access and enhances its visual appeal. Remember, the possibilities are limitless, so let your creativity soar and customize these elements to reflect your personal style.
Finishing Touches: Enhancing the Beauty and Functionality of Your Fence
The final stage of your fence-building journey involves adding the finishing touches that elevate its appearance and functionality. Here are some key considerations to ensure a stunning and durable fence:
Painting or Staining for Protection and Aesthetics:
Applying a fresh coat of paint or stain not only enhances the aesthetic appeal of the fence but also protects it from weathering and environmental damage. Choose a color that complements your home and surroundings, and consider semi-transparent stains to highlight the natural grain of the wood.
Decorative Accents for a Personal Touch:
Don’t hesitate to add your personal flair by incorporating decorative elements. Finials, arbors, and trellises can transform the fence into a focal point of your outdoor space. Lighting fixtures can enhance safety and create a warm and inviting ambiance.
Landscaping for a Natural Touch:
Enrich the surroundings of your fence by planting flowers, shrubs, or vines. These natural elements soften the hard lines of the fence, provide privacy, and attract wildlife. Consider incorporating raised garden beds or trellises for vertical gardening, creating a living fence that adds depth and interest.
Gate and Hardware Selection for Functionality:
Choose a gate design that aligns with the overall style of the fence. Arched gates add a touch of elegance, while sliding gates save space. Invest in quality hardware, such as hinges, latches, and locks, to ensure smooth operation and security.
Regular Maintenance for Longevity:
A well-maintained fence will last for years to come. Regular cleaning, repairs, and re-staining or painting are essential to maintain its appearance and performance. Inspect the fence annually for any issues and address them promptly to prevent costly repairs in the future.
By paying attention to these finishing touches, you can create a fence that not only provides security and privacy but also enhances the beauty and enjoyment of your outdoor space.
Maintenance and Upkeep for a Durable Fence
Ensuring the longevity of your newly installed fence is paramount. Regular maintenance and upkeep will not only enhance its appearance but also safeguard its structural integrity for years to come. Here’s a comprehensive guide to help you keep your fence looking its best and standing strong:
Regular Inspections:
-
Inspect your fence thoroughly: Conduct regular visual checks to identify any potential issues early on. Look for signs of damage, such as loose posts, rotting wood, or broken panels.
-
Examine the panels: Pay close attention to the condition of the fence panels. Check for any gaps, cracks, or missing pieces that could compromise the fence’s security and functionality.
Cleaning and Maintenance:
-
Remove dirt and debris: Use a pressure washer or a garden hose to remove any dirt, dust, or cobwebs that accumulate on the fence over time. This will help prevent the growth of mold or mildew.
-
Inspect fasteners: Check all nails, screws, or bolts to ensure they are secure and not loose or rusty. Tighten any loose fasteners as needed.
Painting and Staining:
-
Protect the wood: If your fence is made of wood, apply a fresh coat of paint or stain every few years to protect it from the elements. This will prevent the wood from rotting or fading.
-
Choose the right type: Select a high-quality paint or stain specifically designed for outdoor use. This will ensure a longer-lasting finish.
Seasonal Considerations:
-
Winter preparation: In cold climates, prepare your fence for winter by removing any snow or ice buildup. Excess weight can put strain on the fence posts and panels.
-
Summer maintenance: During the summer, trim any overgrown vegetation around the fence. This will prevent the fence from being damaged by falling branches or roots.
Professional Assistance:
- Consult a professional: If you encounter any significant issues or repairs beyond your expertise, do not hesitate to consult with a professional fence contractor for assistance. They possess the necessary skills and equipment to handle complex repairs effectively.
By following these maintenance tips and periodically inspecting your fence, you can ensure that your fence remains a secure, beautiful, and long-lasting addition to your property.
Estimated Cost and Timeline: Planning Your Fence Project
Building a fence is an important home improvement project that adds security, privacy, and aesthetic appeal to your property. However, before you embark on this endeavor, it’s crucial to estimate the cost and timeline involved to ensure it aligns with your budget and schedule.
Cost Considerations
The cost of building a fence varies significantly depending on several factors, including:
- Materials: The type of materials you choose will greatly impact the cost. Wood, vinyl, and metal are common options, with wood being the most economical and metal the most expensive.
- Complexity: The design and features of your fence will also affect the cost. A simple fence with straight lines is less expensive than a fence with curves, decorative elements, or multiple gates.
- Labor: If you hire a contractor to install the fence, the labor costs will depend on the size of the fence, the complexity of the design, and the hourly rates in your area.
Timeline Considerations
The timeline for building a fence can also vary, influenced by:
- Size of the fence: A larger fence will naturally take longer to complete.
- Complexity of the design: Installing a fence with intricate patterns or multiple gates will require more time.
- Weather conditions: Adverse weather conditions, such as rain or snow, can delay the project.
General Estimates
As a general estimate, a simple wood fence, materials included, can cost between $10 to $25 per foot. For a larger, more complex fence, the cost could range from $25 to $50 per foot or more.
The timeline for a fence installation typically takes between 2 to 5 days for a small to medium-sized fence. However, larger fences or those with intricate designs may take longer.
Tips for Saving Time and Money
To save time and money on your fence project, consider the following tips:
- Plan ahead and obtain multiple quotes from contractors.
- Choose durable materials that require less maintenance.
- Simplify the fence design to reduce labor costs.
- Consider installing the fence yourself if you have the necessary skills and tools.
