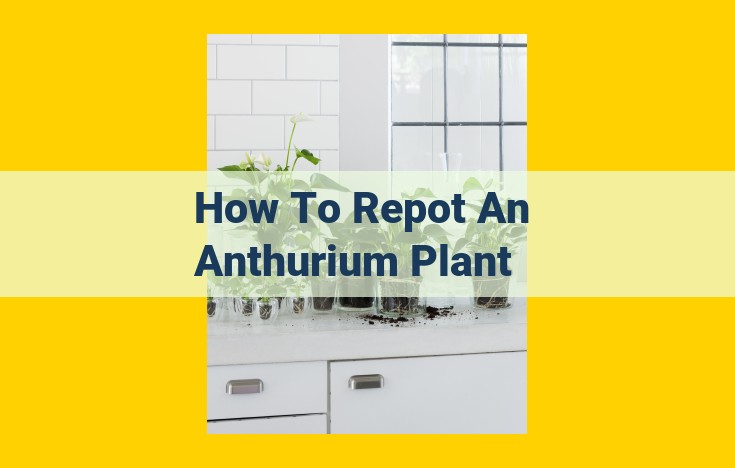
To repot an Anthurium, ensure a healthy plant, select a pot with adequate drainage, and use a high-quality potting mix specifically designed for Anthuriums. Trim damaged roots or overgrown parts, and incorporate perlite or orchid bark for optimal drainage. After replanting, provide a warm, humid environment with bright, indirect light, and establish a consistent watering schedule.
Selecting a Healthy Anthurium Specimen for Flourishing Growth
As a plant enthusiast, embarking on the journey of cultivating breathtaking Anthuriums requires a discerning eye when selecting the perfect specimen. Just like a seasoned collector seeking a rare gem, choosing a healthy Anthurium is paramount for a thriving indoor oasis.
Upon your arrival at the nursery, carefully inspect the plant for any signs of disease, pests, or damage. Healthy Anthuriums should exhibit vibrant, glossy foliage with no signs of wilting or discoloration. Check for any yellowing or brown spots, which may indicate underlying health issues.
The root system is another crucial indicator of plant health. Gently remove the plant from its container and examine the roots. Healthy roots should be firm, white, and well-developed. Avoid plants with mushy or discolored roots, as this could be a sign of root rot or other problems.
Size and maturity are also important considerations. Select a plant that is proportionate to the size of your intended pot and that has reached a certain level of maturity. Younger plants may take some time to establish and may not produce blooms as quickly as more mature specimens.
By taking the time to choose a healthy Anthurium, you lay the foundation for a thriving indoor companion that will graciously reward you with its stunning blooms for years to come.
2 Potting and Drainage: A Foundation for Flourishing Anthuriums
Selecting the right pot and ensuring adequate drainage is paramount for the well-being of your Anthurium. Proper drainage prevents waterlogging, which can lead to root rot and other issues.
When choosing a pot, opt for a material that allows for proper aeration, such as terracotta or glazed ceramic. The pot should be slightly larger than the root ball of your plant, allowing for some growth.
Drainage is crucial for Anthuriums. The pot should have multiple drainage holes at the bottom to allow excess water to escape. Additionally, consider using a potting mix that promotes drainage, such as one containing perlite or orchid bark. These materials help to create air pockets in the soil, preventing compaction and improving drainage.
By providing your Anthurium with a suitable pot and ensuring adequate drainage, you create a solid foundation for healthy growth and vibrant blooms.
Essential Materials for Thriving Anthuriums: A High-Quality Potting Mix
Indulge in the captivating allure of Anthuriums, known for their exquisite blooms and vibrant foliage. To cultivate these tropical treasures, providing them with a high-quality potting mix is paramount. It’s the foundation upon which their health and prosperity thrive.
Unveiling the secrets of a specialized potting mix for Anthuriums is a journey into a world of nutrient-rich ingredients designed to emulate their natural habitat. These wonderplants demand a well-draining substrate that fosters optimal root development and allows for proper aeration.
The ideal mix should strike a delicate balance between moisture retention and drainage. Incorporating elements like peat moss, perlite, and orchid bark creates a heavenly environment for Anthurium roots to thrive. These components ensure that water flows freely through the mix, preventing waterlogging and the dreaded root rot that can plague these sensitive plants.
Moreover, a high-quality potting mix for Anthuriums should be enriched with essential nutrients to sustain their growth and vitality. A balanced blend of nitrogen, phosphorus, and potassium ensures healthy foliage, stunning blooms, and robust root systems. Remember, a proper potting mix is like a gourmet meal for your Anthurium, providing all the nutrients it needs to flourish.
Pruning Tools for Flourishing Anthuriums: The Key to a Thriving Plant
Every gardener knows that healthy plants require proper care and maintenance, and pruning is an essential aspect of that care. For anthuriums, pruning is not just about trimming overgrown foliage; it’s about fostering a plant’s health and beauty.
The Importance of Sharpening
Sharp pruning tools are crucial for the well-being of your anthurium. Dull blades can crush and tear plant tissues, inviting infection and hindering the plant’s ability to recover. A clean cut, on the other hand, allows the plant to seal the wound quickly, reducing the risk of disease and promoting healthy growth.
Choosing the Right Tools
The type of pruning tools you need depends on the size and maturity of your anthurium. For smaller plants, sharp scissors or a utility knife will suffice. As the plant grows, you may need a pruning saw for thicker stems.
Techniques for Trimming
Remove dead or damaged leaves to prevent disease and improve the plant’s appearance. Cut the leaves at their base, close to the stem.
Trim overgrown stems to control the plant’s size and shape. Make cuts above a node, where new growth originates.
Encourage branching by pinching back the tips of growing stems. This will promote the development of side shoots, resulting in a fuller plant.
Safety Precautions
Always wear gloves when pruning anthuriums to protect your hands from the plant’s sap. Clean your tools after each use to prevent the spread of disease.
By equipping yourself with sharp pruning tools and knowing the proper pruning techniques, you can maintain the health and beauty of your anthuriums. Remember, regular pruning will not only improve the plant’s appearance but also encourage vigorous growth, abundant blooms, and a longer lifespan.
Essential Materials for Flourishing Anthuriums: Drainage Enhancers
When embarking on the delightful journey of cultivating Anthuriums, ensuring optimal drainage is paramount. These tropical beauties hail from environments where their roots thrive in well-aerated, moisture-retentive soil. To replicate this ideal, incorporating drainage enhancers into your potting mix is crucial.
1.5.1 Perlite: The Magic of Lightweight Drainage
Perlite, a volcanic rock with incredible absorption and drainage capabilities, is an invaluable addition to your Anthurium’s soil. Its lightweight nature prevents soil compaction, allowing for excellent aeration and root respiration. Perlite helps retain moisture without creating waterlogged conditions that could suffocate your plant’s roots.
1.5.2 Orchid Bark: Mimicking Nature’s Ecosystem
Orchid bark, derived from the bark of fir or pine trees, is another exceptional drainage enhancer for Anthuriums. Its coarse texture and porous nature facilitate airflow and water movement, mirroring their natural epiphytic habitat. Orchid bark provides a stable structure for roots to grip and supports long-term aeration.
Incorporating Drainage Enhancers:
When preparing your Anthurium’s potting mix, aim for a ratio of 50-75% regular potting mix to 25-50% drainage enhancers, such as a combination of perlite and orchid bark. This ratio ensures excellent drainage without sacrificing moisture retention. By providing your Anthurium with an optimal drainage system, you lay the foundation for healthy root development, vigorous growth, and a profusion of stunning blooms.
2.1 Temperature and Humidity: Providing a warm, humid environment that mimics their natural habitat.
2.1 Temperature and Humidity: Mimicking Anthurium’s Tropical Paradise
Picture this: lush, tropical rainforests where Anthuriums thrive in a paradise of warmth and humidity. To create this ideal environment in your own home, providing the right temperature and humidity is crucial.
Temperature: A Warm Embrace
Anthuriums adore temperatures between 70-85°F (21-29°C). This warmth stimulates their growth and encourages lush foliage and bountiful blooms. Avoid exposing them to temperatures below 60°F (16°C), as it can stunt their growth and make them more susceptible to cold damage.
Humidity: A Moist Haven
In their natural habitat, Anthuriums thrive in humid environments. Aim for a humidity level of 50-70% around the plant. This can be achieved by misting the leaves regularly or placing a humidifier nearby. Alternatively, group your Anthurium with other moisture-loving plants to create a mini humidity haven.
When humidity levels drop, problems arise. Dry air can cause leaf tips to brown and curl, and hinder growth. Tip: Consider using a hygrometer to monitor humidity and adjust your care routine accordingly.
Remember, consistent temperature and humidity are key to keeping your Anthurium happy and thriving. By providing these ideal conditions, you’re giving your plant the tropical oasis it deserves, fostering its unparalleled beauty and vitality.
Lighting Requirements for Thriving Anthuriums
The radiant glow of Anthurium blooms is a testament to their need for ample lighting. But harnessing the sun’s energy while protecting delicate foliage requires finesse. In their native tropical habitats, these plants bask in the dappled shade of the rainforest canopy. Emulating this environment is key to unlocking their full potential.
Bright, Indirect Light: The Goldilocks Zone
Anthuriums crave bright, indirect light. Imagine the gentle embrace of a leafy curtain, filtering harsh rays while allowing ample illumination to penetrate. Avoid placing your plant in direct sunlight, as this can scorch its leaves, turning them a crispy brown. A north- or east-facing window often provides the ideal balance of brightness without excessive heat.
Window Sill Wonders
If your home’s layout doesn’t accommodate a perfectly placed window, don’t despair. A few tricks can still provide your Anthurium with the light it needs.
- East- or west-facing window: These rooms offer morning or afternoon sunlight, providing a boost of brightness without the midday sun’s intensity.
- Artificial light: LED grow lights mimic natural sunlight, providing a consistent source of illumination. Place them about 12 inches above your plant, adjusting the intensity as needed.
Indications of Light Stress
Observing your Anthurium’s appearance will reveal any lighting imbalances.
- Leggy growth: Insufficient light causes plants to stretch towards a light source, resulting in elongated stems and sparse foliage.
- Yellowing leaves: Too much direct sunlight can bleach leaves or cause yellowing due to nutrient loss.
- Pale or dull blooms: Inadequate light can prevent Anthuriums from producing vibrant blooms.
By understanding the specific lighting requirements of Anthuriums, you can create an environment that fosters their health, beauty, and that unmistakable touch of the tropics.
Watering Regimen for Thriving Anthuriums
Anthuriums, with their stunning blooms and lush foliage, require meticulous care to flourish. One crucial aspect of their maintenance is establishing a consistent watering regimen.
Understanding Anthurium’s Water Needs
These tropical plants thrive in moist but well-drained environments. Overwatering can lead to root rot, while underwatering can cause wilting and stunted growth. The key is to strike a balance that ensures adequate hydration without waterlogging.
Establishing a Watering Schedule
Determine the frequency of watering based on the following factors:
- Pot size and drainage: Larger pots with better drainage require less frequent watering.
- Environmental conditions: Warm, humid environments evaporate moisture faster, necessitating more frequent watering.
- Plant size and maturity: Larger, mature plants have greater water requirements.
As a general rule, water Anthuriums when the top 1-2 inches of soil feel dry to the touch. Avoid watering on a strict schedule; instead, check the soil moisture before each watering.
Signs of Overwatering and Underwatering
Symptoms of overwatering:
- Yellowing and wilting leaves: Excessive moisture disrupts chlorophyll production and leads to nutrient deficiencies.
- Soft, mushy roots: Soggy soil can cause roots to rot.
Symptoms of underwatering:
- Dry, crispy leaves: Plants that lack moisture exhibit brown, withered leaves.
- Wilting and drooping: When insufficiently watered, Anthuriums lose their turgidity and appear limp.
Tips for Effective Watering
- Use lukewarm water: Cold water can shock the plant’s roots.
- Water deeply: Soak the soil thoroughly until water drains from the bottom of the pot.
- Allow excess water to drain: Avoid leaving water in the saucer as prolonged exposure to moisture can promote root rot.
- Consider humidity: If your indoor environment is dry, increase humidity by misting the plant or using a humidifier.
- Adjust watering frequency: Observe your plant’s response and adjust the watering schedule accordingly.
Fertilization Practices: Nurturing Anthuriums for Thriving Growth
Amidst the tapestry of vibrant blooms and graceful foliage, Anthuriums captivate plant enthusiasts with their exotic allure. But to unlock their full potential, they require a tailored fertilization regimen that supports their unique nutritional needs. Here’s how to provide your beloved Anthuriums with the nourishment they crave:
Understanding Nutrient Requirements
Anthuriums, hailing from the lush, tropical rainforests of South America, thrive in a nutrient-rich environment. They require a balanced fertilizer that provides essential macronutrients such as nitrogen, phosphorus, and potassium, as well as micronutrients like iron, magnesium, and manganese.
Dosage and Frequency
The frequency and dosage of fertilization depend on several factors, including plant size, growing conditions, and the time of year. A general rule of thumb is to fertilize monthly during the growing season (spring and summer) and reduce the frequency to once every two to three months during the dormant season (fall and winter).
To determine the correct dosage, follow the instructions on the fertilizer label. It’s always better to err on the side of under-fertilizing than over-fertilizing, as excess nutrients can harm the plant.
Choosing the Right Fertilizer
Opt for a balanced, slow-release fertilizer that provides a gradual release of nutrients over time. This type of fertilizer minimizes the risk of nutrient burn and ensures a steady supply of essential elements. Liquid fertilizers (diluted according to the label) can also be used, but they require more frequent application.
Signs of Nutrient Deficiency
If your Anthurium is not receiving adequate fertilization, you may observe signs of nutrient deficiency, such as:
- Yellowing or pale leaves: Indicates nitrogen deficiency.
- Purple or reddish leaves: A sign of phosphorus deficiency.
- Slow or stunted growth: Suggests potassium deficiency.
- Discolored or deformed leaves: Can indicate a lack of micronutrients.
Tips for Effective Fertilization
- Water your Anthurium before fertilizing: This helps the nutrients penetrate the soil and reach the roots more easily.
- Avoid fertilizing during the hottest or coldest months: Extreme temperatures can stress the plant and reduce its ability to absorb nutrients.
- Don’t over-fertilize: As mentioned earlier, excess nutrients can harm the plant. Follow the fertilizer instructions carefully.
3 pH Monitoring: The Key to Unlocking Nutrient Absorption and Plant Health
Maintaining appropriate soil pH levels is crucial for the well-being of your Anthurium. The pH level determines the availability of nutrients to the plant, ensuring proper growth and preventing deficiencies.
Anthuriums thrive in slightly acidic soil with a pH range of 5.5 to 6.5. By monitoring the soil pH and adjusting it when necessary, you create an optimal environment for your plant to absorb nutrients. This results in lush foliage, vibrant blooms, and overall good health.
Soil pH can be affected by various factors, including watering habits, fertilizer application, and the composition of the potting mix. Using a soil pH test kit is recommended to determine the current pH level. If the pH is too high or too low, you can adjust it by adding pH-adjusting products.
For acidic soils, add lime or wood ash to raise the pH. For alkaline soils, add sulfur or elemental sulfur to lower the pH. Always follow the manufacturer’s instructions for the appropriate amount and application method to avoid harming your plant.
Maintaining optimal soil pH is a simple yet impactful practice that can significantly enhance the health of your Anthurium. By ensuring the right pH balance, you provide the necessary foundation for nutrient absorption and unlock the plant’s full potential for growth and beauty.
