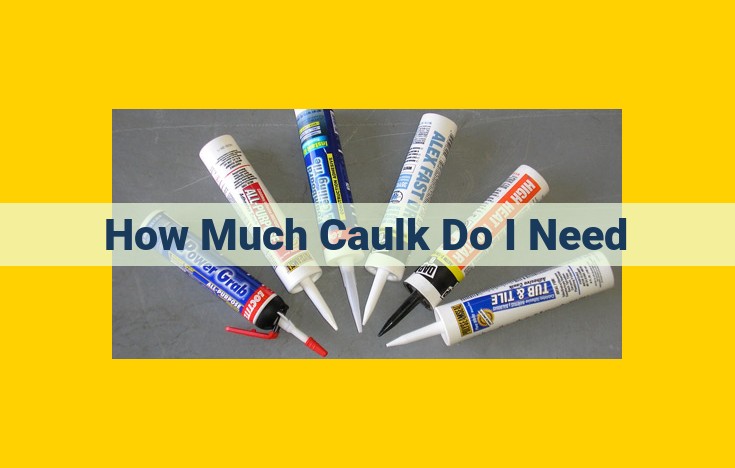
Determining the amount of caulk required depends on several factors, including the size and number of joints, the type of caulk used, and the desired thickness of the bead. As a general guideline, estimate the total length of the joints and multiply by the average bead width (typically between 1/4″ and 1/2″). Adjust this calculation based on the caulk’s specific coverage rate, which can be found on the product label. For larger projects or joints with varying widths, it’s advisable to purchase additional caulk to ensure you have enough on hand. Remember to factor in some additional caulk for waste and cleanup.
Caulk: The Unsung Hero of Home Maintenance
In the realm of home maintenance, there’s an unsung hero that plays a crucial role in preserving the integrity of your dwelling: caulk. It’s a versatile sealant that forms a watertight barrier, preventing leaks and protecting against moisture damage.
Whether you’re a seasoned DIYer or a novice homeowner, understanding the purpose and importance of caulk is essential. It’s the secret weapon that keeps your home dry, comfortable, and looking its best.
Types of Caulk: Unveiling the Diverse World of Sealing Solutions
When it comes to sealing and caulking, understanding the different types of caulk available is crucial. Each type possesses unique properties and applications, making it essential to choose the right one for the job. Let’s dive into the captivating world of caulk and explore the distinct characteristics of each type:
Acrylic Caulk: The Versatile All-Rounder
- Properties: Acrylic caulk is water-based, making it easy to apply and clean up. It boasts good adhesion to porous surfaces and is paintable for a seamless finish.
- Applications: Acrylic caulk is a versatile choice for interior and exterior applications, sealing joints around windows, doors, baseboards, and other areas where flexibility and durability are needed.
Silicone Caulk: The Flexible and Weather-Resistant Champion
- Properties: Silicone caulk is non-porous, offering excellent water resistance and UV resistance. It is also highly flexible and adheres well to a wide range of surfaces, including glass, metal, and plastic.
- Applications: Silicone caulk is ideal for sealing joints in bathrooms, kitchens, and other areas prone to moisture and temperature fluctuations. It is also effective for repairing cracks, filling gaps in tiles and grout, and waterproofing around plumbing fixtures.
Polyurethane Caulk: The Heavy-Duty Solution
- Properties: Polyurethane caulk is a strong and durable sealant with excellent adhesion to most surfaces. It is weather and chemical resistant and provides a firm and rigid bond.
- Applications: Polyurethane caulk is primarily used for heavy-duty applications where structural strength is required. It is ideal for sealing joints in concrete, brick, and other rough or uneven surfaces.
Other Types of Caulk:
- Butyl Caulk: A thick, rubbery caulk used for sealing gaps in metal ductwork, flashing, and other outdoor applications.
- Polysulfide Caulk: A high-performance caulk that offers excellent adhesion, weather resistance, and chemical resistance. It is used in industrial and marine applications.
- Latex Caulk: Similar to acrylic caulk, but provides a thicker consistency and is ideal for filling gaps and cracks.
Versatile Applications of Caulk
Caulk, a versatile sealant, plays a crucial role in maintaining the integrity and functionality of various structures. Its remarkable ability to seal joints, repair cracks, and prevent leaks makes it an indispensable tool in both residential and commercial settings.
Sealing Joints:
Caulk excels in sealing joints where different materials meet, creating a watertight and airtight barrier. For example, it effectively prevents leaks around windows, doors, and baseboards. It’s also essential for sealing joints in bathrooms, kitchens, and other areas prone to moisture.
Repairing Cracks:
Cracks in walls, floors, and ceilings can be unsightly and lead to structural damage. Caulk can effectively fill these cracks, creating a smooth and seamless surface. It not only improves the aesthetics but also prevents further damage caused by moisture infiltration.
Preventing Leaks:
Caulk is a powerful weapon against leaks, preventing water from seeping into unwanted areas. It’s applied around pipes, drains, and fixtures to create a watertight seal. This helps prevent mold growth, water damage, and costly repairs.
Additional Applications:
Beyond its primary uses, caulk has various other applications, including:
- Filling gaps: Caulk can be used to bridge gaps between molding, trim, and other surfaces.
- Creating weatherproof barriers: It can be applied to outdoor structures to prevent wind and rain from entering.
- Soundproofing: Caulk can reduce noise transmission by filling gaps between walls, floors, and ceilings.
Caulk’s adaptability and effectiveness make it an indispensable tool for homeowners and professionals alike. Its ability to enhance the structural integrity, prevent damage, and improve aesthetics makes it a valuable addition to any toolkit.
Caulk Joints: The Foundation of a Leak-Free Home
Introduction:
Caulk plays a crucial role in maintaining a home’s integrity, preventing leaks and drafts. Properly sealed caulk joints are the key to a long-lasting and effective barrier against water damage.
Types of Caulk Joints:
Understanding the different types of caulk joints is essential for selecting the right technique and materials. Here are the most common types:
- Butt Joints: The simplest joint, where two surfaces meet without overlapping.
- Miter Joints: A joint where two surfaces are cut at an angle and joined to create a stronger and more aesthetically pleasing bond.
- Scarf Joints: A stronger and more durable joint where the edges of two surfaces are tapered and overlapped, creating a wider bonding surface.
Joint Preparation and Techniques:
Before applying caulk, preparing the joint properly is key:
- Clean the surfaces: Remove any dirt, oil, or debris using a cleaner or denatured alcohol.
- Mask the edges: Use painter’s tape to protect surrounding areas from caulk overflow.
- Apply a backer rod (optional): For wider joints, a backer rod helps reduce the amount of caulk needed and provides better support.
Expert Tips for Flawless Caulk Joints:
- Use a caulk gun with a smooth trigger for precise application.
- Apply caulk in a steady, even bead, filling the joint completely.
- Tool the caulk immediately using a caulk tool or your finger to smooth and shape it.
- Remove the painter’s tape while the caulk is still wet to prevent tearing.
- Allow the caulk to cure fully before exposing it to water or stress.
Caulk Tools: Your Essential Caulking Arsenal
When it comes to successful caulking, the right tools make all the difference. Just as a skilled chef relies on their knives and pans, a competent caulk master requires a well-stocked toolbox. To equip yourselves with caulking mastery, let’s dive into the essential tools and their proper usage.
Caulk Guns
Caulk guns are the cornerstone of any caulking adventure. These trusty tools are responsible for dispensing the caulk evenly and effortlessly. From manual to battery-operated models, choose one that fits your hand and project scale. For home projects, a basic manual caulk gun will suffice, while professional caulkers often opt for powered models.
Tips for Using a Caulk Gun:
- Snip the Nozzle: Cut the nozzle tip at a 45-degree angle to match the desired bead size.
- Load the Caulk Tube: Insert the caulk tube into the gun and puncture the seal.
- Apply Even Pressure: Hold the gun at a steady angle and apply consistent pressure to create a uniform bead.
- Smooth and Finish: Use a damp sponge or your finger to smooth the caulk and ensure a clean finish.
Scrapers and Putty Knives
Scrapers and putty knives are your trusty sidekicks for removing old caulk or excess material. Opt for a metal scraper with a sharp edge for stubborn old caulk, while a plastic putty knife is gentler on delicate surfaces.
Tips for Using Scrapers and Putty Knives:
- Hold at a Low Angle: Keep the scraper or putty knife at a low angle to avoid gouging the surface.
- Scrape Gently: Apply gentle pressure while scraping to prevent damage.
- Use a Razor Blade: For precise removal of dried caulk, use a sharp razor blade, taking extra care not to cut yourself.
Smoothing Tools
Smoothing tools provide the finishing touch to your caulk masterpiece. They come in various shapes and sizes to accommodate different joint configurations. From finger-shaped tools to specialized trowels, choose one that contours to your joint’s shape.
Tips for Using Smoothing Tools:
- Dip in Water: Dip the smoothing tool in water to prevent the caulk from sticking and ensure a smooth finish.
- Apply Light Pressure: Gently press the tool against the caulk to shape and smooth it.
- Remove Excess: Use a clean cloth to wipe away any excess caulk for a seamless finish.
With this arsenal of caulking tools in your possession, you’re well on your way to sealing, repairing, and beautifying your home like a pro. Remember, the right tools make all the difference in achieving professional-looking results, so invest in quality tools that will serve you well for many caulking adventures to come.
Caulk Properties: The Key Factors for Successful Caulking
When choosing and using caulk, understanding its properties is crucial. These properties determine the performance, durability, and effectiveness of your caulking projects.
Flexibility
Caulk should be flexible to accommodate joint movement and prevent cracking or splitting. It allows the joint to expand and contract without compromising the seal. For areas with significant movement, such as expansion joints, use highly flexible caulk.
Durability
Caulk should withstand exposure to UV rays, moisture, and temperature fluctuations. Durability ensures a long-lasting seal that won’t fade, crack, or deteriorate prematurely. Choose caulk rated for the specific conditions it will be exposed to.
Adhesion
Caulk must adhere strongly to the surfaces it’s applied to. Good adhesion prevents leaks and ensures a lasting bond. Different types of caulk have varying degrees of adhesion, so select the one that’s best suited for your materials and application.
Resistance to Water and Chemicals
In areas exposed to moisture or chemicals, caulk must be resistant to water and chemical penetration. Water resistance prevents leaks and mold growth, while chemical resistance ensures the seal won’t be damaged by cleaning agents or other hazardous substances.
Caulk Maintenance: Ensuring Long-Lasting Seals
Maintaining the integrity of caulk joints is essential to prevent leaks, improve insulation, and extend their lifespan. Regular cleaning and proper maintenance practices can ensure your caulk performs optimally for years to come.
Cleaning Techniques
- Regular cleaning removes dirt, mildew, and other contaminants that can compromise the caulk’s adhesion.
- Use a mild cleaning solution and a soft cloth to gently wipe down the caulk joints.
- Avoid harsh chemicals or abrasive cleaners, as they can damage the caulk.
Re-caulking Procedures
- Inspect caulk joints regularly for signs of wear, cracking, or peeling.
- If the caulk is damaged or no longer sealing effectively, remove the old caulk and reapply new caulk.
- Follow the manufacturer’s instructions for proper application and curing time.
Troubleshooting Common Issues
- Caulk cracking: Excessive movement or shrinkage in the joint can cause the caulk to crack. Re-caulk with a more flexible or adhesive-based caulk.
- Caulk peeling: Poor surface preparation or incompatible materials can lead to peeling caulk. Remove the caulk and prepare the surface properly before re-caulking.
- Caulk discoloration: Exposure to sunlight or certain chemicals can discolor caulk. Choose a fade-resistant caulk or apply a protective coating to prevent discoloration.
- Caulk mold growth: Moisture accumulation in the caulk joint can promote mold growth. Clean the area thoroughly and apply a mold-resistant caulk to prevent recurrence.
By following these maintenance practices, you can ensure your caulk joints remain in optimal condition, providing long-lasting protection and enhancing the durability of your home.
