To seal Medium Density Fibreboard (MDF), start by sanding the surface until smooth. Apply a primer to prevent moisture absorption. Choose a sealant, such as lacquer or polyurethane, based on your desired finish and level of protection. Apply the sealant using a brush or roller, ensuring even coverage. For a painted finish, apply paint after the sealant has dried. Optionally, stain the MDF before sealing for a different aesthetic.
Preparing and Finishing MDF: A Comprehensive Guide for a Flawless Finish
Before embarking on your MDF project, it’s crucial to gather the essential materials that will help you achieve a professional-looking finish. These include:
- MDF (Medium Density Fiberboard): The main material you’ll be working with, available in various thicknesses and sizes.
- Sandpaper: Used to smooth the MDF’s surface, ranging from coarse grits for removing imperfections to fine grits for a polished finish.
- Paintbrush or Roller: For applying primer, paint, or sealant. Choose the right size and type based on the project’s scale and desired application method.
- Primer: A base coat applied before painting to enhance paint adhesion and provide a uniform surface.
- Sealant: A protective layer that guards the MDF from moisture, wear, and discoloration. Choose between primers, sealers, lacquers, or polyurethanes based on the desired finish and protection level.
Additional Tips:
- For smaller projects, a paintbrush may suffice, but a roller is more efficient for larger surfaces.
- Use a dust mask when sanding to prevent inhaling harmful particles.
- Allow ample drying time between each step to ensure proper adhesion and a durable finish.
Surface Preparation: The Key to a Pristine MDF Finish
Sanding: The Foundation of a Smooth Surface
Embarking on an MDF preparation journey begins with sanding, a crucial step that transforms the raw material into a smooth, receptive surface. This process not only removes splinters and imperfections, but also creates a uniform texture that enhances the adhesion of subsequent finishes.
Choosing the Right Grit: A Matter of Degree
The secret to effective sanding lies in selecting the appropriate sandpaper grit. For coarse MDF surfaces, begin with a low grit (80-120) to quickly remove major imperfections. Gradually increase the grit (150-220) as you refine the surface, ending with a fine grit (240-320) to achieve a velvety smoothness.
Techniques for Effective Sanding
Mastering sanding techniques is essential for achieving a flawless finish. Use long, even strokes with a sanding block to ensure uniform pressure distribution. Avoid excessive sanding, as this can damage the underlying MDF. For intricate areas, utilize a sanding sponge or fine-grit sandpaper wrapped around a foam block.
Final Touches: A Dust-Free Canvas
Once the sanding process is complete, meticulously remove all sawdust from the surface. Use a vacuum cleaner with a soft brush attachment to gently lift away any lingering particles. This meticulous attention to detail will ensure a pristine foundation for the subsequent steps of MDF preparation.
Priming the Surface:
- Highlight the significance of priming MDF before painting or sealing. Explain the types of primers available and provide tips for proper application.
Priming MDF: Laying the Foundation for a Flawless Finish
Before you embark on the exciting journey of painting or sealing your MDF (Medium Density Fiberboard), it’s crucial to take a vital preparatory step: priming. Priming serves as the bedrock upon which a beautiful and durable finish is built. Just as a strong foundation ensures the stability of a house, a well-prepared MDF surface will guarantee the longevity and aesthetics of your final creation.
Why Prime MDF?
Priming MDF is essential for several reasons. First, it helps to seal the porous surface of the board, preventing paint or sealant from being absorbed unevenly. This ensures a smooth, uniform finish that enhances the overall appearance of your project.
Secondly, priming acts as a barrier, protecting the MDF from moisture and other environmental factors that can cause warping or damage. It creates a protective layer that safeguards your finished surface from scratches, stains, and fading over time.
Choosing the Right Primer
The type of primer you choose will depend on the specific application and desired finish. For MDF, latex-based primers are generally recommended. They offer excellent adhesion, provide a durable base, and are easy to apply.
Tips for Proper Primer Application
- Sand the MDF Surface: Before applying the primer, lightly sand the surface of the MDF using fine-grit sandpaper (120-150 grit) to create a smooth base.
- Apply the Primer: Use a paintbrush or roller to apply a thin, even coat of primer. Allow it to dry completely before sanding lightly with fine-grit sandpaper.
- Repeat the Process: Apply a second coat of primer and sand again to achieve a completely smooth and sealed surface.
Benefits of Priming MDF
Properly priming your MDF will reap numerous benefits, including:
- Improved Paint Adhesion: Priming creates a surface that paint can adhere to more effectively, resulting in a stronger bond and a flawless finish.
- Enhanced Durability: The protective layer provided by primer safeguards your finished surface from wear and tear, extending its lifespan.
- Smoother Finish: Priming eliminates surface imperfections and creates a smooth canvas for painting, ensuring a professional-looking finish.
By following these simple steps and choosing the right primer, you can create a solid foundation for a beautiful and long-lasting MDF project. Remember, priming is not a sprint but an investment in the future of your finished masterpiece.
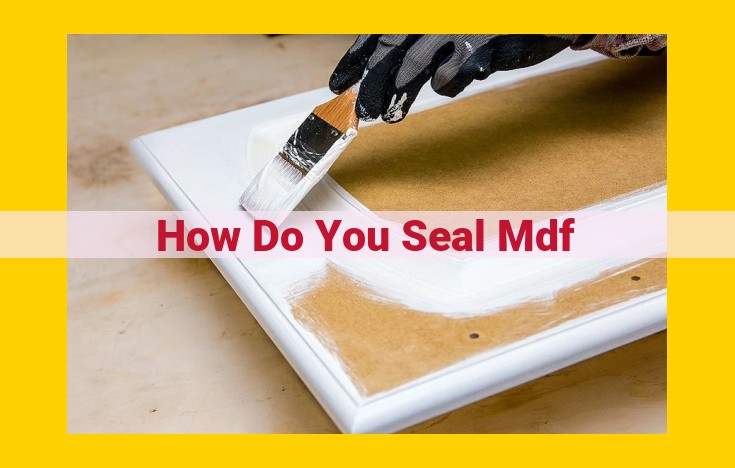
Preserving Your MDF Masterpiece: The Art of Sealing MDF
When it comes to creating stunning projects with Medium Density Fiberboard (MDF), sealing is a crucial step that often gets overlooked. But trust me, it’s the secret ingredient that will elevate your MDF from a mere material to a work of art that will last for years to come.
Why Seal MDF?
MDF is a versatile material, but it’s not naturally waterproof. Without proper sealing, it can easily absorb moisture, leading to swelling, warping, and unsightly mold growth. Sealing creates a protective barrier that keeps these moisture-related woes at bay, ensuring your MDF projects remain pristine.
Types of Sealants: A Match for Every Need
There’s no one-size-fits-all approach to sealing MDF. Different sealants offer unique benefits and characteristics, so choosing the right one is key.
-
Primer: The unsung hero of the sealing process, primer provides a smooth, even base for paint or stain to adhere to. It fills in gaps and imperfections, enhancing the overall finish.
-
Sealer: The first line of defense against moisture, a sealer penetrates into the MDF, creating a water-resistant barrier. It comes in various forms, including varnish, lacquer, and polyurethane.
-
Lacquer: A high-gloss sealant that provides a durable and scratch-resistant finish. It’s ideal for areas that experience heavy use, such as furniture or countertops.
-
Polyurethane: A versatile sealant known for its resistance to water and UV rays. It’s a great choice for outdoor projects or surfaces that need extra protection.
Application Tips: Master the Art of Sealing
Once you’ve chosen the right sealant, it’s time to apply it with precision. Remember, preparation is half the battle. Make sure your MDF surface is clean, dry, and sanded smooth.
Apply the sealant liberally, using a brush or roller. Allow each coat to dry completely before applying the next. Sand lightly between coats for an ultra-smooth finish.
And there you have it! By sealing your MDF, you’ve transformed it from a raw material into a masterpiece that will withstand the test of time. So grab your sealant, let your creativity flow, and enjoy the satisfaction of preserving your MDF creations beautifully.
Painting MDF: A Journey to a Flawless Finish
As you embark on your MDF painting adventure, the first step is to meticulously select the paint. Explore the array of available paints, considering their qualities and suitability for your project. Whether you’re after durability or a vibrant pop of color, there’s a paint out there to meet your needs.
Next, it’s time to decide between wielding a trusty paintbrush or a dependable roller. If you crave intricate details and precise brushstrokes, a paintbrush is your perfect companion. For broader strokes and a less time-consuming process, the roller is your go-to choice.
Whether you’re using a paintbrush or a roller, the technique you employ holds the key to a flawless finish. Apply thin and even coats, allowing each layer to dry completely before applying the next. This patience will be rewarded with a smooth and consistent surface.
Don’t be afraid to experiment with different strokes. Circular motions can create a textured effect, while parallel strokes provide a more streamlined look. The beauty of painting lies in its versatility—let your creativity guide you.
Remember, the path to a flawless finish is paved with ample preparation. Ensure that your MDF surface is primed to enhance paint adhesion and prevent any nasty surprises like peeling or chipping down the road.
With your paint selected and your technique perfected, let the painting process become a dance between your brush or roller and the MDF surface. Each stroke you make brings you closer to a painting masterpiece.
As you step back to admire your handiwork, take pride in the professional-looking finish you’ve achieved. Your MDF project has transformed from a blank canvas into a vibrant expression of your creativity.
Staining MDF: A Guide to Transforming Ordinary into Extraordinary
If you’re looking to add a touch of sophistication to your MDF project, staining is a fantastic option. With a wide range of stains and techniques available, you can create unique and captivating finishes that will elevate your designs.
Why Stain MDF?
Staining MDF offers several advantages over painting or sealing alone. First and foremost, it allows you to achieve a more natural and elegant aesthetic. Stains penetrate the wood fibers, enhancing the grain and giving your project a rich, warm look. Moreover, stains are typically more durable than paints, providing long-lasting protection against wear and tear.
Types of Stains
When it comes to stains, there are two main types: oil-based and water-based.
- Oil-based stains are highly pigmented and provide a deep, rich color. They are more durable and water-resistant than water-based stains, but they require longer drying times and can be more difficult to apply.
- Water-based stains are less pigmented but offer a wider color range. They are easier to apply, dry faster, and clean up more easily with water.
Application Techniques
The method of application you choose will depend on the size and complexity of your project, as well as the desired finish.
- Brushing is the most common method, providing good control over the application. Use a soft-bristled brush and apply the stain in the direction of the wood grain.
- Ragging involves applying the stain with a clean cloth or rag. This technique creates a more rustic, uneven finish.
- Spraying is a great option for larger projects. Ensure even coverage by using a spray gun and following the manufacturer’s instructions carefully.
Tips for Stunning Finishes
- Always test the stain on a scrap piece of MDF before applying it to your project. This will help you avoid any unpleasant surprises.
- Sand the MDF smoothly before applying the stain. This will create a uniform surface and prevent the stain from absorbing unevenly.
- Apply thin, even coats of stain. Allow each coat to dry completely before applying the next.
- Use a clear finish to protect the stained surface. This will enhance its durability and protect it from moisture and scratches.
By following these tips, you can confidently transform your MDF project into a masterpiece with the beauty and elegance of stained wood.
