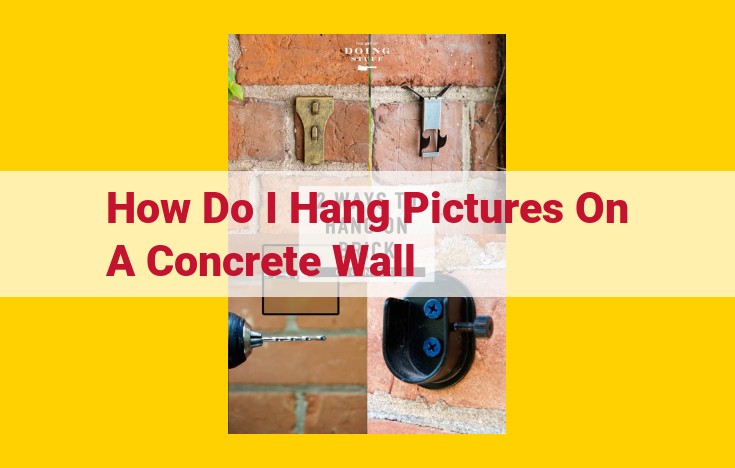
To hang pictures on concrete walls, use heavy-duty concrete hooks or anchors. Drill a small hole and insert the hook. Tap it in with a hammer until it’s flush with the wall. Hang the picture by aligning it with the hook and sliding it down. Use a level to ensure it’s straight.
Hanging Pictures: The Ultimate Guide to Tools and Materials
Hanging pictures can be a daunting task, but with the right tools and materials, it can be a breeze. Here’s a comprehensive guide to help you get started:
Picture Hooks: A Comprehensive List
Choosing the right picture hook is crucial for ensuring your pictures stay securely on the wall. Here are some of the most common types:
- Drywall Hooks: Ideal for hanging lightweight pictures on drywall. Available in various shapes and sizes.
- Toggle Bolts: Perfect for heavy pictures on drywall. They expand behind the wall, providing extra support.
- Screw-in Hooks: Best for hanging pictures on plaster walls. Require a small hole, making them less noticeable.
- Adhesive Strips: A convenient option for small, lightweight frames. They can be removed without damaging the wall.
Safety Considerations: Hang with Confidence
Prioritize safety when hanging pictures. Consider the weight limits of the hooks and the proper placement to prevent accidents.
- Determine the weight: Choose hooks rated to hold the weight of the picture.
- Consider the height: Hang pictures at eye level or slightly higher to prevent neck strain.
- Avoid studs: Never hang pictures directly on studs. Use special stud finders to locate studs and avoid damaging them.
Special Considerations: Hanging on Different Walls
Different wall types require specific hanging methods. Here’s what to keep in mind:
- Drywall: Use drywall hooks or toggle bolts. Avoid nails, which can damage the wall.
- Plaster: Opt for screw-in hooks. Plaster is brittle, so use small holes and avoid overtightening.
- Concrete: Drill a hole and insert concrete anchors. These provide the strongest support for heavy pictures on concrete walls.
Picture Hanging Techniques: A Step-by-Step Guide for Perfect Placement
Hanging pictures on walls can be a daunting task, but with the right techniques and a little know-how, you can transform your space with beautiful artwork that enhances your decor and adds a personal touch. Here’s a comprehensive guide to help you hang pictures like a pro:
Selecting the Right Hooks
The first step in picture hanging is selecting the appropriate hooks for your artwork. Weight and size are crucial factors to consider. Heavy frames or large canvases require more support, while lightweight prints can hang on lighter hooks. Use sturdy picture hooks that are designed to hold the weight of your picture securely.
Step-by-Step Installation Techniques
Once you have the right hooks, it’s time to install them. The installation process varies slightly depending on the type of wall you’re working with:
- Drywall: Use hammer-in hooks or self-adhesive strips for most drywall surfaces. Ensure the hook is firmly anchored into the wall to prevent damage or accidental falls.
- Plaster: Plaster walls require more delicate handling. Use push pins or special plaster hooks that are less likely to damage the fragile surface.
- Concrete: Concrete walls need extra strength to support heavy frames. Use masonry screws or toggle bolts that expand behind the wall, ensuring a secure hold.
Common Mistakes to Avoid
Here are some common mistakes to avoid while hanging pictures:
- Overloading hooks: Never hang more weight on a hook than it can support. This can lead to accidents and damage.
- Hanging too high or low: Consider the height and eye level of the viewer when placing pictures. Too high and it may appear disconnected, too low and it may look cramped.
- Using nails directly: Nails can damage walls and weaken the structure. Always use hooks designed for picture hanging.
Tips for Secure Hanging
To ensure secure hanging, follow these tips:
- Test the hooks: Before hanging the picture, test the hook by applying pressure to it. It should hold firmly without bending or breaking.
- Use a level: A level helps you align the picture frame horizontally and prevents crooked displays.
- Double-check the alignment: Step back from the picture and check its alignment from different angles to ensure it’s even.
- Hang multiple pictures: When hanging multiple pictures in a group, use a template to ensure they are spaced evenly and create a cohesive display.
Wall Types and Hanging Considerations
When it comes to hanging pictures, understanding the type of wall you have is crucial for ensuring a secure and visually appealing display. Different wall surfaces have distinct characteristics that dictate the type of hardware and installation techniques required.
Drywall
Drywall is a popular wall material made from gypsum board. It is relatively soft and easy to penetrate, making it suitable for lightweight pictures. Standard picture hooks or nails are typically sufficient for drywall walls. However, for heavier pictures, consider using molly bolts or toggle bolts that can distribute weight more effectively.
Plaster
Plaster walls are more durable than drywall but also more delicate. To avoid damaging the plaster, use picture hooks specifically designed for this surface. These hooks have blunt tips that gently grip the plaster without causing cracks. For heavier pictures, consider screw anchors or butterfly anchors that provide a secure hold without penetrating the plaster.
Concrete
Concrete walls are extremely strong and require specialized hardware. Concrete screws or hammer drills are necessary for anchoring into this surface. Heavy-duty picture hooks or d-rings are essential for supporting the weight of framed pictures. It is important to pre-drill small holes before inserting the screws to prevent cracking the concrete.
Special Considerations
Beyond these common wall types, there are other special surfaces that require specific hanging techniques:
- StuCCO: Use stucco nails or molly bolts.
- Tile: Self-adhesive hooks or adhesive tape are suitable for lightweight tiles. For larger tiles, use tile clips or grout-set hooks.
- Thin Walls: Command Strips or adhesive hooks provide a non-invasive option for hanging pictures on thin walls.
- Old or Crumbly Surfaces: Toggle bolts or rotary anchors provide a secure hold without causing further damage.
By understanding the unique characteristics of different wall types and selecting the appropriate hardware and installation methods, you can ensure your pictures are securely hung and enhance the aesthetics of your space.
