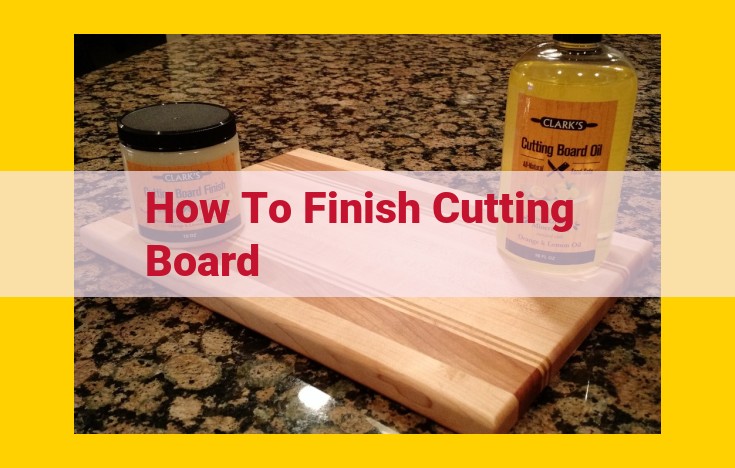
Finishing Cutting Board:
To finish a cutting board, sand it with fine-grit sandpaper to remove imperfections. Apply food-grade mineral oil or cutting board conditioner to protect and enhance the wood’s durability. For a water-resistant barrier, add beeswax or carnauba wax. Buff with a soft cloth to create a smooth, glossy finish. Repeat the process as needed to maintain the board’s condition and prevent bacteria growth.
Essential Materials and Tools for Cutting Board Maintenance
Maintaining your cutting board is crucial for ensuring its longevity and hygiene. Proper care not only keeps it in pristine condition but also protects you and your family from foodborne illnesses. This comprehensive guide will equip you with the essential materials and tools you need for effective cutting board maintenance.
Materials
Cutting Board Conditioner: This magic potion is specifically designed to shield your cutting board from the damaging effects of moisture, bacteria, and discoloration. It nourishes and protects the wood, extending its lifespan.
Food-Grade Mineral Oil: A time-honored and safe solution for conditioning wooden cutting boards, mineral oil enhances their durability. It seeps into the wood’s pores, creating a barrier that prevents moisture penetration and preserves the board’s natural beauty.
Beeswax: Derived from the hardworking honeybee, beeswax boasts water-repellent properties. When applied to cutting boards, it forms a protective layer that keeps moisture at bay. Its natural antibacterial qualities further enhance hygiene.
Carnauba Wax: This plant-derived wax is harder than beeswax, providing an even more durable finish. It’s ideal for heavy-use cutting boards that endure frequent chopping and slicing. Its lustrous shine adds an extra touch of elegance.
Butcher Block Oil: A specialized formula created specifically for butcher blocks, butcher block oil combines mineral oil with other ingredients to nourish and protect these hardworking surfaces. It maintains their integrity and prevents drying and cracking.
Sandpaper: This abrasive material is available in various grits and is used to smooth and refine cutting board surfaces. Before and after conditioning, sandpaper helps to remove imperfections and create a uniform finish.
Tools
Soft Cloth: As the name suggests, a soft cloth is gentle on your cutting board. It’s ideal for applying and buffing conditioner or oil, ensuring an even distribution and a smooth finish.
Polishing Cloth: Upgrade your cutting board’s appearance with a polishing cloth. It creates a glossy finish that not only looks stunning but also provides additional protection.
Sanding Block or Electric Sander: For larger surfaces or removing stubborn imperfections, a sanding block or electric sander is your go-to tool. They smooth the cutting board’s surface, making it ready for conditioning.
Orbital Sander: This power tool is suitable for large-scale sanding or removing deep scratches. Its oscillating motion ensures an even and consistent finish.
Tack Cloth: This sticky cloth effectively removes sanding dust and debris before applying conditioner or oil. It ensures a clean and smooth surface for optimal adhesion.
Polishing Buffer: Give your cutting board a professional-looking shine with a polishing buffer. It buffs out imperfections, leaving your cutting board with a mirror-like finish that’s both beautiful and hygienic.
Essential Materials and Tools for Cutting Board Maintenance: Food-Grade Mineral Oil for Preserving Durability
Maintaining your cutting boards is crucial for ensuring their longevity, hygiene, and functionality. Among the various materials and tools you’ll need, food-grade mineral oil stands out as an indispensable element.
The Importance of Food-Grade Mineral Oil
Food-grade mineral oil is a refined, purified type of mineral oil that is safe and effective for conditioning wooden cutting boards. Unlike other oils or waxes, mineral oil does not impart any flavor or odor to food, making it ideal for use in the kitchen.
Benefits of Using Food-Grade Mineral Oil
- Protects against moisture: Mineral oil penetrates the wood’s pores, creating a barrier that repels water and other liquids. This prevents the wood from warping or cracking due to moisture absorption.
- Inhibits bacterial growth: By sealing the wood’s surface, mineral oil reduces the risk of bacteria and mold growth, ensuring a hygienic cutting surface.
- Enhances durability: Regular conditioning with mineral oil strengthens the wood fibers, making cutting boards more resistant to scratches and cuts.
- Restores and rejuvenates: Mineral oil can help revive weathered or dull cutting boards, restoring their original luster and functionality.
How to Apply Food-Grade Mineral Oil
- Clean the cutting board: Thoroughly wash and dry the cutting board to remove any food residue or debris.
- Apply the oil: Dip a clean, soft cloth into the mineral oil and apply a thin, even layer to the entire surface of the board.
- Let it penetrate: Allow the oil to penetrate the wood for 15-20 minutes.
- Buff or wipe off excess: Use a polishing cloth or paper towels to remove any excess oil that has not been absorbed.
- Repeat regularly: Condition your cutting board with food-grade mineral oil every 2-3 months, or more often if the board is heavily used.
By incorporating food-grade mineral oil into your cutting board maintenance routine, you can effectively preserve their durability, ensure hygiene, and keep them looking their best. Regular conditioning will extend the life of your cutting boards, ensuring they remain a reliable and indispensable tool in your kitchen for years to come.
Beeswax: A Natural Protector for Your Cutting Boards
Beeswax, a natural wax produced by bees, is an indispensable tool for maintaining the longevity and hygiene of your cutting boards. Unlike other conditioning agents, beeswax not only nourishes the wood but also forms a protective barrier against moisture and bacteria.
The application of beeswax on cutting boards is a simple yet effective process. After thoroughly cleaning the board, apply a thin layer of beeswax to the surface using a soft cloth. Allow the beeswax to soak in for a few hours or overnight. Once the beeswax has fully absorbed, buff the surface with a clean cloth to create a glossy shine.
Beeswax not only enhances the appearance of your cutting boards but also plays a crucial role in preserving their integrity. By sealing the pores of the wood, beeswax prevents moisture from penetrating and damaging the board. This protection against moisture also inhibits the growth of bacteria, ensuring a safe and hygienic surface for food preparation.
Regular use of beeswax on cutting boards can significantly prolong their lifespan. The protective barrier formed by beeswax reduces wear and tear and prevents the wood from becoming dry and brittle. Moreover, beeswax helps to mask the natural odor of wood, leaving your cutting board with a pleasant, fresh scent.
If you value the durability, hygiene, and overall aesthetic appeal of your cutting boards, incorporating beeswax into your maintenance routine is a wise choice. Its natural and effective properties make beeswax an essential tool for preserving and protecting your kitchen companion for years to come.
Carnauba Wax: A harder wax than beeswax, providing a more durable finish for heavy-use cutting boards.
Carnauba Wax: The Ultimate Shield for Your Heavy-Duty Cutting Boards
In the bustling kitchens of professional chefs and home cooking enthusiasts alike, cutting boards endure the relentless onslaught of sharp knives and acidic ingredients. To ensure their longevity and hygiene, proper maintenance is crucial. And among the essential tools for this task, carnauba wax stands as a prime contender.
The Unsurpassed Hardness of Carnauba Wax
Derived from the leaves of Brazilian palm trees, carnauba wax boasts an exceptional level of hardness. Compared to its softer counterpart, beeswax, carnauba wax forms a more durable barrier on the surface of your cutting board, providing enhanced protection against scratches, abrasions, and moisture.
Ideal for Heavy-Use Applications
This exceptional durability makes carnauba wax the ideal choice for cutting boards that see frequent and intensive use. Commercial kitchens, where culinary professionals wield sharp knives with precision, demand a finish that can withstand the rigors of daily food preparation. Carnauba wax delivers this resilience, ensuring your cutting board remains in pristine condition for years to come.
A Water-Resistant Shield
Moisture poses a significant threat to the integrity of wooden cutting boards. Prolonged exposure to water can cause warping, cracking, and the proliferation of bacteria. Carnauba wax acts as an impenetrable barrier, preventing water from penetrating the wood and compromising its structural stability. This water resistance safeguards your cutting board against warping and the associated health risks.
Easy Application for Professional-Level Results
Maintaining your cutting board with carnauba wax is a breeze. Simply apply a thin layer to the surface and allow it to fully penetrate the wood. Buff the surface with a clean cloth to achieve a glossy, protective finish. Your cutting board will be rejuvenated and protected, ready to handle the most demanding culinary challenges.
**Essential Care and Maintenance for Your Cutting Boards with Butcher Block Oil**
In the realm of culinary craftsmanship, where precision and hygiene reign supreme, cutting boards stand as indispensable tools. Their durability and resistance to moisture and bacteria ensure the safe preparation of your culinary creations. To maintain their pristine condition and extend their lifespan, proper care and maintenance are paramount. Among the arsenal of essential materials and tools, butcher block oil emerges as a cornerstone for safeguarding the health and beauty of your wooden cutting boards.
Unveiling the Secrets of Butcher Block Oil
Butcher block oil is a specialized blend of food-grade mineral oil and additional conditioning agents, expertly formulated to nourish and protect your wooden cutting boards. Its unique composition penetrates deep into the wood fibers, creating a water-resistant barrier against moisture and bacteria. This protection ensures that your cutting boards remain hygienic and safe for preparing even the most delicate ingredients.
Beyond Moisture Protection: The Benefits of Butcher Block Oil
The benefits of butcher block oil extend far beyond mere moisture resistance. It also serves as a natural preservative, protecting your cutting boards from warping, cracking, and discoloration. Its nourishing properties help to maintain the wood’s natural beauty, enhancing its grain and preventing the buildup of unsightly stains.
Applying Butcher Block Oil: A Step-by-Step Guide
Applying butcher block oil is a simple and straightforward process that yields profound results. Begin by cleaning your cutting board thoroughly with warm soapy water and allowing it to dry completely. Next, liberally apply the oil to the board’s surface, ensuring even coverage. Allow the oil to penetrate for several minutes, then use a clean cloth to wipe away any excess. For optimal protection, repeat this process monthly.
Additional Tips for Maintaining Your Cutting Boards
In addition to using butcher block oil, here are a few additional tips to ensure the longevity and well-being of your cutting boards:
- Clean them regularly with warm soapy water and dry them thoroughly.
- Avoid soaking them in water or putting them in the dishwasher.
- Use different cutting boards for different types of food to prevent cross-contamination.
- Store them upright in a well-ventilated area to prevent warping.
By following these simple guidelines and utilizing the power of butcher block oil, you can keep your cutting boards spotless, protected, and ready for countless cooking adventures to come.
Smoothing and Refining with Sandpaper
When it comes to maintaining cutting boards, sandpaper plays a crucial role in smoothing and refining their surfaces. Whether you’re preparing a new cutting board for use or rejuvenating an old one, sandpaper can help you achieve a smooth and hygienic surface.
Types of Sandpaper
There are various types of sandpaper available, each with its own grit level. For cutting boards, choose sandpaper with a medium to fine grit (120-220). Avoid using coarse sandpaper, as it can leave deep scratches that may harbor bacteria.
Hand Sanding
Hand sanding is a straightforward technique. Simply grab a sanding block and a sheet of sandpaper and go to work. Start with a coarser grit sandpaper to remove any imperfections or rough edges. Then, gradually move to a finer grit sandpaper to smooth the surface.
Orbital Sanding
If you’re working on a large cutting board or have a lot of imperfections to remove, an orbital sander can save you time and effort. This power tool rotates a sanding disc in a circular motion, allowing you to quickly and evenly remove material.
Wet Sanding
Wet sanding is a method that involves using water along with sandpaper. This technique helps to reduce the risk of scorching the wood and creates a smoother finish. Dip the sandpaper in water and sand the cutting board while keeping it wet.
Why Use Sandpaper on Cutting Boards?
Sanding cutting boards before and after conditioning provides several benefits:
- Removes imperfections: Sanding helps to smooth out any rough edges or scratches, creating a more uniform surface.
- Prepares the wood for conditioning: Sanding opens up the wood’s pores, allowing conditioner or oil to penetrate more deeply.
- Extends the lifespan of your cutting board: By removing imperfections and conditioning the wood properly, sanding helps to prevent cracking, warping, and other damage, extending the life of your cutting board.
Beyond the Basics: Unlocking the Power of a Soft Cloth in Cutting Board Maintenance
When it comes to cutting board maintenance, the humble soft cloth plays a pivotal role. Often overlooked, this little gem holds the key to a clean, protected, and aesthetically pleasing cutting board. Let’s delve into its extraordinary powers and explore how a soft cloth can elevate your cutting board care routine.
1. Application and Buffing Virtuoso:
A soft cloth serves as the perfect applicator for cutting board conditioner or oil. Its gentle touch distributes the product evenly, ensuring that every nook and cranny is nourished and protected. When it comes to buffing, a soft cloth works its magic, removing excess product and leaving behind a smooth, satin-like finish.
2. Dust Removal Ace:
Before applying any conditioner or oil, it’s essential to remove sanding dust and debris. A soft cloth, acting as a dust removal ace, effortlessly whisks away these particles, preparing the surface for a flawless application. This meticulous step ensures that your cutting board receives the optimal care it deserves.
3. Finishing Touches:
After applying conditioner or oil, a soft cloth transforms into a polishing wizard. By gently rubbing the cloth in circular motions, you create a glossy and durable finish. This not only enhances the appearance of your cutting board but also adds an extra layer of protection against moisture and bacteria.
Choosing the Right Soft Cloth:
Not all soft cloths are created equal. Opt for a cloth that is lint-free and absorbent. Avoid using abrasive fabrics that can damage the surface of your cutting board. Microfiber cloths or soft cotton cloths are excellent choices for this delicate task.
The humble soft cloth is an indispensable tool in your cutting board maintenance arsenal. Its versatility and effectiveness make it an essential companion for keeping your cutting boards clean, protected, and looking their best. By incorporating these tips into your routine, you’ll unlock the full potential of your soft cloth and ensure that your cutting boards serve you well for years to come.
Polish Your Cutting Board to a Brilliant Shine with a Polishing Cloth
When it comes to maintaining the beauty and longevity of your cutting boards, a polishing cloth is an indispensable tool. This unassuming piece of fabric holds the secret to transforming your cutting board from a mere prep surface to a gleaming work of art.
Imagine the satisfaction of slicing and dicing on a board that radiates a glossy finish, reflecting light like a mirror. With a polishing cloth, this dream can be a reality. These cloths are specially designed to buff away any imperfections and bring out the natural luster of your cutting board.
As you gently rub the cloth over the surface, watch as scratches and marks magically disappear, revealing the warm, rich tones of the wood. The polishing action not only enhances the board’s appearance but also seals in the protective layer of oil or wax, ensuring your board stays hygienic and ready for action.
Using a polishing cloth is a breeze. Simply apply a few drops of mineral oil or cutting board conditioner to the cloth and gently massage it into the surface. Allow the oil to penetrate for a few minutes, then buff the board with a clean polishing cloth until it shines.
Pro Tip: For an extra touch of brilliance, use a circular motion when buffing. This helps distribute the oil evenly and creates a uniform, glossy finish.
Don’t underestimate the power of a polishing cloth for your cutting board maintenance routine. This modest tool will not only enhance the appearance of your board but also extend its lifespan and keep it performing at its best. So next time you’re cleaning your cutting board, reach for a polishing cloth and witness the transformation from dull to dazzling.
Sanding: A Crucial Step for Pristine Cutting Boards
In the realm of cutting board maintenance, sanding holds immense significance, often serving as the cornerstone upon which aesthetics and functionality thrive. Whether you’re dealing with rough splinters or deep scratches, sanding block or electric sander can effectively erase these imperfections, leaving behind a smooth and refined surface.
Sanding not only enhances the board’s appearance but also promotes its longevity. By smoothing out nicks and gouges, you reduce the likelihood of food particles becoming trapped, which can harbor bacteria and compromise hygiene. A well-sanded cutting board is a testament to both meticulous care and a commitment to culinary excellence.
Choosing the Right Sanding Tool
The choice between a sanding block or an electric sander often depends on the scale and severity of the sanding task. A sanding block provides manual control, allowing you to focus on specific areas that require attention. It’s a cost-effective option for smaller cutting boards or touch-ups.
However, if you’re faced with a heavily damaged cutting board or a large surface area to tackle, an electric sander becomes a more efficient tool. Orbital sanders or finishing sanders, in particular, offer speed and precision, allowing you to remove material quickly and evenly.
Sanding Techniques
Once you’ve selected your sanding tool, the next step is to master the technique. Start with a medium-grit sandpaper, gradually progressing to a finer grit to achieve a smooth finish. Hand sanding requires gentle, circular motions, while orbital sanding allows for broader strokes.
For optimal results, employ wet sanding, a technique that involves adding water to the sandpaper. This reduces friction, minimizing heat buildup and preventing the wood from scorching. Wet sanding also generates a smoother surface, leaving your cutting board looking its best.
Benefits of a Well-Sanded Cutting Board
A well-sanded cutting board not only looks pristine but also offers numerous benefits:
- Improved hygiene: A smooth surface makes it harder for bacteria to hide, reducing the risk of cross-contamination.
- Enhanced durability: By removing imperfections, you reduce the likelihood of the board splitting or warping, extending its lifespan.
- Easier cleanup: A smooth surface facilitates cleaning, allowing you to remove food residue with minimal effort.
- Professional appearance: A well-sanded cutting board exudes a sense of care and attention to detail, making it a welcome addition to any kitchen.
The Indispensable Orbital Sander: A Game-Changer for Cutting Board Maintenance
When it comes to restoring and rejuvenating beloved cutting boards, the orbital sander emerges as a truly indispensable tool. Its powerful yet controlled sanding action makes light work of large-scale sanding tasks and effectively removes even the deepest scratches.
Why an Orbital Sander Reigns Supreme
Unlike traditional hand sanding, the orbital sander’s rotating and oscillating motion ensures a more even and consistent finish. This is especially crucial for cutting boards, where uniform sanding is essential for maintaining a smooth and hygienic surface.
Moreover, the orbital sander’s speed and efficiency greatly reduce the time and effort required for sanding. This makes it an ideal choice for tackling large cutting boards or those with particularly deep scratches and imperfections.
Unveiling the Benefits
The benefits of using an orbital sander for cutting board maintenance are undeniable:
-
Effortless Removal of Deep Scratches: Its powerful action effortlessly removes even the most頑固的 scratches, leaving the cutting board looking as good as new.
-
Large-Scale Sanding Efficiency: The orbital sander’s broad sanding head allows for efficient sanding of large surfaces, significantly reducing the time and労力 involved.
-
Uniform and Consistent Finish: Its unique rotation and oscillation motion ensures a smoother and more consistent finish, providing an optimal surface for food preparation.
Tips for Effective Orbital Sanding
To ensure a seamless and successful sanding experience, follow these tips:
- Choose the appropriate sandpaper grit for your desired outcome. A coarser grit will remove more material quickly, while a finer grit will create a smoother finish.
- Use a sanding block or orbital sander attachment for better control and a more even finish.
- Sand in the direction of the wood grain to minimize scratches and splinters.
- Clean the cutting board thoroughly with a tack cloth before sanding to remove any dust or debris.
- Wear appropriate safety gear, including a dust mask and eye protection, while sanding.
Tack Cloth: The Unseen Hero of Cutting Board Maintenance
Every seasoned chef or home cook knows the value of a well-maintained cutting board. It’s not just about aesthetics; it’s about hygiene, food safety, and the longevity of your kitchen workhorse. Among the essential tools and materials for cutting board maintenance, one often overlooked yet indispensable item is the tack cloth.
Imagine this: you’ve spent hours sanding your cutting board to a silky-smooth surface. You’re ready to apply the conditioner or oil, but then you notice the fine dust clinging to the wood. Sanding dust is abrasive and can interfere with the smooth application of the conditioner, leaving tiny scratches and imperfections.
Enter the humble tack cloth. Its secret lies in its sticky composition, which attracts and traps dust particles like a magnet. Before applying any conditioner or oil, simply wipe the surface of your cutting board with a tack cloth. The dust will adhere to the cloth, leaving the wood pristine and ready for the next step.
It’s not just dust that the tack cloth tackles. It also removes sawdust, sanding residue, and tiny wood chips. These particles can lodge in the grain of the wood, weakening its structure and compromising its hygiene. By using a tack cloth, you ensure that your cutting board is thoroughly cleaned and ready for a protective layer.
Remember, a clean surface is imperative for the effective application of conditioners and oils. Any remaining dust or debris can create a barrier, preventing these products from fully penetrating the wood and providing optimal protection. By using a tack cloth, you maximize the performance of your cutting board maintenance regimen.
So, the next time you embark on a cutting board maintenance mission, don’t forget to grab your tack cloth. It may not be the most glamorous tool, but its role in ensuring a pristine, hygienic, and durable cutting surface is immeasurable.
Polishing your Cutting Board to Perfection: A Professional Shine at Home
Maintaining cutting boards is essential for both hygiene and durability. Polishing your cutting board adds a professional-looking shine that not only enhances its appearance but also protects it from moisture and wear. Using a polishing buffer is the most effective way to achieve this gleaming finish.
A polishing buffer is a mechanical tool designed to create a smooth, glossy surface on wood. Its rotating head is covered with soft pads that gently polish and buff the wood, removing imperfections and enhancing the grain’s natural beauty. The buffer’s speed and pressure can be adjusted, allowing you to customize the finish to your liking.
For optimal results, start by thoroughly sanding the cutting board with fine-grit sandpaper. This will remove any rough patches or splinters and create a smooth base for the polish. Wipe the board clean with a tack cloth to remove sanding dust.
Next, apply a generous amount of cutting board oil or conditioner to the board’s surface. Use a soft cloth to spread the oil evenly, ensuring it penetrates into the wood’s pores. Allow the oil to soak in for several hours or overnight.
Now, it’s time for the polishing buffer to work its magic. Attach a soft polishing pad to the buffer’s head and apply gentle pressure. Start by polishing in small circles, gradually increasing the speed and pressure as needed. Move the buffer in the direction of the wood grain to avoid scratching the surface.
Continue polishing until the oil has been evenly distributed and the surface is smooth and shiny. Wipe away any excess oil with a clean cloth. If desired, apply a second coat of oil for a more durable finish.
Your cutting board now boasts a professional-looking shine that will make it the centerpiece of your kitchen. Not only does it look stunning, but it’s also well-protected and ready to handle all your culinary adventures with ease.
Hand Sanding: A Gentle Touch for Cutting Board Refinement
In the realm of cutting board maintenance, the art of hand sanding emerges as a time-honored technique, requiring patience and precision. Like a sculptor chiseling away at raw marble, this method allows you to gently refine the surface of your beloved cutting board, revealing its hidden beauty.
Armed with a fine-grit sandpaper and a sturdy sanding block, you embark on a journey of transformation. With gentle strokes, you glide over the board’s surface, smoothing out any imperfections and removing stubborn food stains. The friction generated by the sandpaper creates a fine dust, which can be easily removed with a tack cloth.
As you progress, you’ll notice the once-rough surface becoming increasingly smooth and polished. Hand sanding gives you the flexibility to focus on specific areas, ensuring that every nook and cranny is meticulously refined. It’s a labor of love that requires patience, but the results are undoubtedly worth the effort.
Once you’re satisfied with the smoothness of the surface, you can gently round the edges of your cutting board. This not only enhances its aesthetic appeal but also reduces the risk of splinters or sharp edges. With a firm grasp on the sandpaper, gradually round off the corners and edges, creating a soft and inviting touch.
Finally, wipe away the sanding residue with a soft cloth, unveiling the new and improved surface of your cutting board. Hand sanding is not just a technique; it’s a testament to your dedication to preserving and caring for your culinary companion. By investing the time and effort into hand sanding, you not only restore your cutting board to its former glory but also extend its lifespan for years to come.
Orbital Sanding: A Quick and Efficient Way to Revitalize Your Cutting Boards
When your wooden cutting boards start to show signs of wear and tear, such as deep scratches or stubborn stains, it’s time to restore them to their former glory. Orbital sanding is a powerful tool that can quickly and evenly remove these imperfections, leaving your cutting boards looking and performing like new.
An orbital sander moves in a circular motion, allowing you to cover a large surface area in a short amount of time. This makes it ideal for sanding down cutting boards that have been heavily used or have accumulated multiple scratches. The oscillating motion also reduces the risk of creating unsightly sanding marks, ensuring a smooth and even finish.
To use an orbital sander, start by attaching the appropriate sandpaper to the sanding pad. For most cutting boards, a medium-grit sandpaper (around 120-150 grit) will suffice. Secure the cutting board in place and turn on the sander. Move the sander in a circular motion, applying even pressure over the entire surface.
Be sure to regularly check the progress of your sanding and adjust the pressure or sandpaper grit as needed. Once you have removed all the imperfections, switch to a finer-grit sandpaper (around 220-400 grit) to smooth out the surface and prepare it for conditioning.
Orbital sanding is a versatile technique that can also be used for other woodworking projects, such as smoothing out tabletops, removing paint, or refinishing furniture. It’s important to wear safety glasses and a dust mask while sanding to protect yourself from flying particles. With a little practice, you’ll be able to master the art of orbital sanding and keep your cutting boards looking their best for years to come.
Essential Materials and Tools for Cutting Board Maintenance
Wet Sanding: Reducing Scorching and Enhancing Smoothness
Wet sanding is a technique that utilizes sandpaper and water to smooth and refine the surface of cutting boards. This method is particularly effective in minimizing the risk of scorching, which can occur during dry sanding due to friction. The presence of water acts as a lubricant, reducing heat buildup and preventing the sandpaper from overheating.
Water also helps to create a smoother finish on the cutting board. When sandpaper is used in conjunction with water, the abrasive particles become less likely to become clogged with wood dust. This allows for a more consistent and even sanding action, resulting in a surface that is both smooth to the touch and visually appealing.
Applying the Wet Sanding Technique
To effectively wet sand a cutting board, follow these steps:
- Prepare the cutting board: Clean the board with soap and water and allow it to dry thoroughly.
- Choose appropriate sandpaper: Select a fine-grain sandpaper (220 or higher grit) for smoothing and 400 or higher grit for refining.
- Wet the sandpaper: Submerge the sandpaper in a shallow container filled with water or mist it with a spray bottle.
- Sand the cutting board: Start with the lower-grit sandpaper and work in the direction of the wood grain. Apply light pressure and use circular motions.
- Rinse and repeat: Rinse the cutting board and sandpaper frequently to remove wood dust and debris. Switch to the higher-grit sandpaper and continue sanding until the desired smoothness is achieved.
- Dry and condition: Once the sanding process is complete, allow the cutting board to dry thoroughly. Apply a food-grade mineral oil or cutting board conditioner to protect and nourish the wood.
Benefits of Wet Sanding
Wet sanding offers several advantages over dry sanding:
- Reduced scorching: Water acts as a lubricant, preventing the sandpaper from overheating and scorching the wood.
- Smoother finish: Wet sanding creates a more consistent and even sanding action, resulting in a smoother surface.
- Less dust: Water helps to minimize the amount of wood dust generated during sanding, making it a cleaner and healthier process.
Essential Cutting Board Maintenance: Oiling to Preserve Wood and Fight Bacteria
In the culinary realm, cutting boards bear the brunt of our slicing, dicing, and mincing adventures. To keep these workhorses in pristine condition, oiling is a crucial step that not only enhances their longevity but also safeguards against moisture and bacteria.
Why Oil Your Cutting Board?
Cutting boards, particularly those made of wood, are porous and prone to absorbing moisture and food particles. Over time, this can lead to warping, cracking, and the growth of harmful bacteria. Oiling creates a protective layer that repels moisture, preventing these issues.
Choosing the Right Oil
The type of oil you use is critical. Choose food-grade mineral oil or cutting board conditioner. These oils are specifically formulated to penetrate the wood without leaving a greasy residue. Avoid using cooking oils like olive oil or vegetable oil, as they can go rancid and attract bacteria.
Oiling Your Cutting Board
- Clean the Cutting Board: Wash the cutting board thoroughly with warm, soapy water and let it dry completely.
- Apply the Oil: Using a soft cloth or brush, apply a thin layer of oil evenly over the surface of the cutting board.
- Let It Soak In: Allow the oil to soak into the wood for at least 12 hours.
- Wipe Off Excess: Remove any excess oil with a dry cloth.
Benefits of Oiling
- Protects Against Moisture: Penetrating oils seal the wood’s pores, preventing water and other liquids from seeping in.
- Prevents Warping and Cracking: Moisturized wood is less likely to warp or crack due to changes in temperature or humidity.
- Reduces Bacteria Growth: Bacteria thrive in moist environments. Oiling creates a barrier that limits their access to moisture and nutrients.
- Enhances Appearance: Oiled cutting boards have a beautiful, glowing finish that adds aesthetic value to your kitchen.
Remember: Regular oiling is essential for maintaining the health and longevity of your cutting boards. Aim to oil them monthly or more often if they are heavily used.
Protect Your Culinary Canvas: A Comprehensive Guide to Waxing Cutting Boards
In the culinary realm, cutting boards are not mere tools; they are essential canvases upon which every dish is brought to life. Whether slicing tender cuts of meat, prepping vibrant vegetables, or preparing aromatic herbs, a well-maintained cutting board is a chef’s most trusted ally. However, like any other kitchen staple, cutting boards require proper care to ensure their longevity and hygiene. One crucial aspect of cutting board maintenance is waxing.
Waxing creates a water-repellent barrier on the surface of your cutting board, protecting it from moisture and bacteria. This not only enhances its durability but also ensures that your food stays safe and uncontaminated. Using the right type of wax and following proper application techniques will keep your cutting board looking its best and performing at its peak.
The Natural Choices: Beeswax and Carnauba Wax
When it comes to waxing cutting boards, two natural options stand out: beeswax and carnauba wax. Beeswax is a byproduct of honey production, while carnauba wax is derived from the leaves of a Brazilian palm tree. Both waxes are food-grade, making them safe for direct contact with food.
Beeswax is a softer wax, providing a relatively thin but hydrophobic layer. It is easy to apply and absorbs well into the wood, creating a natural barrier against moisture. Carnauba wax, on the other hand, is harder and creates a thicker, more durable finish. It is resistant to scratches and heat, making it ideal for heavy-use cutting boards.
Step-by-Step Guide to Waxing Your Cutting Board
-
Clean and dry your cutting board: Before waxing, ensure that your cutting board is thoroughly cleaned and completely dry. This will remove any dirt, food particles, or bacteria that could interfere with the adhesion of the wax.
-
Apply a thin layer of wax: Using a soft cloth, apply a thin, even layer of beeswax or carnauba wax to the surface of your cutting board. If using beeswax, you can warm it up slightly to soften it.
-
Buff in the wax: Once the wax is applied, use a clean polishing cloth to buff it into the wood. This will help distribute the wax evenly and create a smooth, protective finish.
-
Wipe away excess wax: After buffing, use a tack cloth to wipe away any excess wax that may have accumulated on the surface. This will ensure that the finish is clean and free of dust.
-
Let the wax dry and cure: Allow the waxed cutting board to dry and cure for several hours. The drying time will vary depending on the type of wax used. Follow the manufacturer’s instructions for optimal curing time.
By following these steps and periodically reapplying wax, you can keep your cutting board in pristine condition, ensuring that it remains an essential tool in your kitchen for years to come.
Buffing: Achieving a Lustrous Finish for Your Cutting Board
In the realm of cutting board maintenance, buffing stands as the final touch, bestowing a glossy, durable finish that enhances both aesthetics and functionality. This simple yet transformative step elevates your cutting board from a mere kitchen tool to a cherished culinary masterpiece.
After conditioning your cutting board with oil or wax, it’s time to unleash the buffing power. Buffing entails using a polishing buffer or cloth to gently rub the surface of the board in circular motions. This process removes excess product, smooths out any imperfections, and creates a radiant sheen.
The polishing cloth you choose is crucial for achieving the desired finish. Soft, lint-free cloths allow for delicate buffing, while terry cloths provide a more abrasive touch. For a professional-grade shine, consider using a polishing buffer, which generates high-speed rotations that effortlessly polish the surface.
As you buff, pay special attention to areas with deep scratches or imperfections. Repeat the process until the entire surface gleams with a uniform glow. The result is a cutting board that not only protects your knives and food but also becomes a stunning addition to your kitchen décor.
Remember: Regular buffing will maintain your cutting board’s pristine condition, preserving its beauty and longevity. So, embrace the art of buffing and witness your cutting board transform into a culinary work of art.
Protect Your Culinary Canvas: Essential Materials and Tools for Cutting Board Maintenance
In the realm of culinary artistry, a cutting board is an indispensable tool. From the rhythmic chopping of vegetables to the intricate slicing of meats, it serves as the foundation for countless culinary creations. However, maintaining the pristine condition of your cutting board is crucial to ensuring its longevity and food safety.
Materials for Cutting Board Care
Choosing the right materials is the cornerstone of effective cutting board maintenance. Cutting board conditioner, specifically designed to protect against moisture, bacteria, and discoloration, is a must-have. Food-grade mineral oil is a natural way to condition wooden boards, enhancing their durability. Beeswax and Carnauba wax create water-resistant barriers, providing additional protection for heavy-use boards. Butcher block oil is formulated with a blend of ingredients to condition and protect butcher blocks, while sandpaper is an essential tool for smoothing and refining cutting board surfaces.
Tools for Precision Maintenance
Proper cutting board maintenance requires the right tools. Soft cloths are used for applying and buffing conditioners and oils. Polishing cloths create a glossy finish, while sanding blocks and electric sanders remove imperfections and smooth surfaces. Orbital sanders tackle large areas, and tack cloths remove sanding dust before applying protective coatings. For a professional-looking shine, a polishing buffer is indispensable.
Techniques for Impeccable Results
Hand sanding ensures precision smoothing, while orbital sanding quickly removes larger imperfections. Wet sanding reduces the risk of scorching and creates a smooth finish. Oiling nourishes wood, preventing moisture absorption and bacterial growth. Waxing creates a water-repellent barrier, further protecting your board. Buffing enhances durability and provides a glossy finish. Finally, sealing with a cutting board sealer adds an extra layer of protection against moisture, food acids, and staining.
By incorporating these essential materials and tools into your cutting board maintenance routine, you can ensure that your culinary companion remains in pristine condition, ready to enhance your culinary creations for years to come.
