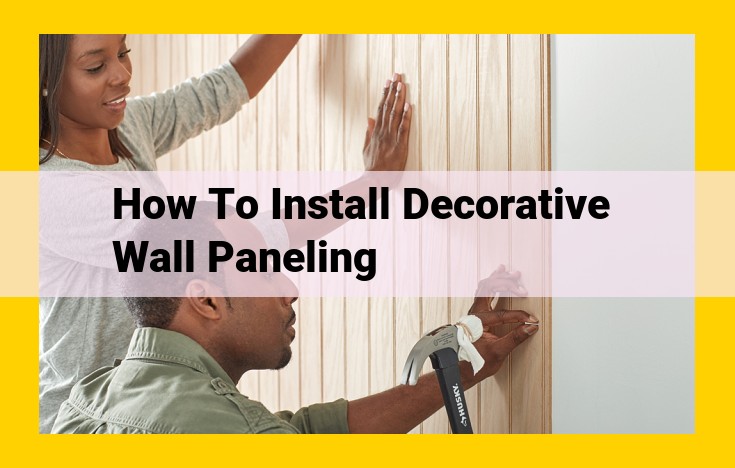
To install decorative wall paneling, you’ll need basic tools like a hammer, level, measuring tape, caulk gun, and saw. Choose the type of paneling based on style and application, ranging from beadboard to shiplap to plywood. Nail, staple, glue, or use tongue-and-groove techniques to install the panels. Enhance the aesthetics with trim molding like chair rail or baseboard to create a polished finish.
Essential Tools for Wall Paneling Installation
Drawing a Tool-ful Picture: Embarking on a Wall Paneling Adventure
When embarking on the journey of installing wall paneling, it’s imperative to equip yourself with the right tools. These instruments will serve as your trusty companions, guiding you through the process with ease and precision. Let’s delve into their purpose and operation, ensuring a seamless and satisfying installation experience.
Measuring and Marking:
-
Tape Measure: Embodying accuracy, the tape measure allows you to determine precise distances and measurements, ensuring your paneling fits snugly within the designated space.
-
Carpenter’s Pencil: Marking your way to success, the carpenter’s pencil facilitates precise markings on both panels and walls, guiding the next steps with accuracy.
-
Chalk Line: Creating a chalky blueprint, the chalk line effortlessly marks long, straight lines, serving as a beacon for cutting and aligning panels.
Cutting Essentials:
-
Circular Saw: The circular saw wields its sharp blade, slicing through paneling with precision. Its adjustable depth ensures clean cuts that fit perfectly into place.
-
Miter Saw: For those intricate angles, the miter saw steps up to the challenge. It expertly cuts angled edges, allowing for seamless joints at corners.
-
Clamps: Harnessing the power of grip, clamps firmly hold panels together during cutting and installation, preventing unwanted movement that could compromise accuracy.
Installation Tools:
-
Nail Gun: The nail gun drives nails into panels and walls with speed and precision, securing them firmly in place.
-
Stapler: For those who prefer a less heavy-handed approach, the stapler securely attaches panels using staples, offering an alternative to nailing.
-
Trim Router: This versatile tool makes quick work of trimming and shaping panels, resulting in a professional-looking finish.
Remember, the right tools are not just tools—they are allies in your quest for flawless wall paneling. So, gather your trusted companions and prepare to conquer the installation challenge, one tool at a time!
Essential Tools for Wall Paneling Installation
Tools: The Unsung Heroes of Wall Paneling
Embarking on the journey of wall paneling installation requires an arsenal of trusty tools, each playing a pivotal role in turning raw materials into an exquisite masterpiece. Let’s unveil the secrets behind these indispensable tools, understanding their purpose and effectiveness to achieve a flawless installation.
1. Measuring Tape: The Precision Guide
A precise measuring tape is the cornerstone of successful paneling. It accurately measures walls, ensuring panels fit snugly and align perfectly with each other. Choose a tape that’s at least 25 feet long and has clear, easy-to-read markings.
2. Level: The Balance Keeper
A reliable level safeguards the horizontality and verticality of panels. Its bubble indicator ensures panels are installed straight and true. Opt for a level that’s long enough to span multiple panels, providing a consistent and level surface.
3. Circular Saw: The Precision Cutter
A circular saw empowers you to cut precise, clean angles and panels with ease. Its versatility extends to various materials, including wood, MDF, and plywood. Choose a saw with a blade diameter suitable for the thickness of your paneling.
4. Nail Gun: The Speedy Installer
A nail gun significantly speeds up paneling installation. It drives nails quickly and securely, ensuring a strong and durable bond. Opt for a nail gun that’s compatible with the size and type of nails recommended for your paneling.
5. Utility Knife: The All-Purpose Helper
A sharp utility knife is indispensable for trimming excess paneling, creating clean edges, and cutting through moldings. Its versatility makes it a must-have tool for any paneling project.
6. Putty Knife: The Smoothing Solution
A flexible putty knife fills nail holes and gaps with caulk or wood filler. Its angled blade allows for precise application and smooth, seamless finishes. Choose a putty knife with a blade size appropriate for the size of your nail holes.
7. Sandpaper: The Surface Refiner
Sandpaper smooths out rough edges, removes imperfections, and prepares surfaces for painting or staining. Opt for sandpaper with a fine grit for a polished, professional finish.
Types of Wall Paneling: An Extensive Guide to Transform Your Walls
When it comes to elevating your walls, wall paneling offers an array of captivating options to suit every taste and decor. From classic charm to modern sophistication, the myriad types of wall paneling available cater to the aesthetic aspirations of any homeowner.
Beadboard:
Picture this: a timeless classic that exudes a touch of tradition and warmth. Beadboard consists of narrow vertical boards with rounded grooves, lending a subtle texture and depth to walls. Its versatility allows for a range of applications, from cozy bedrooms to charming bathrooms.
Wainscoting:
Step into the realm of elegance with wainscoting, a paneling style that adds a sophisticated touch to any room. Typically installed up to chair rail height, it combines the appeal of a raised panel design with the charm of painted or wallpapered upper walls.
Shiplap:
Drift into a coastal haven with shiplap, a unique paneling style reminiscent of ship hulls. Its horizontal planks overlap slightly, creating a subtle shadow effect and a distinctively rustic ambiance. Whether in cozy cottages or modern beach houses, shiplap adds a touch of maritime magic.
Tongue and Groove:
For a seamless and durable option, tongue and groove paneling interlocking planks provide exceptional strength and stability. Its interlocking mechanism allows for easy installation and a clean, unified appearance.Tongue and groove is perfect for accent walls, ceilings, and even outdoor areas.
Plywood:
When durability and versatility are paramount, plywood emerges as a practical and cost-effective choice. Its layered construction offers structural integrity and can be painted, stained, or covered with veneer to match any decor. Plywood is ideal for workshops, garages, and industrial-style spaces.
Types of Wall Paneling: Exploring Their Unique Features and Applications
Walk into a room adorned with wall paneling, and you’ll be instantly transported to a realm of timeless elegance and cozy charm. From the rustic allure of beadboard to the sophisticated shimmer of wainscoting, here’s a captivating exploration of different wall paneling types that will elevate your interior design dreams:
Beadboard: A Timeless Classic with Enduring Appeal
Picture an idyllic farmhouse kitchen, its walls adorned with pristine beadboard panels. With its narrow, vertical strips separated by delicate grooves, beadboard exudes a nostalgic charm that effortlessly blends into traditional and modern interiors. Its durability makes it a perfect choice for high-traffic areas, such as bathrooms and kitchens, while its versatility allows it to complement any decor style.
Wainscoting: A Touch of Refinement for Elegant Spaces
Step into a stately dining room, where wainscoting panels grace the lower walls, creating an air of sophistication. This paneling style consists of tall, rectangular panels framed by decorative moldings. Wainscoting adds visual interest and architectural detail to any room, making it an excellent choice for formal settings and elegant bedrooms.
Shiplap: A Coastal Haven with Modern Flair
Immerse yourself in the serenity of a beach house, where shiplap panels line the walls, whispering tales of coastal charm. Resembling the overlapping planks of a ship’s hull, shiplap adds a touch of nautical elegance to any space. Its horizontal planks create a visually expansive effect, making it ideal for small rooms or creating a cozy nook.
Tongue and Groove: Seamless Elegance with a Touch of History
Journey back in time with tongue and groove paneling, a style that has stood the test of centuries. Its interlocking design, where one plank’s tongue fits snugly into the groove of another, ensures a seamless installation. Tongue and groove paneling exudes warmth and character, making it a popular choice for rustic-chic and traditional interiors.
Plywood: A Versatile Option for Functional Beauty
Don’t underestimate the humble plywood panel. Its layered construction provides exceptional strength and durability, making it ideal for areas that require extra resilience, such as garages, workshops, and mudrooms. However, plywood can also be transformed into stunning wall art or used to create unique accent walls with its unique grain patterns.
Explore the Diverse Styles of Wall Paneling
Immerse yourself in the captivating world of wall paneling, where aesthetics seamlessly intertwine with functionality. From the timeless charm of traditional paneling to the sleek lines of modern designs, there’s a style to complement every decor and ignite your imagination. Let’s embark on a journey through the enchanting realm of paneling styles:
Traditional: A Timeless Elegance
Distinguished by its intricate detailing and classic profiles, traditional wall paneling evokes an air of sophistication and warmth. Raised panels create a three-dimensional effect, adding depth and dimension to walls. Beadboard paneling, with its narrow vertical strips and recessed beading, brings a touch of coastal charm to any room.
Modern: A Sleek Simplicity
In the realm of modern paneling, clean lines and minimalist aesthetics reign supreme. Flat panels offer a sleek and streamlined look, reflecting the contemporary spirit of simplicity and functionality. Tongue and groove paneling, with its interlocking mechanism, creates a smooth, seamless surface that exudes modern sophistication.
Farmhouse: Rustic Charm
Inspired by the rustic allure of country living, farmhouse paneling embodies warmth and coziness. Shiplap paneling, featuring overlapping planks, brings a touch of rustic charm to walls with its natural imperfections and weathered textures. Tongue and groove paneling can also be used to create a farmhouse look, adding depth and character to any space.
Industrial: Urban Edge
For those seeking a distinctive and edgy aesthetic, industrial paneling provides the perfect solution. Metal panels, with their rugged textures and weathered finishes, evoke the ambiance of an urban loft. Concrete paneling, with its sleek and minimalist lines, creates a contemporary and industrial-chic atmosphere.
Coastal: Breezy Serenity
Capture the essence of a seaside retreat with coastal paneling. Beadboard paneling, painted in soothing shades of white or blue, brings a nautical flair to walls. Tongue and groove paneling, with its horizontal planks, creates a relaxed and breezy atmosphere reminiscent of beachside living.
Discuss the design elements and materials associated with each style and how they contribute to the overall aesthetic of a room.
Paneling Styles and Aesthetics
Whether you’re dreaming of a warm and inviting farmhouse retreat or a sleek and modern living space, the style of your wall paneling can dramatically transform the atmosphere of your room.
Traditional paneling exudes a timeless charm with classic beadboard or wainscoting, evoking a sense of nostalgia and elegance. Its intricate beading and raised panels add depth and character to your walls, creating a welcoming and cozy ambiance.
For a more industrial edge, shiplap or plywood panels will lend a rugged and masculine touch to your room. Their weathered textures and exposed knots bring a rustic yet modern flair, perfectly complementing raw materials like concrete and exposed brick.
Coastal paneling styles transport you to a seaside oasis with beadboard or wainscoting painted in soft, airy hues like white, gray, or blue. Its delicate beading resembles the gentle waves of the ocean, while weathered finishes can evoke the weathered charm of a beach cottage.
Modern paneling redefines elegance with clean lines, bold patterns, and geometric shapes. From sleek wall panels with hidden lighting to three-dimensional textures, modern paneling creates a sophisticated and contemporary aesthetic that commands attention.
Each style brings its unique design elements and materials. Natural wood adds warmth and texture, while painted panels allow for endless color customization. Metal accents introduce a touch of industrial sophistication, and fabric panels bring a cozy and inviting feel.
By understanding these different styles and their design elements, you can choose the perfect wall paneling to complement the overall aesthetic of your room, creating a space that reflects your personality and enhances your well-being.
Paneling Installation Techniques
When embarking on a wall paneling project, you’ll encounter various installation methods tailored to different panel types and project requirements. Understanding these techniques is crucial for a successful and satisfactory installation.
Nailing or Stapling
This straightforward method involves securing the panels to the wall using nails or staples. It is commonly used with plywood, MDF, and some hardboard panels. Nailing provides a strong and secure hold, especially when using a nailer or staple gun. Ensure you use the appropriate fasteners based on the panel thickness and wall material.
Gluing
Gluing involves applying construction adhesive to the back of the panels before positioning them on the wall. This technique is ideal for delicate or lightweight panels that may be prone to damage from nailing or stapling. Additionally, it allows for a seamless and invisible bond, particularly advantageous for modern or minimalist styles.
Tongue and Groove Interlocking
This ingenious joining system features interlocking edges on the panels, allowing them to be slotted together to create a sturdy and seamless connection. Tongue and groove paneling is a popular choice for traditional or rustic styles, such as shiplap and wainscoting. The interlocking mechanism provides strength and stability, making it ideal for large or heavily used areas.
Installing Wall Paneling: A Step-by-Step Guide to Transform Your Walls
Whether you’re renovating an old room or adding character to a new one, wall paneling can instantly elevate the aesthetic appeal of your space. With a little know-how and the right tools, you can effortlessly install wall paneling yourself.
Nailing or Stapling Method
- Measure and mark: Determine the desired height and location of your panels. Mark guide lines on the wall to ensure even spacing.
- Cut the panels: Measure and cut the panels to the appropriate length. Use a straight edge and a saw for clean cuts.
- Position and secure: Place the first panel against the wall, aligning it with the guide lines. Nailing or stapling it at the top and bottom will hold it securely.
- Continue installation: Continue installing successive panels, overlapping them slightly at the edges. Nail or staple them at the studs for maximum strength.
- Finishing touch: Conceal nail or staple holes with filler or paint for a seamless finish.
Gluing Method
- Prepare the surface: Ensure the wall is clean and dry. Apply primer to enhance adhesion.
- Apply adhesive: Apply a generous amount of construction adhesive to the back of the panel. Spread it evenly using a notched trowel.
- Position and press: Place the panel against the wall, aligning it with the guide lines. Press firmly to ensure good contact.
- Use clamps: Use clamps or weights to hold the panel in place while the adhesive sets. Allow ample time for the adhesive to cure.
- Finishing step: Remove any excess adhesive that may have squeezed out around the edges.
Tongue and Groove Interlocking Method
- Cut the panels: Cut the panels to length, ensuring the tongue and groove edges are intact.
- Create a starting point: Determine the starting point and secure the first panel to the wall using nails or screws.
- Slide and lock: Align the tongue of the next panel with the groove of the first. Slide it into place and tap gently to lock it.
- Repeat the process: Continue installing the panels, ensuring the tongue and groove edges interlock securely.
- Final step: Trim the last panel to fit and secure it into place.
Transform Your Walls with Trim Molding
In the world of home decor, wall paneling reigns supreme as a versatile and captivating design element. But when it comes to elevating its aesthetics, trim molding plays an indispensable role. Think of it as the finishing touch that turns a masterpiece into a breathtaking symphony.
Imagine a grand ballroom with intricately carved crown molding framing the ceiling, casting an ethereal glow upon the walls. Or a cozy cottage with a delicate chair rail separating the paneling from the walls, adding a touch of whimsical charm. Trim molding possesses the power to transform an ordinary room into an extraordinary haven.
Types of Trim Molding
The world of trim molding is a vast and captivating realm, offering a myriad of options to complement any style. From classic to contemporary, there’s a molding for every taste and decor:
-
Chair Rail: A horizontal molding that separates the wall from the lower paneling, adding a touch of elegance and sophistication.
-
Baseboard: A molding that runs along the bottom of the wall, providing a seamless transition to the flooring.
-
Crown Molding: The grand finale, an elaborate molding that adorns the ceiling’s perimeter, adding an air of grandeur to any room.
Selecting the Right Molding for You
Choosing the right trim molding is akin to finding the perfect accessory to complement an outfit. Consider the style of your room, the type of paneling, and the overall aesthetic you wish to achieve.
For a traditional look, opt for intricate moldings with ornate carvings. Modern spaces call for sleek, streamlined designs with clean lines. If you’re embracing the farmhouse aesthetic, choose rustic moldings in natural wood tones.
Installing Trim Molding
Installing trim molding may seem daunting, but with careful planning and precision, you can create a seamless and stunning finish.
-
Measure and Cut: Measure the length of the walls and cut the moldings to size using a miter saw.
-
Miter Joints: When joining two pieces of molding at an angle, create miter joints by cutting the ends at a 45-degree angle.
-
Attach to Wall: Secure the moldings to the wall using nails or adhesive.
-
Fill and Finish: Fill any gaps or nail holes with wood filler and sand smooth. Apply paint or stain to match the moldings to the paneling.
By incorporating trim molding into your wall paneling, you unlock a world of endless design possibilities. Embellish your walls, elevate their appearance, and indulge in the transformative power of this architectural gem.
Embellishing Wall Paneling with Trim Molding
When it comes to wall paneling, the details make all the difference, and trim molding stands as the unsung hero that elevates the look of your walls to a whole new level. It not only adds a touch of sophistication but also functions as a practical solution to conceal gaps and transitions.
There’s a wide variety of trim molding to choose from, each with its unique purpose. Let’s delve into the most common types and discover how they can transform your wall paneling:
Chair Rail
Chair rail, often known as dado rail or picture rail, is a horizontal piece of molding installed at about 3 feet above the floor. It was initially employed to protect the wall from damage caused by chair backs. Today, it serves as a decorative accent that visually divides the wall and creates a sense of architectural interest.
Baseboard
Baseboard is the molding that runs along the bottom of the wall, where it meets the floor. It conceals the gap between the wall and floor while protecting the wall from scuffs and kicks. Baseboard can come in a variety of profiles, allowing you to customize the look of your wall paneling.
Crown Molding
Crown molding is the decorative element that adorns the intersection between the wall and ceiling. It is most commonly used to add an element of elegance and grandeur to a room. Crown molding is available in an array of intricate designs, allowing you to match your desired aesthetic, from classic to contemporary.
Wall Hooks
Wall hooks are a functional form of molding that provides a practical way to hang items on your wall-paneled walls. They come in a variety of styles, from simple hooks to ornate decorative pieces. Wall hooks can add a touch of charm while keeping your walls clutter-free.
By carefully choosing the right trim molding, you can complement the style of your wall paneling and elevate the overall look of your room. Whether you prefer traditional or modern aesthetics, there’s a molding option that will enhance the beauty and functionality of your walls.
The Art of Trim Molding: Enhancing the Elegance of Wall Paneling
Installing wall paneling is a practical and transformative way to upgrade the style of any room. But to truly elevate the look, it’s essential to choose the right trim molding and install it seamlessly. Here are some tips to guide you:
Choosing the Perfect Trim Molding
Consider the Room’s Style:
* Traditional: Intricate profiles with rosettes and scrolls.
* Modern: Clean lines and geometric shapes.
* Farmhouse: Simple, beadboard-style moldings.
* Industrial: Exposed metal or raw wood moldings.
* Coastal: Soft curves and weathered finishes.
Match the Wood Species:
* Choose moldings that match the wood species of your paneling to create a cohesive look.
* If using painted paneling, opt for moldings in white or a contrasting color for a striking effect.
Installation Techniques
Cut Precisely:
* Miter Joints: Use a miter saw to cut 45-degree angles at the corners of the molding.
* Coping Joints: Use a coping saw to cut the molding to fit around the curves of the wall or other moldings.
Attach Securely:
* Nails: Use 16-gauge finish nails and a nail gun to attach the molding to the wall.
* Adhesive: Apply a bead of construction adhesive to the back of the molding before nailing for added strength.
Seam Perfection:
* Caulk Joints: Fill any gaps between the molding and the wall or paneling with paintable caulk.
* Sand Smoothly: Lightly sand the caulk after it dries to create a seamless transition.
Decorative Elements
Crown Molding:
* Adds an elegant touch to the top of walls, especially in rooms with high ceilings.
* Choose a profile that complements the architectural style of the room.
Baseboard:
* Covers the gap between the floor and wall paneling.
* Consider a baseboard with a decorative edge or a contrasting color to enhance the look.
Chair Rail:
* Divides the wall into two sections and adds character to the room.
* Choose a chair rail that matches the trim molding or use a contrasting color for a bolder statement.
Wall Hooks:
* Provide convenient hanging space and add decorative flair.
* Choose hooks that match the style of the trim molding or add a whimsical touch with unique designs.
By carefully selecting and installing the right trim molding, you can transform your wall paneling from functional to fabulous!
