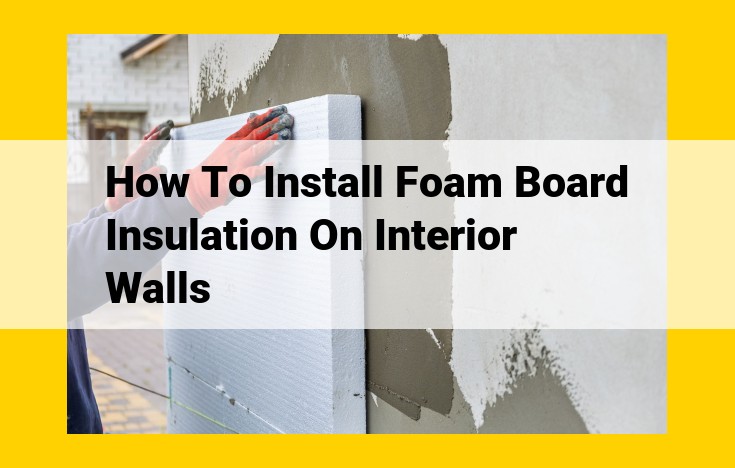
To install foam board insulation on interior walls, gather materials like foam board insulation for insulation and soundproofing, adhesive suited to your surface type, drywall tape for reinforcement, and drywall mud for finishing. Use tools such as a utility knife for cutting, a measuring tape and level for precision, a square for right angles, a drill or screwdriver for securing, a trowel for mud application, and a sander for a smooth finish.
Essential Drywall Installation Materials: Foam Board Insulation
Foam board insulation, a crucial component in drywall installation, offers a plethora of benefits for improving your home’s comfort and efficiency. It serves as an effective insulator, helping to maintain a consistent temperature within your living space, reducing energy consumption, and potentially lowering utility bills. Moreover, it excels at soundproofing, minimizing noise transmission both within and between rooms, creating a more peaceful and serene environment.
Types of Foam Board Insulation
The world of foam board insulation offers a range of options to suit your specific needs. Polystyrene (EPS) and extruded polystyrene (XPS) are widely used for their affordability and durability. Polyurethane (PUR), known for its exceptional insulating properties, is another popular choice. Each type varies in its density, R-value, and moisture resistance, so it’s essential to consider the unique requirements of your project before selecting the most suitable option.
Benefits of Foam Board Insulation
Beyond its insulating and soundproofing capabilities, foam board insulation boasts several other advantages. Its lightweight nature makes it easy to handle and install, saving you time and effort. It’s also moisture-resistant, providing an additional layer of protection against mold and mildew. Additionally, it helps conceal imperfections in the underlying surfaces, resulting in a smoother, more professional-looking finish.
Installation Tips
When installing foam board insulation, it’s important to ensure that the surface is clean and dry. Measure the area carefully and cut the foam board to size using a utility knife. Secure the insulation to the surface using adhesive, ensuring a tight fit. Avoid leaving gaps or overlaps as these can compromise its effectiveness. Once you’ve covered the entire area with insulation, it’s ready for the next step in your drywall project.
Essential Drywall Installation Materials: Adhesive
Adhesive plays a crucial role in ensuring a secure and long-lasting drywall installation. Selecting the right adhesive is essential to match the specific requirements of your project. Let’s delve into the different types of adhesives and their suitability for various surfaces.
Types of Adhesives
Joint Compound Adhesive:
This is a versatile adhesive specifically formulated for bonding drywall panels together. It creates a strong and permanent bond, making it ideal for interior walls and ceilings.
Liquid Drywall Adhesive:
This adhesive comes in a liquid form and is applied using a caulking gun. It offers fast and convenient application, making it suitable for quick installations.
Suitability for Different Surfaces
Gypsum Drywall:
Joint compound adhesive is the ideal choice for adhering gypsum drywall to wood or metal framing. It provides excellent adhesion and creates a smooth finish.
Soundproof Drywall:
Liquid drywall adhesive is more suitable for soundproof drywall panels, which are thicker and require a stronger bond.
Moisture-Resistant Drywall:
Moisture-resistant drywall requires an adhesive specifically designed to withstand moisture. Use adhesives with water-resistant properties to prevent the drywall from separating or warping.
Tips for Choosing the Right Adhesive
- Consider the thickness of the drywall panels
- Evaluate the surface you’re applying it to
- Determine if you need fast or permanent bonding
- Read the manufacturer’s instructions carefully for proper mixing and application techniques
Drywall tape (8): Highlight its purpose in reinforcing joints and preventing cracking.
Drywall Tape: The Unsung Hero of a Seamless Drywall Installation
In the world of drywall installation, the unsung hero that quietly works behind the scenes to ensure a seamless finish is drywall tape. This humble material plays a crucial role in reinforcing joints and preventing unsightly cracks, ensuring the integrity and durability of your drywall surfaces.
What is Drywall Tape?
Drywall tape is a thin, flexible material, typically made from paper or fiberglass, that is applied over the joints between drywall panels. Its primary purpose is to provide support and reinforcement to these joints, preventing them from separating or cracking under stress or movement.
How Drywall Tape Works
When drywall tape is embedded into drywall mud, it creates a continuous, reinforced bond that bridges the joint between the panels. This bond prevents the edges of the drywall from flexing or moving independently, which could lead to gaps or cracks. By distributing the stress evenly across the joint, drywall tape ensures that it remains strong and secure over time.
Different Types of Drywall Tape
There are several types of drywall tape available, each designed for specific applications:
- Paper tape: The most common type, paper tape is a thin, self-adhesive strip that is easy to apply and provides good reinforcement.
- Fiber mesh tape: A stronger and more durable option, fiber mesh tape is made from a thin mesh fabric and is ideal for large joints or areas subject to movement.
- Joint compound reinforced tape: This tape has a thin layer of joint compound already applied, making it easier and faster to finish the joints.
Proper Installation of Drywall Tape
To ensure the effectiveness of drywall tape, it is essential to install it correctly:
- Apply a thin layer of drywall mud over the joint.
- Center the drywall tape over the mud and press it firmly into place.
- Apply another thin layer of drywall mud over the tape, smoothing it out with a trowel.
Drywall Mud: The Unsung Hero of Smooth Finishes
When it comes to drywall installation, the humble drywall mud often goes unnoticed, yet it plays a pivotal role in creating the smooth, polished surfaces we all desire. Composed of a blend of gypsum powder, water-soluble polymers, and various additives, drywall mud is available in different types, each tailored to specific applications.
Types of Drywall Mud
-
Topping Mud: The “creme de la creme” of drywall muds, topping mud boasts a smooth, fine texture that yields an ultra-smooth finish. It’s the ideal choice for final coats, as it fills minor imperfections and creates a flawless surface for painting or wallpapering.
-
All-Purpose Mud: As its name suggests, all-purpose mud is a versatile option suitable for various applications. It can be used for taping joints, filling small holes, and skim coating.
-
Lightweight Mud: This lightweight mud is a godsend for larger repairs or filling deep holes. It’s less dense than traditional muds, making it easier to apply and sand.
Mixing Techniques for Perfect Consistency
Mixing drywall mud is an art form, and the key to achieving the perfect consistency lies in the following steps:
-
Measure accurately: Use a measuring cup to determine the correct ratio of water to mud powder.
-
Add water gradually: Pour water into the bucket a little at a time while mixing constantly to prevent lumps.
-
Mix thoroughly: Using a drill with a mud mixing paddle, mix the mud until it forms a smooth, uniform paste.
-
Achieve desired consistency: Depending on the application, you may need to adjust the consistency of the mud. For taping, use a slightly thicker mud; for filling holes, opt for a thinner one.
Remember, well-mixed drywall mud is the cornerstone of a successful drywall installation, ensuring a smooth, professional finish that will elevate the aesthetics of any room.
Drywall Installation: An Essential Tool – The Utility Knife
Imagine embarking on a drywall installation journey, where precision and efficiency are paramount. Among the indispensable tools, the utility knife stands tall as a versatile workhorse, ready to tackle a myriad of cutting tasks with unwavering dexterity.
Unveiling the Multifaceted Nature of the Utility Knife
The utility knife’s razor-sharp blade gleams, poised to effortlessly slice through layers of drywall, its keen edge gliding smoothly across the material. It’s a master of versatility, equally adept at carving precise incisions in insulation, ensuring a snug fit, and trimming drywall tape, creating seamless joints.
Navigating the Maze of Drywall with Precision
As you maneuver the utility knife, it becomes an extension of your hand, guiding you through the maze of drywall with precision. Its sharp blade allows for clean, accurate cuts, ensuring that each sheet of drywall fits perfectly into place. No more ragged edges or uneven seams – the utility knife empowers you with the control you need for flawless drywall installation.
A Versatile Companion for Insulation and Tape
Beyond its prowess in drywall cutting, the utility knife seamlessly transitions to other tasks. Its versatility shines as it deftly slices through insulation, creating a snug fit that minimizes heat loss. With equal ease, it cuts drywall tape, a crucial component in reinforcing joints and preventing unsightly cracks. The utility knife’s adaptable nature makes it an indispensable tool for every drywall enthusiast.
Measuring tape (5): Emphasize its importance for accurate measurements and precise cuts.
Measuring Tape: The Essential Tool for Precision Drywall Installation
When it comes to drywall installation, meticulous measurements are paramount for a seamless and professional finish. The measuring tape is an indispensable tool that empowers you to achieve accuracy and precision in every step of the process.
From Framing to Taping
Right from the outset, the measuring tape guides you in framing the walls. It ensures straight lines and equal spacings for the studs and joists, creating a solid foundation for your drywall.
Cutting Drywall and Insulation
As you progress, the measuring tape becomes your trusted ally for precise cuts. Whether you’re trimming drywall sheets or shaping insulation, this tool enables you to determine the exact dimensions and make clean, straight cuts.
Taming the Joints
When joining drywall panels, the measuring tape helps you locate and mark the studs. This is essential for proper screw placement, ensuring that the joints are securely fastened and flush with the surface.
Taping and Mudding
Before taping the joints, accurate measurements ensure that the tape is centered and adheres perfectly to the seams. Similarly, when applying drywall mud, the measuring tape helps you gauge the thickness of the layer, promoting uniform coverage and a smooth finish.
Maintaining Level and Plumb
Throughout the installation process, it’s crucial to maintain level and plumb walls. The measuring tape becomes your go-to tool for checking vertical and horizontal alignments. This prevents deviations that could compromise the integrity of the drywall structure.
Tips for Achieving Accurate Measurements
- Use a high-quality measuring tape with clear markings.
- Extend the tape fully and hold it taut for precise measurements.
- Read the measurements from the inside edge of the tape for greater accuracy.
- Double-check your measurements to eliminate any potential errors.
By mastering the measuring tape and its versatile applications, you can elevate your drywall installation skills to a new level. Its importance lies not only in its ability to ensure precision but also in its role as a constant companion throughout the entire process, guiding you towards a flawless and professional result.
Essential Tools for Drywall Installation: A Level for Precision and Professionalism
In the realm of drywall installation, precision is paramount. Among the indispensable tools that guarantee a flawlessly smooth and leveled surface is the level. This trusty companion plays a pivotal role in ensuring that drywall panels are installed with meticulous accuracy, both horizontally and vertically.
The level is a straightforward yet essential tool, consisting of a long, straight base with a bubble indicator. When placed on a surface, the bubble should align perfectly between two marked lines. This alignment signifies that the surface is perfectly level, without any discernable slope or slant.
In the context of drywall installation, the level is used to ensure that each panel is installed plumb, meaning that it is perfectly vertical. This is crucial for creating a sturdy and reliable wall or ceiling surface. Any deviation from plumb can compromise the structural integrity of the installation, leading to potential issues down the road.
Moreover, using a level helps achieve a uniform and visually appealing appearance. Drywall panels that are installed level create a cohesive and professional-looking surface, free from unsightly gaps or unevenness. This not only enhances the aesthetic value of the space but also ensures that subsequent finishing tasks, such as painting or wallpapering, can be executed with optimal results.
In summary, the level is an indispensable tool for drywall installation, playing a vital role in ensuring precision, structural integrity, and a visually stunning end product. By utilizing this tool throughout the installation process, you can guarantee a smooth, level, and professional-grade drywall surface that will stand the test of time.
Square (5): Explain its use for marking right angles and creating straight cuts.
Indispensable Drywall Installation Tools: Empowering Your Drywall Project
The Impeccable Square: Precision with Every Cut
Amidst the arsenal of tools that empower drywall installation, the humble square stands as an indispensable ally. It’s an unassuming tool, yet its role is pivotal in ensuring accurate and precise cuts, the foundation of a flawless drywall installation.
Carpenters and DIY enthusiasts alike rely on the square to mark crisp right angles and delineate straight lines. It’s a trusted guide when measuring and cutting drywall panels, ensuring they align seamlessly without gaps or overlaps. By establishing a true perpendicular reference point, the square enables you to create sharp, clean cuts that result in a professional-looking finish.
Whether you’re a seasoned pro or a first-time installer, the square is an indispensable tool that empowers you to execute precise cuts, ensuring your drywall installation is nothing short of impeccable. Its unassuming presence belies the immense value it brings to your project, making it a worthy addition to your drywalling arsenal.
Drywall Installation: Essential Tools and Materials
Transforming bare walls into smooth, polished surfaces requires a strategic combination of tools and materials. For a successful drywall installation, it’s crucial to have the right gear and understand their importance. Let’s delve into the essential components that will empower you to achieve professional-grade results.
Essential Drywall Installation Materials
- Foam Board Insulation: This insulation not only enhances thermal efficiency but also muffles sound, creating a quieter and more comfortable living space.
- Adhesive: Choose adhesives that adhere effectively to your specific surface, ensuring a secure bond between drywall and studs.
- Drywall Tape: This reinforcing material strengthens joints where drywall panels meet, preventing unsightly cracks and fractures.
- Drywall Mud: This versatile compound fills gaps, conceals seams, and provides a smooth finish for flawless walls.
Indispensable Drywall Installation Tools
- Utility Knife: A sharp utility knife is a must-have for slicing through drywall, insulation, and tape with precision.
- Measuring Tape: Accurate measurements are essential for precise cuts, ensuring panels fit seamlessly together.
- Level: This tool ensures a perfectly level installation, preventing uneven surfaces that compromise both aesthetics and functionality.
- Square: For right-angled cuts and marking straight lines, a square is an indispensable tool for creating sharp, clean edges.
- Drill or Screwdriver: Electric drills or screwdrivers provide the power needed to securely fasten drywall to studs and framing, creating a strong and stable structure.
Drill or Screwdriver: Your Powerhouse Assistant
The drill or screwdriver is your workhorse for drywall installation, driving screws into studs and framing with ease. Choose a tool with adjustable speed settings to optimize performance for different materials and tasks. Opt for a model with a light weight to minimize fatigue during extended use. Additionally, consider investing in specialized attachments, such as hex-head drivers and screw-setting bits, to enhance accuracy and efficiency.
Equipping yourself with the right tools and quality materials is the cornerstone of a successful drywall installation. By following these recommendations and utilizing the powerhouse drill or screwdriver, you can confidently embark on your drywall project, ensuring a flawless finish that will elevate the aesthetics of any room.
Indispensable Drywall Installation Tools
Trowel: The Masterful Hand for a Smooth Finish
When it comes to transforming raw drywall panels into a flawless surface, the trowel emerges as an indispensable tool in the arsenal of every drywall installer. This versatile and time-honored instrument is the key to applying and smoothing drywall mud with precision, ensuring a seamless and professional finish.
Crafted from durable materials such as stainless steel or plastic, trowels come in various sizes and shapes to accommodate different tasks. The most common type for drywall mud is the floater trowel, featuring a wide, flat blade that allows for quick and even application.
Using a trowel effectively requires a steady hand and a keen eye. The mud is first loaded onto the blade, and then the trowel is moved across the drywall surface in smooth, overlapping strokes. With each pass, the mud is spread and leveled, filling any gaps or imperfections.
The art of troweling lies in achieving the perfect consistency. The mud must be wet enough to spread easily but not so wet that it sags or drips. To achieve this balance, installers often use a wet sponge to dampen the trowel or mist the drywall surface before applying the mud.
As the mud dries, the trowel is used to smooth the surface and remove any excess. This process involves lightly scraping and feathering the edges of the mud until it blends seamlessly with the surrounding drywall.
A skilled installer can use a trowel to create curves, angles, and other intricate shapes with precision. With patience and practice, even novice drywallers can master this essential tool and achieve impressive results.
Drywall Installation 101: Essential Materials and Tools for a Flawless Finish
As a homeowner embarking on a drywall installation project, it’s crucial to have the right materials and tools to achieve a professional-looking and durable result. In this comprehensive guide, we’ll explore the essential items you’ll need, from the materials that lay the foundation to the tools that bring it all together.
Materials:
Foam Board Insulation
- Reduces heat loss and improves soundproofing.
- **Provides a smooth surface* for drywall installation.
Adhesive
- Liquid adhesive: Suitable for sturdy surfaces like concrete and cement board.
- Mastic adhesive: Flexible option for surfaces with slight movement.
- Construction adhesive: Versatile choice that works on various surfaces.
Drywall Tape
- Reinforces joints to prevent cracking.
- **Available in paper or mesh* for different applications.
Drywall Mud
- Premixed or powder form: Dries quickly and is easy to apply.
- Types include joint compound, topping compound, and skim coat: Each with specific applications.
- **Proper mixing is essential* for a smooth and strong finish.
Tools:
Utility Knife
- Sharp and versatile: Cuts drywall, insulation, and tape.
- Safety feature prevents accidental cuts.
Measuring Tape
- Accurate measurements: Ensures precise cuts and a level installation.
- Durable material for longevity.
Level
- Checks for level and plumb: Prevents unevenness and ensures a flat surface.
- Multiple bubble levels for precise readings.
Square
- Marks right angles: Essential for cutting straight lines and creating corners.
- Calibrated angles for accuracy.
Drill or Screwdriver
- Attaches drywall to studs: Securely fastens the drywall.
- Variable speed settings for different materials.
Trowel
- Applies and smooths drywall mud: Creates a seamless finish.
- Various sizes and shapes: For different joint widths and textures.
Sander
- Creates a smooth surface: Sanded areas allow for even paint application.
- Types include manual, electric, and orbital: Choose based on project size and budget.
- Use with caution: Avoid over-sanding to preserve the drywall’s integrity.
