To tear down plaster walls, gather tools (pry bar, sledgehammer, chisel) and ensure safety (safety glasses, dust mask). Plan by inspecting walls, preparing for lead hazards, and removing nails. Break plaster loose from lath or gypsum lath using a pry bar, sledgehammer, or crowbar. Consider alternatives like drywall afterwards. Troubleshoot issues like lead paint and uneven surfaces. Seek professional help if necessary.
Essential Tools and Materials for Plaster Wall Removal: A Comprehensive Guide
Embarking on a plaster wall removal project requires a carefully curated arsenal of tools and materials to ensure a smooth and efficient process. Here’s a comprehensive list to equip you for the task:
Pry Bar:
This trusty tool is invaluable for prying loose stubborn plaster from the underlying lath or gypsum board. Its angled end allows you to leverage the plaster, minimizing damage and reducing the risk of injuries.
Sledgehammer:
For heavy-duty demolition, a sledgehammer is your go-to tool. Its impact force will shatter the plaster, making it easier to remove. Ensure you use it with caution to avoid damaging the surrounding walls.
Crowbar:
Similar to the pry bar, a crowbar offers additional leverage for removing plaster. Its angled head can be wedged underneath the plaster to create a fulcrum, effectively breaking the bond with the lath.
Scraper and Chisel:
These tools come in handy for precise removal of smaller plaster sections. The scraper’s sharp edge can be used to scrape away thin layers, while the chisel provides a more forceful approach for removing thicker sections.
Drywall and Patching Compound:
Once the plaster has been removed, you’ll need drywall to replace the missing sections. Patching compound will smooth out any imperfections or gaps, creating a flush surface.
Joint Tape and Screws:
Joint tape is applied over the seams of drywall sheets to reinforce the joints. Screws are used to secure the drywall to the wall framing, ensuring a sturdy and durable surface.
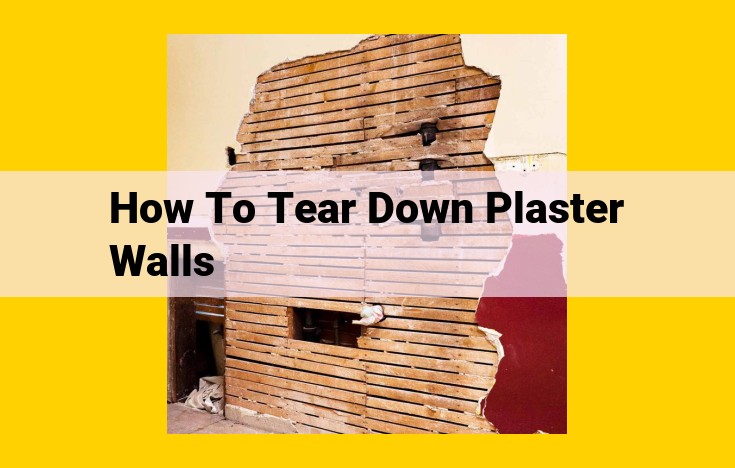
Lath and Gypsum Lath:
These materials form the base for plaster walls. Lath is made of wooden strips nailed to the wall studs, while gypsum lath is a fire-resistant alternative made of plaster-impregnated fiberboard.
Plaster:
The star of the show, plaster is a versatile material used to create a smooth, finished wall surface. It is applied in layers, with each layer strengthening the bond to the lath or gypsum lath.
Safety Considerations for Plaster Wall Removal
When embarking on a plaster wall removal project, it’s paramount to prioritize safety. Before starting any demolition, ensure you’ve taken the necessary precautions to protect yourself and your surroundings.
First and foremost, turn off the electricity and water supply to the area where you’ll be working. Any electrical wires or plumbing pipes behind the plaster could pose a serious hazard if damaged during removal.
Protect your eyes from flying debris by wearing safety glasses. Similarly, a dust mask will shield your lungs from the harmful particles that will be released as you break down the plaster.
To prevent damage to furniture and belongings, cover them with plastic sheeting or move them out of the workspace altogether. This will protect your valuables from dust, plaster shards, and any other debris that may arise during the demolition process.
Remember, plaster often contains lead—a highly toxic substance. If you suspect your plaster walls may have been painted with lead paint, contact a professional for proper removal to avoid any health risks.
Prepare for Demolition: Planning the Removal of Plaster Walls
Before embarking on the task of removing plaster walls, meticulous planning is crucial to ensure safety and efficiency. Here are the essential steps to prepare:
-
Inspect and Identify: Begin by thoroughly examining the walls to identify any potential hazards. Look for exposed wires, piping, or any signs of damage.
-
Deconstruction Prep: Remove all nails and screws from the walls to prevent injury during demolition. This includes removing any window or door frames.
-
Lead Paint Detection: If your home was built before 1978, test the plaster for lead paint. Lead paint, if present, requires specialized removal techniques to avoid health risks.
-
Protective Measures: Protect yourself and your belongings from dust and debris by using a dust mask and safety glasses. Cover furniture and floors with drop cloths. Turn off the electricity and water supply to the area where you will be working.
Methods for Removing Plaster Walls: A Comprehensive Guide
When embarking on the task of plaster wall removal, understanding the various techniques is crucial. Each method has its own advantages and challenges, and the choice depends on the specific condition of the wall.
Breaking Plaster Loose with a Pry Bar
The pry bar is an essential tool for removing plaster. By inserting the forked end between the plaster and the lath or gypsum lath, you can gently pry the plaster loose. This method is effective when the plaster is relatively thin and firmly attached to the lathing beneath. However, care must be taken to avoid damaging the lath or gypsum lath, as it may require replacement.
Demolishing Plaster with a Sledgehammer
In cases where the plaster is thick or strongly bonded to the lath, a sledgehammer may be necessary. Striking the plaster with the sledgehammer generates force that shatters the plaster into smaller pieces. It’s important to use controlled force and aim for the joints between the plaster panels to minimize damage to the underlying lathing. However, this method can be time-consuming and physically demanding.
Levering Plaster with a Crowbar
A crowbar can be used to leverage plaster loose from the lath or gypsum lath. The technique involves inserting the pointed end of the crowbar behind the plaster and using the flat end to pry it away. This method is suitable for thicker plaster that may not yield to other methods. However, it’s essential to handle the crowbar with caution, as it can cause significant damage if used improperly.
Additional Tips for Removing Plaster Walls
- Wear protective gear, including safety glasses, a dust mask, and gloves, to minimize exposure to dust and debris.
- Safely remove nails or screws from the wall before attempting to break the plaster.
- Test for lead paint before disturbing the plaster, as lead paint poses a health hazard.
- Use a damp sponge to moisten the plaster before removing it, as this can make it easier to break apart.
Alternatives to Plaster Walls
In the world of home renovations, plaster walls have long held a revered position. However, with the advent of modern materials, homeowners are increasingly exploring alternatives that offer distinct advantages. Let’s delve into the realm of plaster wall alternatives and discover their merits and drawbacks compared to their classic counterparts.
Drywall: A Versatile and Affordable Option
- Advantages: Drywall is the most popular plaster wall alternative due to its ease of installation, affordability, and versatility. It is lightweight, making it suitable for various applications, from residential to commercial spaces. Additionally, drywall can be painted or textured to match the desired aesthetic.
- Disadvantages: Drywall is not as durable as plaster and may be prone to cracking or damage. It also provides less soundproofing than plaster, which can be a consideration in noisy environments.
Veneer Plaster: A Hybrid Approach
- Advantages: Veneer plaster combines the aesthetic appeal of plaster with the ease of installation of drywall. It is a thin layer of gypsum plaster applied over a drywall base, creating a smooth, durable surface that resembles traditional plaster.
- Disadvantages: Veneer plaster is more expensive than drywall, and the installation process is more time-consuming. It also requires professional expertise, making it less suitable for DIY projects.
Gypsum Board: A Fire-Resistant Alternative
- Advantages: Gypsum board is a fire-resistant material that is often used in commercial buildings and renovations. It is similar to drywall in terms of installation and comes in various thicknesses for different applications.
- Disadvantages: Gypsum board is heavier than drywall, making it more challenging to handle and install. It also provides less sound insulation than plaster and may be more prone to moisture damage.
Soundproofing Materials
- Advantages: Soundproofing materials, such as acoustic panels or soundproofing boards, can be installed over existing plaster walls or as part of new construction to reduce noise transmission. They are commonly used in home theaters, studios, and other spaces where sound control is crucial.
- Disadvantages: Soundproofing materials can be expensive and may not entirely eliminate noise. They also require professional installation for optimal effectiveness.
When considering alternatives to plaster walls, it’s essential to weigh the advantages and disadvantages of each option to find the best match for your specific needs and budget. Drywall remains a popular choice for its affordability and versatility, while veneer plaster offers a hybrid approach that combines aesthetics and ease of installation. Gypsum board is ideal for fire protection, and soundproofing materials can be incorporated for enhanced noise control. Ultimately, the decision lies in understanding the unique requirements of your project and selecting the alternative that best meets those demands.
Troubleshooting Common Problems During Plaster Wall Removal
Dealing with Lead Paint Hazards
Plaster walls built before 1978 may contain lead paint, posing a significant health risk. If you suspect the presence of lead paint, halt the removal process immediately and contact a licensed professional. Lead paint removal requires specialized equipment and safety precautions to protect your health and the environment.
Patching Uneven Surfaces
After removing the plaster, you may encounter uneven surfaces. This can be caused by variations in the original plaster application or damage during the removal process. To correct unevenness, apply a thin layer of drywall patching compound using a putty knife. Allow the compound to dry completely, then sand it smooth. If the unevenness is significant, you may need to add a layer of drywall to create a flat surface.
Applying Patching Compound
When applying patching compound, avoid overworking it. Excess working can weaken the compound and make it more prone to cracking. Apply the compound in thin, even layers, allowing each layer to dry completely before applying the next. For larger holes or cracks, use joint tape to reinforce the patch and prevent future cracking.
Secure Loose Lath or Gypsum Lath
If the lath or gypsum lath has become loose during the removal process, it’s important to secure it before proceeding. Loose lath can create an uneven surface or cause drywall to sag later on. Use nails or screws to reattach the lath to the studs, ensuring that it is firmly in place.
Professional Assistance for Plaster Wall Removal
When it comes to extensive or complex plaster wall removal projects, seeking professional assistance from experienced individuals is paramount. Skilled professionals possess the expertise and specialized techniques to navigate the challenges associated with plaster walls.
Consider involving a drywaller for projects that require installing new drywall as a replacement. Their knowledge of drywall installation ensures a seamless transition from plaster to drywall, ensuring a pristine finish.
Consulting a plasterer is advisable for intricate or historical plaster work that requires expertise in plaster repair and restoration. Their specialized skills allow them to restore plaster walls to their original grandeur, preserving their architectural integrity.
For larger-scale projects, engaging a contractor or home repair specialist provides access to a comprehensive range of services. They coordinate the project, managing the removal process, electrical and plumbing adjustments, and the installation of alternative wall materials. Their expertise ensures a smooth and efficient execution, addressing all aspects of the renovation.
By engaging professionals for plaster wall removal, homeowners can delegate the task to experienced hands, ensuring safety, quality, and timely completion. This allows them to focus on other aspects of the renovation or their daily routine, while professionals handle the complexities of plaster wall removal.
