To fix scratches in engineered wood floors, identify the severity and gather appropriate repair materials (wood fillers, putty, wax). Clean the scratch, apply the filler or putty, smooth it out, and sand and buff the area. If needed, touch up and blend the repair for an invisible finish. Consider hiring a professional for optimal results. Choose the right repair products based on the type and severity of the scratch. Minimize future scratching with preventive measures like mats and proper cleaning. Maintain the floor by regular inspection and using non-abrasive cleaning methods.
When it comes to home aesthetics, flooring plays a pivotal role in setting the tone and creating a desired ambiance. Among the various flooring options available, engineered wood flooring has gained immense popularity due to its elegance, durability, and affordability. However, like any other flooring material, engineered wood is not immune to wear and tear, and scratches are one of the most common issues that homeowners face.
Engineered wood flooring is a composite material made from thin layers of real wood veneer bonded to a core of plywood or high-density fiberboard. This construction gives it both strength and stability, making it suitable for areas with heavy foot traffic. However, the susceptibility to scratches stems from the fact that the top layer of engineered wood flooring is typically thinner than solid wood flooring, exposing it to the risk of surface damage caused by sharp objects, furniture moving, or even pet claws.
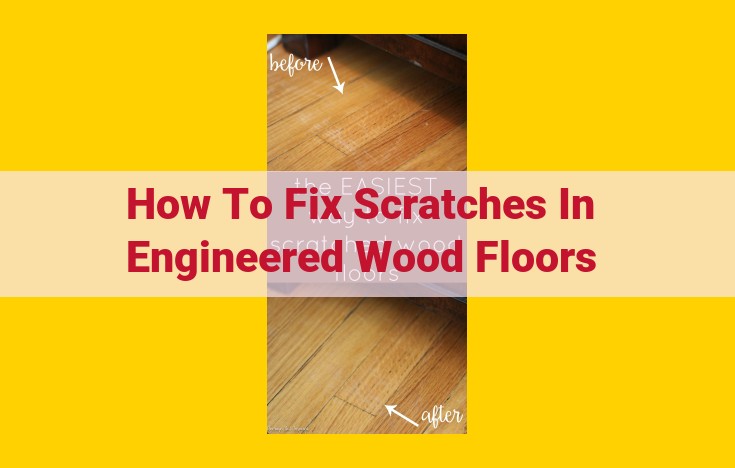
Recognizing scratches on engineered wood flooring is relatively easy. They typically appear as white or light-colored lines or indentations in the wood’s surface. In some cases, deep scratches may expose the darker colored core material beneath the veneer. By being mindful of these potential blemishes, homeowners can take proactive steps to prevent or repair scratches, ensuring that their engineered wood flooring retains its pristine appearance and value.
Essential Materials and Tools for Scratch Repair
To effectively repair scratches on engineered wood flooring, you’ll need the right materials and tools. Here’s a comprehensive list to ensure a seamless fix:
Materials:
- Wood Fillers: Choose a filler that matches the color and grain of your flooring. Pastels are ideal, as they can be mixed to precisely match your floor’s hue.
- Putty: Use a moldable putty to fill in deeper scratches. It provides a sturdy base for sanding and smoothing.
- Wax: Opt for a wax in a matching color to conceal scratches and enhance shine.
Tools:
- Scraper: A sharp scraper is crucial for removing excess filler or putty after repairs.
- Sanders: A sanding block or an electric sander is needed to level the repaired area with the surrounding floor. Use varying grits for smooth transitions.
- Buffers: A buffer is essential for blending repaired areas seamlessly. It creates a uniform sheen and texture. Use a buffer with a soft pad to avoid further damage.
Remember, using quality products is paramount. Look for reputable brands and consult with flooring professionals for recommendations. With the right materials and tools at your disposal, you’ll be well-equipped to tackle scratch repairs and restore the beauty of your engineered wood flooring.
Step-by-Step Techniques for Repairing Scratches on Engineered Wood Flooring
Step 1: Assess the Scratch
Inspect the scratch closely to determine its depth and extent. For shallow scratches, you may only need to touch up the surface, while deeper scratches require filling.
Step 2: Choose the Right Repair Materials
Select a wood filler or putty that matches the color and grain of your flooring. For small scratches, a wax stick may suffice. Choose a flexible filler if the scratch is in a high-traffic area.
Step 3: Apply the Filler
Using a putty knife or spatula, carefully apply the filler into the scratch. Press firmly to ensure it fills the gap completely. Allow the filler to dry and harden according to the manufacturer’s instructions.
Step 4: Smooth the Filler
Once the filler has dried, use a fine-grit sandpaper to sand down the excess and create a smooth surface. Use a tack cloth to remove any dust or debris.
Step 5: Touch Up the Repair
For superficial scratches, you may need to touch up the repair using a stain pen or marker that matches your floor’s color. Apply the touch-up product sparingly and blend it into the surrounding area using a soft cloth.
Step 6: Protect the Repair
To protect your repair from wear and tear, apply a thin coat of clear polyurethane over the scratched area. This will seal and protect the repair, making it more durable.
Tip: For invisible repairs, blend the filler seamlessly into the surrounding wood using a _fingernail file_ or a _buffing wheel_.
Consider Professional Help for Optimal Results
- Outline the benefits of hiring a professional for scratch repair.
- Discuss the qualifications and experience to look for in a qualified contractor.
Consider Professional Help for Optimal Results
When faced with extensive or persistent scratches, professional assistance may be the wisest course of action. Here’s why:
Benefits of Professional Repair:
-
Expertise and Knowledge: Trained flooring professionals possess specialized skills and an in-depth understanding of different wood species and repair techniques. This ensures that your floor will be repaired seamlessly, restoring its original beauty.
-
Precise Color Matching: Matching the exact color and grain pattern of your flooring can be challenging. Professionals have access to a wide range of products and can meticulously blend repairs to ensure an invisible finish.
-
Durable and Long-lasting Repairs: Proper preparation, the use of high-quality materials, and attention to detail result in repairs that will stand the test of time without compromising the integrity of your floor.
Qualifying a Contractor:
To find a qualified contractor, consider the following:
-
Experience and References: Look for contractors with a proven track record in engineered wood flooring repair. Ask for references and check online reviews to gauge their professionalism and work quality.
-
Insurance and Licensing: Ensure the contractor is licensed and insured to protect your investment in case of any accidents or mishaps.
-
Detailed Estimate: Request a detailed estimate that outlines the scope of work, materials to be used, and the estimated cost. Avoid contractors who offer unreasonably low prices or who are hesitant to provide a written estimate.
By hiring a qualified professional, you can be confident that your engineered wood flooring will be repaired to perfection, enhancing its longevity and aesthetic appeal.
Product Guide: Selecting the Right Repair Products
Choosing the appropriate repair products is crucial for successful scratch repair on engineered wood flooring. Here’s a comprehensive product guide to help you navigate the market and select the best options for your needs:
Types of Repair Products:
- Wood Fillers: Fill larger scratches and gaps, available in shades to match your floor.
- Wood Putty: A versatile option for both filling and smoothing scratches.
- Wax Sticks: Ideal for touch-ups and blending repairs with the existing finish.
Selection Criteria:
- Color Matching: Select products that closely match the color and grain pattern of your flooring.
- Finish Compatibility: Ensure the product is compatible with the existing finish on your floor.
- Drying Time: Consider the drying time when selecting a product, as you need sufficient time for the repair to set properly.
- Ease of Use: Choose products that are easy to apply and work with, especially if you’re attempting repairs yourself.
Recommended Products:
- Minwax Wood Filler: A renowned brand for wood fillers, offering a range of colors to match different wood species.
- DAP Plastic Wood: A versatile putty that adheres well to engineered wood and is easy to sand.
- Liquitex Acrylic Gesso: A wax stick ideal for blending repairs and creating a seamless finish.
Additional Tips:
- Test the products on an inconspicuous area before applying them to the damaged spot.
- Allow ample time for the repair to dry and cure before sanding or blending.
- If you’re unsure or prefer a professional touch, do not hesitate to consult a qualified contractor.
Preventive Measures to Minimize Scratching
- Emphasize the importance of preventing scratches to maintain the beauty of engineered wood floors.
- Suggest using mats and area rugs, as well as proper cleaning and maintenance techniques.
Preventive Measures to Minimize Scratching: Safeguarding Your Engineered Wood Floors
Protecting your engineered wood floors from scratches is paramount in preserving their beauty and longevity. By implementing simple preventive measures, you can minimize the risk of unsightly marks and ensure that your flooring remains pristine for years to come.
Embrace Floor Protectors
Strategic placement of mats and area rugs acts as a barrier between your floors and potential scratch-inducing objects. Consider placing mats at entry points, under heavy furniture, and in high-traffic areas. Area rugs can add warmth and style while simultaneously protecting your floors from scuffs and scratches.
Diligent Cleaning and Maintenance
Regular cleaning is crucial for maintaining the integrity of your engineered wood floors. Avoid abrasive materials or harsh cleaning solutions that can damage the surface. Opt for gentle cleaning products designed specifically for engineered wood and follow proper cleaning techniques to minimize the risk of scratches.
Embrace Gentle Care
Daily care plays a vital role in preventing scratches. Avoid dragging furniture or heavy objects across the floor without using protective pads. Use rubber or felt pads under furniture legs and casters to prevent direct contact with the flooring. Regularly inspect your floors for any signs of wear or damage and address them promptly to prevent further deterioration.
Maintenance Tips for Durable Engineered Wood Flooring
Maintaining the pristine beauty of your engineered wood floors requires a proactive approach. Here are some essential tips to ensure the longevity and resilience of your flooring:
Regular Inspection and Upkeep:
Regularly inspect your floors for signs of damage, such as dents, scratches, or loose planks. Promptly address any issues to prevent minor problems from escalating into larger repairs. Vacuum or sweep regularly to remove dirt and debris that can cause scratches. Use a microfiber cloth for damp mopping to avoid excess moisture, which can damage the wood.
Avoid Abrasive Materials:
When cleaning your floors, avoid using harsh chemicals or abrasive materials. Steer clear of steel wool, scouring pads, and acidic cleaners, as they can scratch or damage the surface. Instead, opt for mild cleaning solutions specifically formulated for engineered wood floors.
Proper Cleaning Techniques:
Always follow the manufacturer’s recommended cleaning instructions. Never over-wet the floors, as this can warp or swell the wood. When mopping, wring out the mop thoroughly to prevent excess moisture from damaging the floor. Dry the floors immediately with a clean, soft cloth.
Preventative Measures:
Take preventive measures to minimize the risk of scratches and damage. Place mats or area rugs in high-traffic areas and under furniture legs to protect the flooring. Use felt pads on furniture to prevent scratching. Keep pets’ nails trimmed to reduce the likelihood of scratches from their claws.
By following these maintenance tips, you can preserve the beauty and durability of your engineered wood floors, ensuring that they continue to enhance the charm and comfort of your home for years to come.
