Ensure the electrical outlet is operational. With necessary safety precautions, access the light fixture. Examine the light seal gasket for water leaks and replace if damaged. Verify the bulb is properly installed and test it. If the bulb fails, replace it with a compatible one. Check the transformer if applicable, ensuring proper connections. Consult the pool manual for troubleshooting specific to your model. If the issue persists, contact the manufacturer’s customer service or seek professional assistance from an electrician.
Troubleshooting Pool Light Issues: Essential Equipment and Materials
When your pool light goes out, it can be frustrating and dangerous. But don’t worry, troubleshooting pool light issues is often relatively easy with the right equipment and materials. In this blog post, we’ll cover everything you need to know, from the essential tools to the safety precautions you should take.
Essential Equipment Close to Light Fixture
Before you start troubleshooting, you’ll need to gather some essential equipment. This includes:
- Electrical outlet: You’ll need this to power your pool light.
- Wire nuts: These are used to splice wires together.
- Electrical tape: This is used to insulate wire connections.
- Transformer: If your pool light requires a transformer, you’ll need this to convert the voltage.
Light Fixture and Components
Next, you’ll need to identify the light fixture and its components. This includes:
- Pool light fixture: This is the housing that holds the light source.
- Pool light bulb: This is the illumination component.
- Light seal gasket: This prevents water from leaking into the fixture.
Safety and Essential Tools
Before you start troubleshooting, it’s important to take some safety precautions. This includes:
- Wear gloves and eye protection: These will help to protect you from electrical shock and UV radiation.
- Turn off the power: This will prevent you from getting shocked.
- Use a voltage tester: This will help you to check the electrical currents.
- Read the pool manual: This will provide you with specific troubleshooting guidance.
Additional Support
If you’re having trouble troubleshooting your pool light, there are a few additional resources that you can use. These include:
- Customer service number: You can call the customer service number for the pool light manufacturer for specialized assistance.
- Ladder: You’ll need this to access the light fixture.
- Electrician: If you’re not comfortable troubleshooting the pool light yourself, you can call an electrician.
Emergency Situations Only
In some cases, you may need to call an electrician immediately. This includes:
- If the light is sparking or smoking
- If the pool water is electrified
- If you’re not able to turn off the power yourself
By following these tips, you can safely troubleshoot your pool light and get it working again in no time.
Wire Nuts: The Vital Connectors for Pool Light Troubleshooting
When troubleshooting pool light issues, wire nuts play a crucial role in reconnecting severed wires and ensuring a secure electrical connection. These small, colorful caps are designed to twist onto the bare ends of wires, creating a strong and insulated joint that prevents electrical shorts and hazards.
Wire nuts are made of non-conductive plastic, which acts as an insulating barrier. They come in different sizes, each corresponding to the gauge of the wires being connected. For pool light wiring, you’ll typically need yellow or orange wire nuts, which are suitable for 14-16 gauge stranded copper wire.
To use wire nuts effectively, strip 1/2 inch of insulation from the ends of the wires you want to connect. Twist the bare wires together clockwise, making sure they are securely intertwined. Then, slide the wire nut over the exposed wires and twist it clockwise until it is tight. The wire nut should be snug, but avoid overtightening, as this can damage the wires.
Note: It’s important to match the wire nut size to the wire gauge. Using an undersized wire nut can result in a loose connection, while an oversized wire nut may not provide adequate insulation. Additionally, always use waterproof wire nuts specifically designed for outdoor and underwater applications.
Troubleshooting Pool Light Issues: Essential Equipment and Materials
When your pool lights start acting up, it can throw a wet blanket over your evening swims. But don’t despair! Most pool light issues can be resolved with basic equipment and materials.
Electrical Close to Light Fixture
- Electrical outlet: This will provide the power supply for your pool light.
- Wire nuts: These will be used to splice wires together.
- Electrical tape: This will insulate the wire connections to prevent any accidents.
- Transformer: In some cases, a transformer may be required to convert the voltage to the correct level for your pool light.
Light Fixture and Components
- Pool light fixture: This is the housing where the light source is located.
- Pool light bulb: This is the illumination component of your pool light.
- Light seal gasket: This component prevents water leakage into the fixture.
Safety and Essential Tools
- Screwdriver: This tool will be needed to disassemble and reassemble the fixtures.
- Voltage tester: This device will check electrical currents to ensure safety.
- Pool manual or documentation: This can provide specific troubleshooting guidance based on your model.
Additional Support
- Customer service number for pool light manufacturer: If you need specialized assistance, contact the manufacturer directly.
- Ladder: A ladder will be required to access the light fixture for repairs.
Emergency Situations Only
- Electrician: In urgent scenarios, do not hesitate to call an electrician for immediate repair. Their expertise will ensure the safety and functionality of your pool light.
Remember, safety first. Always follow proper electrical precautions and refer to the pool manual before attempting any repairs.
Transformer (if required for voltage conversion)
Essential Equipment for Pool Light Troubleshooting: A Comprehensive Guide
Electrical Equipment Close to Light Fixture
Before delving into your pool light’s intricacies, ensure you have access to essential electrical components. An electrical outlet serves as the heart of the system, providing power to illuminate your pool’s nocturnal waterscape. Electrical tape meticulously insulates any exposed wires, preventing short circuits and ensuring safe operation. Wire nuts are indispensable for connecting wires, enabling a seamless flow of electricity.
Light Fixture and Components
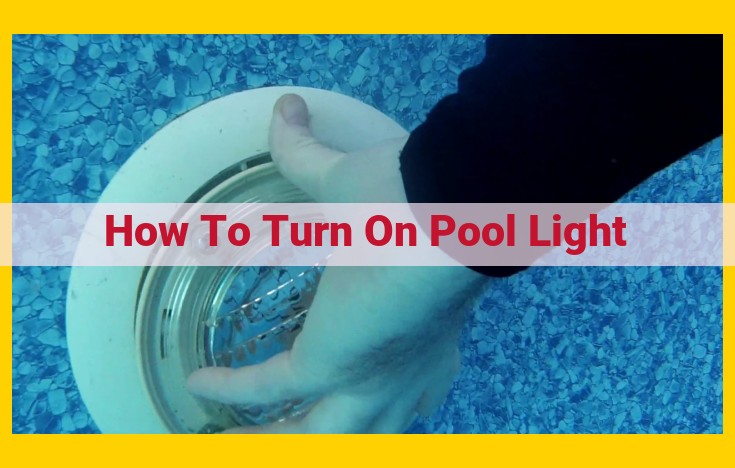
At the core of your pool’s illumination system lies the light fixture, a weather-resistant housing that protects the delicate inner workings. It encloses the light bulb, the vital source of illumination that transforms your pool into a shimmering oasis after sunset. A light seal gasket plays a crucial role in preventing water penetration, safeguarding the electrical components from moisture and potential damage.
Safety and Essential Tools
When troubleshooting pool lights, safety should always take precedence. Keep a handy screwdriver within reach, a versatile tool for dismantling and reassembling fixtures. A voltage tester grants you the power to verify electrical currents, ensuring you navigate the electrical terrain with confidence. Refer to your pool’s manual or documentation as a guiding light, providing specific troubleshooting protocols tailored to your particular model.
Additional Support
Should you encounter a particularly perplexing puzzle, don’t hesitate to engage with the pool light manufacturer’s customer service. Their specialized knowledge can illuminate even the most shadowy of issues, guiding you toward a swift resolution. Access to a ladder will prove invaluable when you need to reach the light fixture, granting you a bird’s-eye view of the situation.
Emergency Situations Only
In the rare event of an electrical emergency, do not attempt to fix the issue yourself. Instead, promptly contact an electrician, a master of electrical mysteries who can swiftly restore your pool’s illumination and ensure your safety.
Essential Pool Light Equipment and Materials for Troubleshooting
Maintaining a pristine and inviting pool environment not only enhances its aesthetic appeal but also ensures safety for you and your loved ones. Proper pool lighting is a key component of this, illuminating your swimming oasis while guiding your path at night. However, when pool lights malfunction, darkness can swiftly descend, rendering your pool unusable and potentially hazardous.
To handle such situations effectively, it’s crucial to have the right tools and materials at your disposal. Let’s delve into the essential equipment and supplies you’ll need to troubleshoot pool light issues:
Equipment Close to Light Fixture
- Electrical outlet: Ensure a nearby electrical outlet provides power to the light fixture.
- Wire nuts: These handy connectors help you splice wires securely.
- Electrical tape: Protect and insulate wire connections with electrical tape.
- Transformer: If your pool light requires voltage conversion, a transformer is necessary.
Light Fixture and Components
- Pool light fixture: The housing that encloses the light source.
- Pool light bulb: The illumination component that emits light.
- Light seal gasket: Prevents water from leaking into the fixture, maintaining electrical safety.
Safety and Essential Tools
- Screwdriver: A versatile tool for disassembling and reassembling fixtures.
- Voltage tester: Essential for checking electrical currents and ensuring safe troubleshooting.
- Pool manual or documentation: Provides specific troubleshooting guidance for your pool light.
Additional Support
- Customer service number for pool light manufacturer: Reach out to the experts for specialized assistance if needed.
- Ladder: Access the light fixture safely and conveniently.
Emergency Situations Only
- Electrician: Contact a licensed electrician immediately if you encounter urgent electrical issues that require immediate attention.
By equipping yourself with this essential toolkit and materials, you can confidently diagnose and resolve common pool light problems, ensuring your pool shines brightly and safely once again.
Pool Light Bulb: The Heart of Illumination
As the sun sets, casting golden hues across the sky, the glow of your pool light becomes a beacon of tranquility, inviting you to enjoy the cool embrace of the water under the starry canopy. But what happens when that glow falters, leaving your pool shrouded in darkness? Fear not, as troubleshooting a malfunctioning pool light bulb is a relatively straightforward task, armed with the right tools and a little bit of know-how.
The pool light bulb, the very essence of illumination, resides within the pool light fixture, a protective housing that shields it from the relentless elements. Replacements are readily available, ensuring that your outdoor oasis remains bathed in ethereal light. Whether it’s a traditional incandescent bulb or an energy-efficient LED, the choice is yours, depending on your specific needs and preferences.
Here’s a pro tip: When replacing the pool light bulb, opt for a bulb designed specifically for underwater use. Its durable construction and waterproof design will ensure longevity and reliable performance in the face of constant moisture exposure.
Essential Equipment and Materials for Pool Light Troubleshooting
Whether you’re an experienced homeowner or a first-time pool owner, understanding the basics of pool light troubleshooting can save you time, money, and unnecessary headaches. One crucial component to consider is the light seal gasket, a seemingly small but essential part that plays a vital role in preventing water leakage and ensuring your pool light’s safety and longevity.
What is a Light Seal Gasket?
A light seal gasket is a rubber or silicone ring that seals the gap between the pool light fixture and the pool wall. It creates a watertight barrier to prevent pool water from seeping into the fixture’s electrical components. This is particularly important because water can cause electrical shorts, damage wiring, and lead to costly repairs.
Signs of a Failed Light Seal Gasket
If your pool light is malfunctioning or showing signs of water leakage, it’s worth checking the condition of the light seal gasket. Common indicators of a failed gasket include:
- Water leaking around the light fixture
- Intermittent lighting
- Flickering or dimming lights
- Short circuits or tripped breakers
Replacing the Light Seal Gasket
Replacing a light seal gasket is a relatively simple task that can be completed in a few steps:
- Turn off the power to the pool light at the electrical panel.
- Remove the pool light fixture from the pool wall.
- Inspect the old light seal gasket for any tears, cracks, or damage.
- Clean the surface where the gasket will be installed.
- Apply a thin layer of pool sealant to the gasket and press it into place.
- Reinstall the pool light fixture and tighten the screws.
- Turn on the power and check for leaks.
Maintaining the Light Seal Gasket
To ensure the longevity of your pool light and prevent future leaks, it’s important to maintain the light seal gasket regularly.
- Inspect the gasket: Check for any signs of wear or damage during routine pool maintenance.
- Lubricate the gasket: Apply a thin layer of silicone lubricant to the gasket to keep it flexible and prevent sticking.
- Tighten the fixture: Make sure the pool light fixture is properly tightened against the pool wall to maintain a secure seal.
By following these steps and keeping an eye on your light seal gasket, you can troubleshoot pool light issues effectively and ensure a safe and enjoyable swimming experience.
Troubleshooting Pool Light Issues: Essential Equipment and Tools
When your pool light flickers, dims, or goes out completely, it can be frustrating and spoil the ambiance of your backyard oasis. Before calling an electrician, consider troubleshooting the issue yourself using essential equipment and materials.
Equipment Close to Light Fixture
Electrical Outlet: Ensure the outlet providing power to the light fixture is functioning. Test it with a voltage tester or plug in another appliance to confirm power supply.
Wire Nuts and Electrical Tape: These are necessary for splicing and insulating wires if any connections need to be made or repaired.
Transformer (Optional): If your light requires voltage conversion, a transformer is needed to regulate the voltage flow.
Light Fixture and Components
Pool Light Fixture: This houses the light source and its internal components. Disassemble it carefully using a screwdriver.
Pool Light Bulb: Replace a burnt-out bulb with a compatible one. Check the fixture’s manual for the recommended bulb type and wattage.
Light Seal Gasket: Examine the gasket for tears or damage. It prevents water leakage into the fixture, which can cause electrical issues.
Safety and Essential Tools
Screwdriver: Use a screwdriver appropriate for the fixture’s screws.
Voltage Tester: Ensure electrical connections are safe by using a voltage tester to check for any live wires before touching them.
Pool Manual: Refer to your pool’s documentation for specific troubleshooting guidance and safety precautions.
Additional Support
Customer Service: Contact the pool light manufacturer’s customer service for specialized assistance if needed.
Ladder: Access the light fixture safely with a sturdy ladder.
Emergency Situations Only
Electrician: In urgent scenarios where immediate repair is necessary, call an experienced electrician for professional assistance.
Voltage tester (for checking electrical currents)
Essential Equipment for Troubleshooting Pool Light Issues: Voltage Tester
When troubleshooting pool light problems, having the right equipment is key. One crucial tool is a voltage tester, an indispensable device for checking electrical currents. Without it, determining if the light fixture is receiving power or experiencing voltage issues can be a daunting task.
A voltage tester, also known as a “voltmeter,” measures the electrical potential difference between two points in a circuit. It helps identify voltage drops or surges, which can indicate faulty wiring, loose connections, or transformer malfunctions.
Using a voltage tester is relatively simple. First, switch off the power to the pool light at the circuit breaker or fuse box. Then, clamp the black probe of the tester to the wire that should be carrying the “hot” current (typically black or red) and the red probe to the wire that should be carrying the “neutral” current (typically white or green).
Now, switch on the power and observe the reading on the tester’s display. If the voltage is within the normal range specified in the pool light manual or documentation, it indicates that the power supply is working correctly. However, if the voltage is significantly low or high, it may signal an electrical issue that needs to be addressed.
Remember to exercise caution while using a voltage tester. Always follow safety guidelines and handle electrical components with care. If you are not comfortable working with electricity, it is best to seek assistance from a qualified electrician.
Essential Equipment and Materials for Pool Light Troubleshooting
When your pool light flickers, dims, or refuses to illuminate, troubleshooting can be daunting. To ease this process, gather the necessary equipment and materials to ensure a successful repair:
Equipment Close to Light Fixture
- Electrical outlet: Provide a power source for testing and repairs.
- Wire nuts: Connect wires securely for splicing.
- Electrical tape: Insulate wire connections for safety.
- Transformer (if required): Convert voltage if necessary for compatibility with the light fixture.
Light Fixture and Components
- Pool light fixture: The housing that holds the light source.
- Pool light bulb: The component that emits illumination.
- Light seal gasket: Guards against water leakage.
Safety and Essential Tools
- Screwdriver: Disassemble and reassemble fixtures with ease.
- Voltage tester: Check electrical currents for safety and fault identification.
- Pool manual or documentation: Provides specific troubleshooting guidance tailored to your pool system.
Having the necessary equipment and guidance empowers you to troubleshoot pool light issues with confidence.
Additional Support
- Customer service number for pool light manufacturer: Access specialized assistance for specific inquiries.
- Ladder: Safely access the light fixture for inspections and repairs.
Emergency Situations Only
- Electrician: Engage a qualified electrician for immediate repairs in urgent scenarios.
Troubleshooting Pool Light Issues: Essential Equipment and Materials
Essential Tools and Equipment for the Job
Before embarking on any pool light repairs, it’s crucial to gather the necessary tools and equipment. These items will ensure your safety and enable you to perform effective troubleshooting and repairs:
-
Electrical outlet (for power supply): Locate the closest electrical outlet for powering the transformer and accessing the electrical grid.
-
Wire nuts and electrical tape: These are essential for splicing wires and ensuring secure and insulated connections.
-
Transformer (if required): For low-voltage lighting systems, a transformer is necessary to convert household voltage to the required lower voltage for the pool light.
Inspecting the Light Fixture and Components
Once you have the necessary tools, it’s time to examine the pool light fixture and its components:
-
Pool light fixture: The housing that holds the light source and other components.
-
Pool light bulb: The illumination component; check for any damage, loose connections, or burnout.
-
Light seal gasket: A crucial component that prevents water leakage; ensure it’s properly fitted and in good condition.
Safety and Troubleshooting Tools
In addition to the above, these items will enhance your safety and troubleshooting efforts:
-
Screwdriver: A versatile tool for disassembling and reassembling fixtures.
-
Voltage tester: For checking electrical currents and ensuring safety before touching any wires.
-
Pool manual or documentation: A valuable resource for specific troubleshooting guidance and technical specifications.
Additional Support for Complex Issues
If you encounter more complex problems, consider these options for assistance:
-
Customer service number for pool light manufacturer: Contact the manufacturer for specialized guidance and troubleshooting advice.
-
Ladder: For safe and easy access to the pool light fixture.
Emergency Situations Only
In urgent situations where immediate repair is required, it’s advisable to contact a qualified electrician to address the issue.
Troubleshooting Pool Light Issues with Essential Tools and Equipment
Maintaining a flawlessly illuminated pool requires regular check-ups and occasional troubleshooting. For those occasional hiccups, having the right tools and materials on hand is crucial.
Essential Equipment for Troubleshooting
1. Electrical Outlet: Ensure you have an electrical outlet nearby to power the equipment you’ll be using.
2. Wire Nuts and Electrical Tape: Wire nuts and electrical tape are essential for splicing and insulating wires, ensuring secure connections.
3. Transformer (if required): If you have a low-voltage pool light, you may need a transformer to convert the voltage to the appropriate level.
Disassembling and Inspecting the Light Fixture
1. Pool Light Fixture and Bulb: Remove the pool light fixture by unscrewing the mounting screws. Examine the pool light bulb for damage or burnout.
2. Light Seal Gasket: Inspect the light seal gasket for any cracks or tears. This gasket prevents water from seeping into the fixture.
Safety and Troubleshooting Tools
1. Screwdriver: Use a screwdriver to disassemble and reassemble the fixtures.
2. Voltage Tester: Check electrical currents using a voltage tester. This ensures your safety and helps identify faults.
3. Pool Manual: Refer to the pool manual for specific troubleshooting guidance and instructions.
Additional Support
1. Customer Service: If you encounter difficulties, contact the customer service of the pool light manufacturer for specialized assistance.
2. Ladder: Use a ladder to access the light fixture safely. Ensure it’s tall enough to reach the fixture without overextending yourself.
3. Electrician (Emergency Situations Only): In case of an immediate repair, contact a licensed electrician. Their expertise will ensure prompt and safe resolution in urgent situations.
Troubleshooting Pool Light Issues: Essential Equipment and Materials
Maintaining a sparkling pool requires a fully functional lighting system. If your pool light is acting up, don’t panic. With the right equipment and materials, you can troubleshoot and fix most common issues yourself.
Essential Equipment
Equipment Close to Light Fixture
- Electrical outlet: for power supply
- Wire nuts: for splicing wires
- Electrical tape: for insulation
- Transformer (if required for voltage conversion): Note that not all pool lights need a transformer, so check your specific model.
Light Fixture and Components
- Pool light fixture: housing the light source
- Pool light bulb: the illumination component
- Light seal gasket: prevents water leakage
Safety and Essential Tools
Safety Considerations
- Always turn off the power to the pool before performing any electrical work.
- Use caution when working with electrical components, especially near water.
Essential Tools
- Screwdriver: for disassembling and reassembling fixtures
- Voltage tester: for checking electrical currents
- Pool manual or documentation: for specific troubleshooting guidance
Additional Support
- Customer Service Number for Pool Light Manufacturer: For specialized assistance, contact the manufacturer of your pool light.
- Ladder: To access the light fixture safely and conveniently.
Emergency Situations Only
In case of an urgent situation where immediate repair is required, such as a blown fuse or damaged wiring, it’s best to contact a qualified electrician. They have the expertise to resolve complex electrical issues and ensure the safety of your pool.
