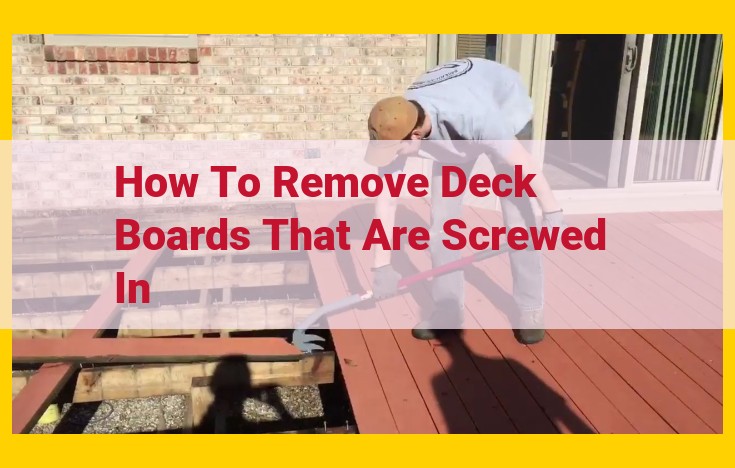
To remove screwed-in deck boards, begin by loosening the screws with a drill. Use a deck board removal tool to pry the board up from the joists. If the screws are stubborn, drill pilot holes next to them before using the removal tool. Protect your hands with gloves and wear safety glasses during the process.
Explain the purpose of the blog post and its target audience.
Deck Board Replacement: A Comprehensive Guide for the Homeowner
Maintaining a beautiful and functional outdoor living space is essential for any homeowner. One crucial aspect is ensuring that your deck is in top condition, which may require replacing damaged or worn deck boards. This comprehensive guide will empower you with the knowledge and instructions to tackle this project confidently.
This blog post is tailored to DIY enthusiasts and homeowners who are seeking a step-by-step solution for replacing deck boards. By following our detailed instructions and safety precautions, you can restore your deck to its former glory and create a safe, inviting outdoor space for years to come.
Deck Board Replacement: Maintain a Safe and Stunning Outdoor Space
Maintaining a deck is crucial for the safety and aesthetics of your outdoor area. Damaged or worn deck boards can pose tripping hazards, detract from the overall appearance, and compromise the structural integrity of your deck. Replacing these boards is an essential task to ensure the longevity and beauty of your outdoor space.
Materials Required
For optimal results, use high-quality replacement deck boards that are compatible with your existing decking material. Determine the length, width, and thickness of the boards required. You’ll also need screws specifically designed for outdoor decking, a deck board removal tool, and any additional supplies like joist tape or sealer.
Tools and Equipment
A power drill is essential for driving screws, while a deck board removal tool will help you safely and efficiently remove the old boards. Ensure you have safety glasses, a tape measure, and a level for accuracy. Consider using a circular saw for precise cutting, and a sander for smoothing rough edges.
Safety Precautions
Working on a deck requires utmost caution. Inspect for electrical wires or plumbing beneath the deck before drilling. Use proper lifting techniques to avoid injury when handling heavy boards. Always wear safety glasses and gloves to protect yourself from splinters or debris.
Deck Board Replacement: A Comprehensive Guide to Refreshing Your Outdoor Oasis
Maintaining a beautiful and safe deck is essential for creating a relaxing and inviting outdoor space. However, over time, deck boards can suffer wear and tear, leading to aesthetic issues or even safety hazards. Replacing damaged or worn deck boards is a crucial maintenance task that can significantly enhance the appearance and longevity of your deck.
To ensure a successful deck board replacement project, gather the essential materials you’ll need:
-
Replacement deck boards: Choose boards that match the size, thickness, and species of your existing deck. Consider factors like durability, appearance, and cost.
-
Screws: Select screws that are designed specifically for outdoor use and are the appropriate length for the thickness of your deck boards.
-
Drill: Use an electric drill with a drill bit sized for the screws you’re using.
-
Deck board removal tool: This specialized tool makes it easier to pry up old deck boards without damaging them.
-
Safety glasses: Protect your eyes from splinters and debris.
-
Measuring tape and pencil: Measure and mark the location of the damaged boards and the position of the new boards.
-
Level: Ensure that the new deck boards are level with the surrounding boards.
-
Joist hanger nails (optional): Use these nails to secure the new deck boards to the joists if necessary.
Deck Board Replacement: A Comprehensive Guide for a Safe and Durable Deck
Tired of that creaking and sagging deck that’s been an eyesore in your backyard? It’s time to roll up your sleeves and embark on a deck board replacement project that will transform your outdoor sanctuary. This comprehensive guide will take you through each step, from gathering the right materials to troubleshooting common problems.
Materials Required
- Replacement Deck Boards: Select pressure-treated lumber that matches the size and style of your existing boards. Common options include cedar, redwood, and composite materials.
- Screws: Exterior-grade screws specifically designed for deck construction. Choose screws that are slightly longer than the thickness of the new boards.
- Deck Board Spacer: Use a deck board spacer to ensure even spacing between boards.
- Other Supplies: Nails, joist hangers, and flashing tape may be needed for additional support and weatherproofing.
Tools and Equipment
- Drill: A cordless or corded drill with a drill bit slightly smaller than the screw size.
- Deck Board Removal Tool: A specialized tool that helps pry up deck boards without damaging them.
- Safety Glasses: Always protect your eyes while working.
- Measuring Tape and Level: Ensure accuracy and proper alignment.
- Hammer or Nail Gun: For securing joist hangers and nails.
Tools and Equipment for Seamless Deck Board Replacement
Embarking on a deck board replacement project requires the right tools and equipment to ensure a smooth and successful experience. Here are the essentials you’ll need:
Tools for Precise Removal:
- Deck Board Removal Tool: Specifically designed for this task, it minimizes damage to surrounding boards while efficiently detaching the damaged board.
- Pry Bar: A versatile lever that can gently lift boards and create space for the removal tool.
Essential Drilling Equipment:
- Drill: A powerful tool for driving screws and making holes for new deck boards. Opt for a drill with adjustable torque settings for optimal screw placement.
- Drill Bits: Specialized bits for drilling into both wood and composite deck boards are crucial. Ensure you have the correct sizes for your screws.
Safety Gear for Protection:
- Safety Glasses: Protect your eyes from dust and splinters while drilling or prying.
- Gloves: Shield your hands from splinters, sharp edges, and potential chemical exposure.
- Hearing Protection: Reduce noise levels while using power tools such as drills and saws.
Additional Helpful Items:
- Measuring Tape: For accurate measurements and ensuring even spacing of deck boards.
- Level: To check the flatness of the deck surface and ensure the new boards align properly.
- Screwdriver: For tightening and loosening screws as necessary.
By gathering these tools and equipment before starting, you’ll be ready to approach your deck board replacement project with confidence and efficiency. Remember, the right tools not only enhance your productivity but also ensure a safe and satisfactory outcome.
Explain the purpose of each tool and provide recommendations for specific models or brands.
Tools and Equipment
When embarking on your deck board replacement project, having the right tools and equipment is crucial. Let’s dive into the essential tools you’ll need:
-
Drill: Invest in a drill with adjustable speed settings to prevent over-drilling. Consider brands like DeWalt or Makita for reliability.
-
Deck Board Removal Tool: This specialized tool makes light work of prying up damaged deck boards. Look for brands like Simpson Strong-Tie or DeckWise.
-
Safety Glasses: Protect your eyes from flying debris and sawdust. Opt for ANSI-approved glasses with polycarbonate lenses.
-
Hammer: A sturdy hammer is essential for driving nails and adjusting deck boards. Stanley or Estwing offer durable options.
-
Level: Ensure your deck boards are installed level for both aesthetic and safety reasons. Use a torpedo level or a longer one for precise measurements.
-
Tape Measure: A reliable tape measure will help you accurately determine the length and spacing of your new deck boards.
-
Screwdriver: Opt for a drill-compatible screwdriver bit for efficient screw driving. Dewalt or Bosch provide excellent options.
Safety Precautions
Safety should be your top priority during any home improvement project. Here are some key precautions to follow:
-
Inspect Before You Drill: Before drilling into your deck, use a stud finder to check for electrical wires or plumbing.
-
Proper Lifting Techniques: Use proper lifting techniques to avoid injury when handling heavy deck boards. Bend your knees and lift with your legs.
-
Wear Appropriate Safety Gear: Always wear safety glasses, gloves, and a dust mask when working on your deck.
Safety First: Essential Precautions for Deck Board Replacement
Embarking on a deck board replacement project can be an exciting endeavor, transforming your outdoor space into a cherished gathering spot. However, as with any home improvement task, safety should be your top priority. Decks are elevated structures, and improper handling can lead to serious accidents.
Before you begin, take the time to inspect the deck thoroughly. Check for any loose or damaged joists or railings. If you notice any structural issues, do not attempt to proceed. Contact a qualified professional to address these concerns.
Electrical safety is paramount. Before drilling into the deck, always check for electrical wires. Use a wire detector to pinpoint their location and avoid any potential hazards. If you encounter any electrical components, immediately discontinue work and seek professional assistance.
Proper lifting techniques are crucial. When removing or installing heavy deck boards, bend your knees and lift with your legs, not your back. This will help prevent injuries. If the boards are particularly heavy, enlist the help of a friend or family member to assist you.
Wear appropriate safety gear. This includes safety glasses, gloves, and sturdy shoes with non-slip soles. These protective measures will shield you from splinters, flying debris, and other hazards.
Never work alone. Having a helper will not only enhance efficiency but also provide an extra layer of safety. They can assist with lifting, holding boards in place, and keeping an eye out for potential dangers.
By adhering to these safety precautions, you can create a safe and enjoyable work environment for your deck board replacement project. Remember, safety first, and a well-maintained deck will provide years of outdoor enjoyment for you and your loved ones.
Deck Board Replacement: A Step-by-Step Guide to Restore Your Outdoor Oasis
Maintaining your deck is crucial for both its longevity and your safety. Damaged or worn deck boards can pose a tripping hazard and detract from the aesthetics of your outdoor space. This comprehensive guide will equip you with all the knowledge and techniques you need to replace deck boards, ensuring your deck remains a safe and inviting extension of your home.
Materials Required
Deck Boards: Choose replacement boards that match the existing ones in terms of material, thickness, and width.
Screws: Use exterior-grade screws that are the appropriate length for your deck board thickness.
Other Supplies: Safety glasses, gloves, drill or impact driver, deck board removal tool (optional), and a level.
Tools and Equipment
Drill or Impact Driver: Use a powerful drill to drive the screws into the deck joists.
Deck Board Removal Tool: This specialized tool makes it easier to pry up and remove old deck boards.
Safety Glasses: Protect your eyes from flying splinters or screws.
Safety Precautions
Check for Hazards: Before drilling, inspect the area for electrical wires or plumbing. Use a stud finder or wire detector to ensure there are no hidden obstacles.
Lift Properly: Bend your knees when lifting deck boards to avoid back strain.
Wear Safety Gear: Protect your eyes and hands with safety glasses and gloves.
Step-by-Step Instructions
- Remove Existing Deck Boards: Use a deck board removal tool or a pry bar to gently lift and remove the damaged boards.
- Clean and Inspect: Remove any dirt or debris from the joists and inspect them for any damage.
- Position New Deck Boards: Place the new deck boards in place, ensuring they are aligned with the existing boards.
- Drive Screws: Use an appropriate-sized drill bit and screws to drive into the joists through the center of the deck board.
- Level and Adjust: Check the deck boards for levelness using a level. Adjust as needed by adding or removing shims.
- Countersink Screws: Use a countersink bit to slightly recess the screw heads below the surface of the deck board.
- Fill Holes: Fill any remaining screw holes with wood filler to prevent water damage.
Techniques for Removing Deck Boards
Pry Bar Method: Use a sturdy pry bar to wedge under the deck board and lift it away from the joists.
Drill and Remove Method: Drill pilot holes near the ends of the deck board and insert long screws. Use the screws as levers to pull the board up.
Terminology and Definitions
Deck Joists: Support beams that run perpendicular to the deck boards.
Stringers: Parallel beams that support the deck joists.
Ledger Board: The beam attached to the house that supports the deck.
Troubleshooting Tips
Broken Screws: Remove the broken screw using pliers or a screw extractor. Replace with a new screw.
Split Deck Boards: Replace the damaged board and reinforce the surrounding area with additional screws.
Uneven Spacing: Adjust the spacing by adding or removing shims under the deck board.
Maintenance and Prevention
Clean and Seal: Regularly clean your deck to remove dirt and debris. Apply a sealant to protect the wood from moisture and UV damage.
Inspect Regularly: Check your deck for any loose screws, damaged boards, or other issues. Address them promptly to prevent further damage.
Replacing deck boards may seem daunting, but it’s a manageable task with the right knowledge and tools. By following this comprehensive guide and adhering to safety precautions, you can confidently restore your deck to its former glory and enjoy a safe and aesthetically pleasing outdoor space for years to come. If you encounter any challenges or have any doubts, don’t hesitate to seek professional assistance from a qualified contractor.
Deck Board Replacement: A Step-by-Step Guide to Revitalizing Your Outdoor Haven
Replacing deck boards may seem like a daunting task, but with the right tools and a step-by-step approach, it’s a manageable project. Here’s a comprehensive guide to help you restore your deck to its former glory:
Materials:
Gather the essential materials:
- Replacement deck boards: Choose the same species and dimensions as your existing boards.
- Screws: Use corrosion-resistant screws designed for outdoor use.
- Other supplies: Nails or deck clips, a deck board removal tool, drill, and safety glasses.
Step-by-Step Instructions:
1. Safety First:
- Check for electrical wires or plumbing before drilling.
- Wear safety glasses and use proper lifting techniques.
2. Removing Old Boards:
- Identify the damaged or worn deck boards.
- Use a deck board removal tool or a pry bar to loosen the screws.
- Gently lift the old board by inserting a flathead screwdriver or knife under its edge.
3. Installing New Boards:
- Align the new board with the adjacent ones.
- Drive screws through the predrilled holes or install deck clips.
- Ensure that the boards are level and securely fastened.
Techniques for Removing Deck Boards:
Pry Bar Method:
- Insert a pry bar under the board’s edge and gently pry it up.
- Use caution not to damage the underlying joists.
Drill and Remove Method:
- Use a drill to remove the screws holding the board.
- Lift the board straight up to avoid splitting it.
Terminology and Definitions:
- Deck joists: Horizontal beams that support the deck boards.
- Stringers: Parallel beams that connect the joists and support the deck.
- Ledger board: A horizontal beam that attaches the deck to the house.
Troubleshooting Tips:
- Broken screws: Use a screw extractor to remove them.
- Split deck boards: Replace the entire board to ensure structural integrity.
- Uneven spacing: Adjust the screw placement or use deck shims.
Maintenance and Prevention:
- Clean and seal your deck regularly.
- Inspect the deck for loose screws, cracked boards, or flashing issues.
- Address minor repairs promptly to prevent major damage.
By following these steps and tips, you can confidently replace deck boards and restore your outdoor sanctuary to its fullest potential. Remember to prioritize safety, stay organized, and enjoy the satisfaction of revitalizing your deck.
Deck Board Replacement: A Step-by-Step Guide to Restore Your Outdoor Haven
Maintaining a beautiful and structurally sound deck is essential for extending its lifespan and ensuring the safety of those who enjoy it. Replacing damaged or worn deck boards is a necessary part of deck maintenance, and while it may seem like a daunting task, with the right tools and techniques, you can tackle this project with confidence.
Step-by-Step Instructions
To begin, loosen the screws that hold the damaged deck board in place. Use a drill or screwdriver to carefully remove the screws without damaging the surrounding wood. Next, insert a deck board removal tool into the gap between the deck board and joist and wiggle it back and forth to pry the board loose. Be cautious not to put too much force on the removal tool, as this could damage the deck joists.
Once the damaged board is removed, thoroughly clean the area where it was located to remove any debris or splinters. Measure and cut a new deck board to the exact length of the old one. When installing the new board, make sure that the grain is running in the same direction as the other boards.
To secure the new deck board, align it with the joists and use a drill or screwdriver to drive screws through the board and into the joists. Ensure that the screws are flush with the surface of the deck board to prevent snagging or tripping.
Techniques for Removing Deck Boards
There are two common techniques for removing deck boards: the pry bar method and the drill and remove method. The pry bar method involves using a pry bar to pry the board loose from the joists, while the drill and remove method involves drilling a small hole in the deck board near the screw and removing the screw using a screwdriver. Both methods have their own advantages and disadvantages, and the best method for you will depend on the specific situation.
Troubleshooting Tips
If you encounter any problems while replacing deck boards, there are several common issues that you can troubleshoot. For instance, if screws are broken or stripped, you can try using a screw extractor or a larger screw. If deck boards are split or cracked, they will need to be replaced with new ones. And if the spacing between deck boards is uneven, you can adjust the screws to create a more uniform appearance.
Replacing deck boards is a necessary part of deck maintenance, but it is a task that can be easily accomplished with the right tools and techniques. By following the steps outlined in this guide, you can restore your deck to its former glory and enjoy a safe and beautiful outdoor space for years to come. If you encounter any significant challenges or have any doubts about the project, do not hesitate to seek professional assistance to ensure a successful outcome.
Add helpful tips and techniques to ensure proper installation.
Step-by-Step Instructions for Replacing Deck Boards
5. Step-by-Step Instructions
As you embark on your deck board replacement journey, meticulous preparation is paramount. Don your safety gear, donning gloves and eye protection for your well-being.
Loosening Screws:
With a power drill or manual screwdriver, meticulously loosen the screws that fasten the old deck board to the deck joists. Proceed cautiously, avoiding over-tightening or stripping the screws.
Using a Deck Board Removal Tool:
To release the deck board from its joist grip, employ a specialized deck board removal tool. Insert the tool near the screw holes, aligning it with the joist. With a firm but controlled motion, pry up the deck board, maneuvering it gently until it separates from the joist.
Installing New Deck Boards:
Position the new deck board over the joists, aligning its edges with the adjacent boards. Drive screws through the predrilled holes in the board, sinking them flush with the surface. For a secure hold, space the screws evenly, ensuring each joist is fastened.
Helpful Tips for Installation:
- Feather Edge Replacement: If the old deck board has a feathered edge, create a similar edge on the new board using a jigsaw or hand saw.
- Reverse the Direction of Grain: Install new deck boards perpendicular to the old ones to minimize warping and enhance durability.
- Use Corrosion-Resistant Screws: Opt for stainless steel or galvanized screws to withstand outdoor elements and prevent rust.
- Allow Space for Expansion: Leave a small gap (about 1/8 inch) between the ends of the deck boards and any obstacles to accommodate expansion and contraction.
- Protect Your Substrate: If you plan on painting or staining your deck, protect the fresh lumber by applying a moisture-resistant sealant or primer before installation.
Techniques for Removing Deck Boards: A Tale of Two Methods
Deck board replacement is a crucial task for maintaining the safety and aesthetics of your outdoor haven. When faced with the inevitable need to replace damaged or worn boards, understanding the proper removal techniques is paramount. Two widely used methods emerge: the pry bar method and the drill and remove method. Let’s delve into their nuances.
The Pry Bar Method: Brute Force with Caution
The pry bar method involves using a sturdy pry bar to gently pry the deck board loose from its underlying joists. This method requires careful technique to avoid damaging the surrounding boards or the substructure.
Step 1: Control the Leverage
Insert the pry bar at the end of the board, close to the joist. Ensure the pry bar is parallel to the board and angled slightly upward.
Step 2: Lift and Wiggle
Apply steady upward pressure on the pry bar while simultaneously wiggling the deck board. This action will gradually loosen the board from its fasteners.
Caution: Excessive force or improper leverage can cause the board to snap or damage the joists.
The Drill and Remove Method: Precision with Finesse
This method employs a drill and a specialized deck board removal tool. It offers greater precision and control, reducing the risk of damage.
Step 1: Drill Pilot Holes
Use a drill to create small pilot holes at each end of the board where it meets the joists. These holes will allow the removal tool to access the screws.
Step 2: Insert the Removal Tool
Insert the deck board removal tool into the pilot holes and turn it counterclockwise to extract the screws. Loosen all the screws until the board is free from the joists.
Advantage: This method provides a controlled and gentle way to remove deck boards without risk of damage.
Deciding the Best Method
The choice between the pry bar and the drill and remove method depends on the condition of the deck boards and your comfort level with tools. For seasoned DIYers, the pry bar method may suffice. However, if the boards are tightly secured or damaged, the drill and remove method offers a safer and more effective approach.
Tips for Safe Deck Board Removal
- Wear appropriate safety gear (gloves, eyewear).
- Ensure the drill or pry bar is securely in place before applying pressure.
- Work from the center of the board towards the ends to prevent bending.
- If the board is particularly stubborn, consult a professional.
Techniques for Removing Deck Boards
In the realm of deck board replacement, there are two primary techniques that stand out: the pry bar method and the drill and remove method. Each technique possesses its own advantages and drawbacks, worthy of exploration before embarking on your decking adventure.
The Pry Bar Method
This technique involves gently leveraging a trusty pry bar beneath the damaged deck board. Subtly applying pressure, you coax the board upward, carefully avoiding any undue damage to the surrounding structure. This method excels in situations where the screws securing the deck board are rusted or have otherwise become troublesome. However, it requires delicate execution to prevent splintering or cracking the deck board.
The Drill and Remove Method
As the name suggests, this technique employs a power drill to precisely remove the screws holding the deck board in place. Using a drill bit slightly smaller than the screw head, you cautiously drill through the screw head, completely removing it. This method offers greater control and precision, minimizing the risk of damaging the deck board. However, it requires a steady hand and can be time-consuming for large decks.
Ultimately, the choice between these techniques depends on the specific circumstances of your project. For heavily rusted screws or damaged deck boards, the pry bar method may be more suitable. For greater precision and control, the drill and remove method is often preferred. Remember, safety should always be your top priority. Wear proper protective gear, take your time, and don’t hesitate to consult a professional if you encounter any difficulties.
Deck Construction Terminology: Unraveling the Building Blocks of Your Outdoor Oasis
As you embark on the task of replacing deck boards, it’s crucial to familiarize yourself with the foundational elements that make up your deck’s structure. These terms, while seemingly technical, will empower you to navigate the project with confidence and ensure a successful outcome.
Deck Joists: The horizontal beams that run perpendicular to the house and provide support for the deck boards. Joists are typically spaced 16 inches on center and rest upon the stringers.
Stringers: The parallel beams that run lengthwise and support the deck joists. Stringers are attached to the ledger board, which connects the deck to the house, and are typically spaced 24 inches on center.
Ledger Board: The horizontal beam that is attached to the house and provides a base for the stringers and joists. The ledger board is crucial for securing the deck to the structure and preventing lateral movement.
By understanding these key terms, you can visualize the intricate framework that underlies your deck. This knowledge will not only enhance your comprehension of the replacement process but also enable you to identify any potential issues and address them promptly.
Understanding Deck Components for a Safe and Lasting Deck
In the realm of home maintenance, maintaining a deck is a crucial aspect of not only enhancing its aesthetic appeal but also ensuring its structural integrity and safety. Replacing worn or damaged deck boards is a common task that plays a pivotal role in extending the life of your outdoor haven. To embark on this project confidently, it’s essential to have a clear understanding of the various deck components and their respective functions.
Deck Joists: The backbone of your deck, these sturdy beams run perpendicular to the deck boards and provide support, transferring weight evenly across the structure. They are typically spaced 16 to 24 inches apart and rest on stringers, which are the parallel beams that run along the length of the deck.
Stringers: The foundation of your deck, these beams run parallel to each other and support the deck joists. They are the primary load-bearing elements and are typically made of pressure-treated lumber to withstand the elements. Stringers are securely attached to the ledger board, which is a beam that is fastened to the house framing.
Ledger Board: The anchor of your deck, this beam is attached to the house framing and supports the ends of the stringers. It plays a crucial role in maintaining the structural stability of your deck, particularly during lateral forces like wind or earthquakes.
Deck Boards: The surface of your deck, these boards run perpendicular to the deck joists and provide the walking surface. They are typically made of pressure-treated lumber or composite materials designed to withstand outdoor conditions. Proper spacing between deck boards allows for water drainage and prevents rot.
By understanding these key components and their location within your deck’s structure, you gain a deeper appreciation for the importance of deck board replacement. When it comes to maintaining a safe and durable deck, replacing damaged or worn deck boards is a necessary task that should not be overlooked.
Troubleshooting Tips for Deck Board Replacement
Maintaining a deck requires regular upkeep, and sometimes, you may encounter issues during the replacement of deck boards. To ensure a smooth and successful project, it’s essential to address potential problems effectively.
Broken Screws
Stripped or broken screws can be a headache, but they can be easily fixed. If you encounter a broken screw during removal, use a pair of pliers to grip the remaining portion and twist it out. If the screw is stuck too tightly, apply some penetrating oil to loosen it up. For stripped screws, use a screw extractor or a larger screw to remove them.
Split Deck Boards
A split deck board can compromise the structural integrity of the deck. If you notice a split, it’s best to replace the entire board. To do this, carefully remove the split board and replace it with a new one of the same dimensions. Ensure that the replacement board is properly attached and secured to the joists.
Uneven Spacing
Uneven spacing between deck boards can create an unsightly appearance. To correct this, use a deck board spacing tool or a simple piece of wood as a guide. Place the guide between the deck boards and tap them into place using a hammer or mallet. Adjust the spacing as needed to create a consistent gap between the boards.
By addressing these common problems effectively, you can ensure a successful and visually appealing deck board replacement. It’s important to approach the project with patience and attention to detail to achieve the best possible results.
Deck Board Replacement: A Comprehensive Guide for DIYers
Maintaining your deck is crucial for its safety and aesthetic appeal, and replacing damaged or worn deck boards is an essential part of that upkeep. This blog post will provide you with a step-by-step guide to deck board replacement, ensuring that your outdoor space remains a source of enjoyment for years to come.
Materials Required
Gather the following materials before you begin:
- Replacement deck boards: Choose boards of the same type and dimensions as the existing ones.
- Screws: Select screws designed for outdoor use, such as galvanized or stainless steel.
- Deck board removal tool: This specialized tool makes removing old deck boards easier.
- Safety glasses: Always wear eye protection when working with power tools or removing splintered boards.
Tools and Equipment
In addition to the materials listed above, you’ll need the following tools:
- Drill: A drill is essential for removing old screws and installing new ones.
- Pry bar: A pry bar can assist in removing stubborn deck boards.
- Hammer: Use a hammer to gently tap the new deck boards into place.
- Level: Ensure that the new deck boards are level with the surrounding ones.
Safety Precautions
- Inspect the deck: Check for any electrical wires or plumbing before drilling.
- Use proper lifting techniques: Lift heavy objects with your legs, not your back.
- Wear safety glasses: Protect your eyes from flying debris.
Step-by-Step Instructions
1. Remove the Old Deck Board
Use the deck board removal tool to hook under the edge of the old deck board and pry it loose. If the screws are rusted or stubborn, use a drill to remove them.
2. Install the New Deck Board
Position the new deck board in place and align it with the surrounding boards. Secure it with screws, ensuring that they are flush with the surface.
3. Level the Deck Board
Use a level to check if the new deck board is level. If necessary, tap it gently with a hammer to adjust its position.
Troubleshooting Tips
- Broken Screws: If a screw breaks while removing an old deck board, carefully use a pliers to remove the broken part and replace it with a new screw.
- Split Deck Boards: If a deck board splits while removing it, use wood glue and clamps to repair it before reinstalling it.
- Uneven Spacing: If there is uneven spacing between the deck boards, use a pry bar or hammer to gently adjust their position until they are aligned.
Maintenance and Prevention
- Regular Cleaning: Clean your deck regularly with a gentle cleaner to remove dirt and debris.
- Sealing: Apply a deck sealant every few years to protect the wood from moisture and UV damage.
- Inspect: Regularly inspect your deck for any signs of damage or wear, and address any issues promptly to prevent more significant problems.
By following these steps and tips, you can successfully replace damaged or worn deck boards, restoring your deck to its former glory. Maintaining a well-maintained deck not only enhances its safety and appearance but also extends its lifespan. If you face any challenges or uncertainties during the process, don’t hesitate to seek professional assistance. With proper care and maintenance, your deck will continue to be a cherished outdoor space for years to come.
Discuss proper maintenance techniques to prolong the life of the deck.
Maintenance and Prevention for a Durable Deck
To ensure your newly replaced deck boards stand the test of time, it’s imperative to adopt a proactive maintenance routine. Here are some tips to keep your deck looking its best:
Regular Cleaning:
- Sweep or hose down your deck frequently to remove dirt, debris, and mildew.
- Use a mild cleaning solution specifically designed for decks to gently wash away grime. Avoid harsh chemicals that can damage the wood.
Periodic Sealing:
- Every 1-2 years, apply a protective sealant to protect the deck from moisture, UV rays, and wear.
- Choose a water-repellent sealant that penetrates the wood and forms a durable barrier.
Inspect and Repair:
- Inspect your deck regularly for any signs of damage, such as loose screws, cracked boards, or warped railings.
- Address minor repairs promptly to prevent them from becoming major issues.
- Check bolts and screws to ensure they are tight and replace any that are loose or rusted.
Additional Tips:
- Trim trees and shrubs around the deck to prevent leaves and debris from accumulating.
- Avoid using harsh cleaners or abrasive materials that can scratch or damage the wood.
- Add weather-resistant furniture and accessories to protect the deck and enhance its curb appeal.
By following these maintenance guidelines, you can prolong the life of your deck and enjoy its beauty and functionality for years to come. Remember, regular care is crucial for keeping your outdoor oasis safe and inviting.
Deck Board Replacement: A Comprehensive Guide for a Safe and Beautiful Deck
Materials and Tools You’ll Need
To embark on this project, you’ll require essential materials such as replacement deck boards, screws, and other necessary supplies tailored to your specific deck. Choose the right type and dimensions of materials for a seamless finish.
Armed with the right gear, you’ll need tools like a drill, a deck board removal tool, and safety glasses. Each tool serves a distinct purpose, so make sure to understand their roles and consider specific brands or models for optimal performance.
Safety First: Essential Precautions
Before diving into the project, prioritize safety. Check for electrical wires or plumbing before drilling to avoid accidents. Remember to lift safely and wear safety glasses to protect your eyes from flying debris.
Step-by-Step Deck Board Replacement
-
Remove Old Deck Boards: Use a pry bar or drill and remove method to loosen the screws and carefully remove the damaged or worn deck boards.
-
Install New Deck Boards: Place the new deck boards in the designated area, ensuring a tight fit. Secure them firmly using screws, spacing them evenly for a professional finish.
-
Techniques for Removing Deck Boards: Choose the most suitable technique based on your deck’s construction. The pry bar method involves prying up the deck board with a crowbar, while the drill and remove method employs a drill to loosen the screws before lifting the deck board.
Maintaining Your Deck for Longevity
To maintain the beauty and safety of your deck, regular maintenance is crucial. Clean your deck frequently to remove dirt and debris. Apply a sealant periodically to protect the wood from the elements and enhance its durability. Inspect the deck regularly for any signs of damage, such as loose screws or splinters, and address them promptly to prevent further issues.
Emphasize the importance of addressing minor repairs promptly to prevent major damage.
Maintaining Your Deck: The Importance of Addressing Minor Repairs
Imagine your deck as a beloved family member. While it provides countless hours of joy and relaxation, it also requires regular care and attention to stay in tip-top shape. Just like a neglected health issue can snowball into a major problem, ignoring minor repairs on your deck can lead to costly and time-consuming challenges down the road.
The Perils of Neglect: A Cautionary Tale
Deck boards are the backbone of your outdoor oasis. They bear the weight of your family, friends, and furniture. Over time, these boards can become loose, warped, or damaged due to weather elements or heavy use. If left unattended, these seemingly insignificant issues can escalate into major problems.
Loose deck boards can create a tripping hazard, while warped boards can pool water, inviting rot and decay. Damaged boards can compromise the structural integrity of your deck, leading to dangerous and costly repairs.
Early Detection: The Key to Prevention
The secret to avoiding these costly headaches lies in early detection and prompt action. Regularly inspect your deck for any signs of wear or damage. Loose screws, protruding nails, and splits or cracks in the boards are all red flags that demand immediate attention.
Addressing Minor Repairs: A DIY Approach
Addressing minor repairs is often a manageable DIY task. With the right tools and a little know-how, you can restore your deck’s glory in no time. Use a deck board removal tool to carefully pry up damaged boards and replace them with new ones. Tighten loose screws and replace any cracked or broken nails.
Professional Assistance When Needed
If you encounter any significant challenges or have doubts about your DIY abilities, don’t hesitate to seek professional assistance. A qualified deck contractor can assess the damage and provide expert repairs to ensure the safety and longevity of your outdoor haven.
In Summary
A well-maintained deck is a source of pride, comfort, and entertainment for you and your loved ones. By addressing minor repairs promptly, you can prevent them from escalating into major problems, saving you time, money, and heartache in the long run. Remember, your deck is like a precious family member; regular care and attention will keep it healthy and vibrant for years to come.
Deck Board Replacement: A Step-by-Step Guide to a Renewed Deck
Maintaining a safe and visually appealing deck is essential for outdoor enjoyment. Damaged or worn deck boards can detract from your deck’s aesthetic and compromise its structural integrity. Replacing deck boards is a project that can be tackled with the right tools and techniques.
Step 1: Gather Your Materials
Essential materials for deck board replacement include replacement boards that match the existing ones, screws, and any necessary supplies like deck board removal tools. Ensure the dimensions and species of the new boards align with the existing ones.
Step 2: Tools and Safety First
Gather the necessary tools, such as a drill, deck board removal tool, and safety glasses. Each tool serves a specific purpose, and it’s crucial to use the right ones. Safety precautions are paramount: check for electrical wires or plumbing before drilling, use proper lifting techniques, and wear appropriate gear.
Step 3: Removing Deck Boards
Pry bar method and drill and remove method are common techniques to remove deck boards. Choose the one that suits your situation best. Carefully loosen the screws, then pry the deck board away using a deck board removal tool or drill out the screws and remove the board.
Step 4: Installing New Deck Boards
Replace the old boards with the new ones, aligning them correctly with the joists. Drill pilot holes to prevent splitting, then secure the boards with screws. Proper spacing is crucial for ensuring the deck’s durability and appearance.
Step 5: Troubleshooting Common Issues
Unexpected problems can arise during deck board replacement. Broken screws can be replaced with longer ones. Split deck boards may require sanding or replacement. Uneven spacing can be adjusted by repositioning the boards. If you encounter significant challenges, don’t hesitate to consult a professional.
Step 6: Maintenance and Prevention
Prolong the life of your deck with proper maintenance. Regular cleaning and sealing will protect it from the elements. Inspect your deck frequently for any signs of damage or wear. Promptly addressing minor repairs can prevent bigger problems down the road.
In conclusion, deck board replacement is a manageable project with the right approach and preparation. By following these steps and paying attention to safety, you can restore your deck to its former glory and enjoy it for years to come.
A Comprehensive Guide to Deck Board Replacement: Maintain a Safe and Stunning Outdoor Oasis
Maintaining a deck is essential to ensure its longevity and safety. Replacing damaged or worn deck boards is a crucial aspect of this upkeep. This blog post will guide you through the process of deck board replacement, providing detailed instructions and essential tips to help you achieve a sturdy and aesthetically pleasing outdoor space.
Benefits of Replacing Deck Boards
Replacing deck boards offers numerous benefits:
- Enhanced Safety: Damaged or rotten deck boards pose a significant safety hazard. Replacing them ensures a safe and stable surface for you, your family, and guests.
- Improved Aesthetics: Worn or discolored deck boards can detract from the overall appeal of your deck. Replacing them restores its beauty and enhances the ambiance of your outdoor retreat.
- Extended Lifespan: By promptly replacing damaged deck boards, you can extend the lifespan of your deck, preventing costly repairs or premature replacement.
Step-by-Step Guide to Deck Board Replacement
Replacing deck boards is a relatively straightforward process that can be completed in a few hours. Follow these steps to achieve a hassle-free and successful outcome:
1. Safety First: Ensure you have all the necessary safety gear and familiarize yourself with electrical and plumbing hazards.
2. Gather Materials: Collect the required deck boards, screws, drill, deck board removal tool, and other supplies.
3. Remove Damaged Boards: Pry loose or cut damaged boards carefully using the appropriate removal technique.
4. Prepare New Boards: Cut new deck boards to the required length and treat them with a suitable sealant or preservative.
5. Install New Boards: Secure new boards with screws, ensuring proper spacing and alignment.
6. Countersink Screws: Countersink screws flush with the surface of the deck to prevent tripping hazards.
7. Trim Excess: Trim any excess material from the edges of the new boards for a clean finish.
Maintenance and Prevention
Regular maintenance is crucial to prolong the lifespan of your deck and prevent premature replacement. Consider these practices:
- Clean Regularly: Remove debris and dirt regularly to prevent moisture damage.
- Seal and Stain: Apply a protective sealant or stain to protect your deck from the elements.
- Inspect Frequently: Check your deck regularly for signs of damage or weakness, and address any issues promptly.
By following the steps outlined in this guide and implementing proper maintenance practices, you can enjoy a safe, beautiful, and long-lasting deck. Remember, if you encounter any challenges or have any safety concerns, don’t hesitate to seek professional assistance. Your deck is a valuable investment, and its well-being directly impacts your outdoor enjoyment and peace of mind.
Deck Board Replacement: A Comprehensive Guide
Maintaining a safe and inviting deck is crucial for your outdoor enjoyment. However, time and weather can take their toll on deck boards, requiring replacement to ensure the integrity and aesthetics of your deck. This comprehensive guide will empower you with the knowledge and techniques to replace deck boards confidently and efficiently.
Essential Materials and Tools
Gather the following materials:
- Replacement deck boards: Determine the type and dimensions that match your existing deck.
- Screws: Choose corrosion-resistant screws specifically designed for outdoor use.
- Other supplies: Include a drill, deck board removal tool, safety glasses, and a level.
Safety First
Always prioritize safety when working on a deck. Check for electrical wires or plumbing before drilling. Use proper lifting techniques and wear appropriate safety gear, such as gloves and eye protection.
Step-by-Step Replacement Guide
- Remove Old Boards: Use a deck board removal tool to pry loose the damaged boards. Alternatively, you can drill into the screws and remove them to gently lift the boards.
- Install New Boards: Place the replacement boards in position and secure them with screws into the joists. Use a level to ensure proper alignment.
- Tips and Techniques: For easier installation, countersink the screws slightly below the surface of the board. Use spacers to ensure even gaps between the boards.
Troubleshooting Common Issues
If you encounter problems, here are some solutions:
- Broken Screws: Remove the screw and replace it with a new one.
- Split Deck Boards: Cut and remove the damaged section and replace it with a new board.
- Uneven Spacing: Adjust the spacing by repositioning the boards or using shims.
Maintenance and Prevention
To prolong your deck’s life, follow these maintenance tips:
- Clean and seal the deck regularly to protect it from moisture and UV rays.
- Inspect the deck periodically for any signs of damage or loose boards.
- Make timely repairs to prevent minor issues from escalating into major problems.
Seeking Professional Help
If you encounter significant challenges or have any doubts during the replacement process, don’t hesitate to consult with a professional. They can provide expert advice and ensure that your deck is safe and structurally sound.
