To stake hydrangeas, gather materials including stakes, wires, and a trellis. Select healthy plants and position the trellis securely. Attach the hydrangeas to the trellis using soft ties or wire, ensuring support without damaging the stems. Provide regular care, including watering, fertilizing, and pruning, to maintain healthy growth and abundant blooms. The trellis supports the plants, improves airflow, reduces disease risk, and enhances their visual appeal.
Essential Materials for Hydrangea Trellising
Creating a vibrant and enchanting trellis adorned with blooming hydrangeas requires meticulous planning and the right materials. Embark on this captivating journey with our essential materials guide, ensuring every step is met with ease and inspiration.
1. Trellis:
- Type: Choose from a range of trellises, including wooden arbors, metal trellises, or bamboo ladders, each with unique aesthetics and support capabilities.
- Dimensions: Select a trellis that complements the size and shape of your hydrangeas. Consider the height and width of the trellis to accommodate the plant’s mature growth.
- Material: Choose a durable material that can withstand outdoor elements, such as weather-resistant wood or powder-coated metal.
2. Support Stakes:
- Quantity and Length: Plan to use one support stake for every hydrangea plant. The length should be approximately 2-3 feet longer than the height of the plant.
- Material: Opt for sturdy stakes made of treated wood, galvanized steel, or bamboo.
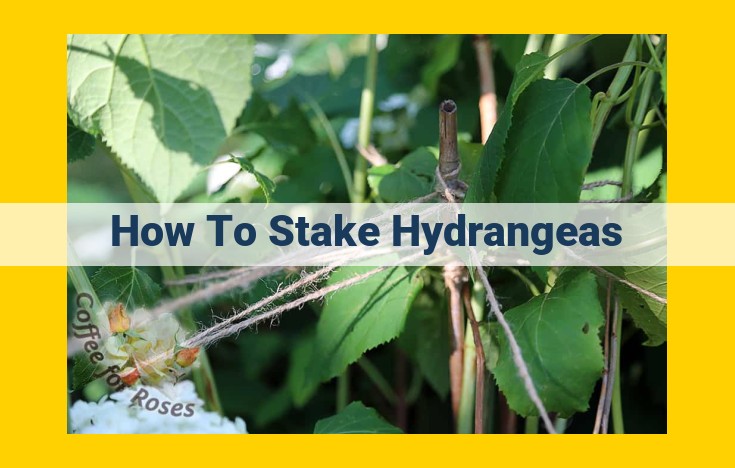
3. Ties or Wire:
- Type: Use soft, pliable materials, such as plant ties or coated wire, to secure the hydrangeas to the trellis without damaging their delicate stems.
- Quantity: Estimate the amount of ties or wire needed based on the number of hydrangeas and the coverage area of the trellis.
4. Mulch:
- Type: Enhance soil moisture retention and suppress weeds with a layer of organic mulch, such as bark chips or shredded leaves.
- Depth: Apply mulch around the base of the hydrangeas, leaving a few inches of space around the stems.
5. Compost or Fertilizer:
- Type: Hydrangeas thrive with nutrient-rich soil. Incorporate compost or a balanced fertilizer into the soil before planting to provide essential nutrients.
- Quantity: Follow the recommended application rates on the product packaging.
6. Watering Can or Hose:
- Capacity: Choose a watering can or hose that can hold an adequate amount of water to hydrate the hydrangeas thoroughly.
- Features: Look for a watering can with a gentle shower head to avoid damaging the delicate blooms.
Preparing the Hydrangeas: A Crucial Step to Successful Trellising
To embark on the journey of trellising hydrangeas, it’s essential to select and prepare healthy plants. Healthy, because they possess the strength and vigor to withstand the rigors of trellis training. Well-prepared, because it sets the foundation for their optimal growth and blossoming.
Start by carefully examining your hydrangeas. Look for vigorous plants with sturdy stems, lush foliage, and an absence of pests or diseases. Age is a factor to consider; mature plants are generally more resilient. Proper root development is also key. Hydrangeas with well-established root systems are more likely to thrive on a trellis.
Before planting, ensure the soil is well-drained and rich in organic matter. Gently loosen the soil around the hydrangea’s root ball and spread out any circling roots. Dig a hole twice as wide as the root ball but no deeper. Carefully place the hydrangea in the hole and backfill with the soil, tamping it gently to remove any air pockets.
Water the hydrangeas deeply immediately after planting to help settle the soil. Throughout the growing season, maintain consistent watering, especially during hot, dry periods. Regular fertilization is also recommended to provide essential nutrients for healthy growth and abundant blooms.
Choosing the Trellis and Support System for Hydrangea Trellising
When selecting a trellis or support system for your trellised hydrangeas, it’s essential to consider the type of trellis and its suitability for the specific variety of hydrangea.
Types of Trellises
Arched Trellises: These elegant trellises provide ample vertical support for climbing hydrangeas, creating a dramatic and eye-catching display.
Flat Trellises: Ideal for spreading hydrangeas, these trellises offer horizontal support, allowing the plants to cascade gracefully over the structure.
Single-Panel Trellises: These versatile trellises are suitable for both climbing and spreading hydrangeas, providing a sturdy and customizable support system.
Materials and Durability
Metal Trellises: Constructed from durable materials such as wrought iron or aluminum, metal trellises withstand the elements, providing long-lasting support.
Wooden Trellises: While less durable than metal trellises, wooden trellises offer a natural aesthetic and can be painted or stained to complement your garden décor.
Plastic Trellises: Lightweight and affordable, plastic trellises are an option for temporary support or in areas with mild climates.
Choosing the Right Trellis
Consider the following factors when selecting a trellis for your hydrangeas:
- Plant Size and Growth Habit: Choose a trellis that can accommodate the expected growth size of the hydrangea variety.
- Flowering Habits: Climbers require vertical support, while spreaders can grow on flat or single-panel trellises.
- Spacing: Hydrangeas need adequate spacing between stems to promote air circulation and prevent overcrowding.
- Aesthetic Preferences: Select a trellis that complements the style of your garden and the overall design of the trellised area.
Installing the Trellis: A Step-by-Step Guide to Secure Your Hydrangea’s Haven
As you embark on the enchanting journey of trellising your beloved hydrangeas, the installation of the trellis stands as a pivotal step, promising to elevate your garden’s beauty and promote the well-being of these cherished blooms. Let us delve into the intricacies of this process, empowering you with a step-by-step guide to ensure the sturdiness and security of your trellis.
1. Choose a Suitable Location
The placement of your trellis plays a crucial role in the health and aesthetics of your hydrangeas. Select a spot with well-drained soil that receives ample morning sunlight and afternoon shade. Avoid areas with strong winds or excessive moisture, as these can damage delicate stems or encourage fungal diseases.
2. Determine the Trellis Type
Once you have identified the ideal location, it is time to choose the type of trellis that best suits your needs. For climbing hydrangeas, a sturdy trellis or arbor is recommended to provide ample support for their vigorous growth. Self-supporting hydrangeas may prefer a freestanding trellis or stakes, offering guidance and preventing sprawling.
3. Digging the Holes
With your trellis selected, it is time to prepare the ground. Dig two holes, approximately 2 feet deep and 1 foot wide, for the trellis posts to ensure stability. Position the holes at the desired width of your trellis, ensuring they are parallel to one another.
4. Setting the Posts
Place the trellis posts in the holes and backfill them with a mixture of soil and gravel or sand. Use a level to ensure the posts are perfectly vertical. Compact the soil firmly around the posts to prevent movement.
5. Securing the Trellis
Connect the trellis to the posts using galvanized wire or bolts. This ensures that the trellis remains secure during high winds or heavy rain. Tighten the wire or bolts securely but avoid overtightening, as this may bend the trellis.
6. Finishing Touches
Mulch around the base of the trellis to retain moisture and suppress weeds. Consider painting or staining the trellis to match your garden décor, especially if it is a wooden trellis. This step enhances the aesthetic appeal and protects the wood from the elements.
By following these steps meticulously, you can rest assured that your trellis will provide a sturdy and enduring foundation for your hydrangeas to thrive and bloom in abundance. The secure installation of the trellis marks the beginning of a flourishing relationship between these enchanting plants and their supportive structure, bringing immeasurable joy and beauty to your garden sanctuary.
Attaching Hydrangeas to the Trellis
Now that your trellis is securely in place, it’s time to unite your beautiful hydrangeas with their support structure. But how do you do it without injuring these delicate beauties? Fear not, dear readers, for we shall guide you through the art of attaching hydrangeas to a trellis with utmost care and expertise.
Choosing the Right Ties
The first step is to choose the right materials for securing your hydrangeas. Soft and flexible ties are essential to avoid damaging the stems. Some popular options include fabric strips, rubber bands, or dedicated plant ties. Avoid using twine or wire, as these can cut into the plant’s delicate tissues.
Securing the Hydrangeas
Once you have your ties ready, it’s time to attach the hydrangeas to the trellis. Gently gather several stems together and loop the tie around them loosely. Avoid overtightening, as this can restrict the plant’s growth. Instead, allow some slack to accommodate the plant’s natural movement.
Strategic Placement
As you tie the hydrangeas to the trellis, pay attention to their growth habit. Attach them in a way that promotes air circulation and prevents overcrowding. This will help to minimize the risk of pests and diseases.
Ongoing Care
Regularly check the ties to ensure they are still secure and not cutting into the stems. As the hydrangeas grow, you may need to adjust the ties or add additional ones.
Benefits of Tying Hydrangeas to a Trellis
Properly attaching hydrangeas to a trellis offers numerous benefits for your beloved plants:
- Improved air circulation: The trellis allows air to flow freely around the plants, reducing humidity and preventing diseases.
- Enhanced support: The trellis provides a sturdy support system, preventing the plants from flopping over or becoming tangled.
- Increased blooming: By training hydrangeas to grow vertically, you maximize sunlight exposure, leading to more blooms and a longer blooming period.
By following these simple steps, you can securely attach your hydrangeas to a trellis and enjoy their beauty and benefits for years to come. Remember to handle your plants with care and provide them with the proper support they need to thrive.
Trellising Hydrangeas: A Comprehensive Guide to Maintenance and Care
Once your hydrangeas are gracefully cascading down the trellis, the ongoing care they receive will determine their health and longevity. Nurturing them properly ensures they continue to thrive and paint your garden with vibrant blooms.
Watering: The Elixir of Life
Water is the lifeblood of your hydrangeas. Regular watering is crucial, especially during hot, dry weather. Deep watering encourages the roots to grow deep into the soil, making the plants more resilient to drought. Avoid overwatering, as soggy soil can lead to root rot.
Fertilizing: A Nutritional Boost
Fertilizing provides essential nutrients that promote healthy growth and abundant blooms. Use a balanced, slow-release fertilizer specifically formulated for hydrangeas. Follow the instructions on the package carefully to avoid over-fertilizing, which can burn the roots.
Pruning: Shaping and Rejuvenating
Pruning is an important task that helps maintain the health and shape of your trellised hydrangeas. After they have finished blooming, remove any dead, diseased, or weak stems. Thin out the plant by removing some of the oldest stems. This encourages new growth and prevents overcrowding.
Other Essential Care Tips
- Mulch around the hydrangeas to retain moisture, suppress weeds, and regulate soil temperature.
- Check for pests and diseases regularly. Treat any infestations promptly to prevent damage.
- Protect the plants from harsh winter conditions by covering them with burlap or a similar material.
By providing your trellised hydrangeas with the proper maintenance and care, you can ensure their health, beauty, and enjoyment for years to come. Remember that these magnificent plants require consistent attention to thrive, and the rewards will be well worth the effort.
The Flourishing Rewards of Trellising Hydrangeas
Embark on a horticultural adventure as we delve into the profound benefits of trellising these enchanting blooms. Trellising hydrangeas unveils a world of advantages, elevating their growth, resilience, and visual splendor.
Improved Air Circulation
By raising hydrangeas off the ground, trellising enhances air circulation. This gentle breeze helps prevent moisture stagnation, which can lead to fungal diseases. A well-ventilated environment fosters healthy foliage, promoting photosynthesis and overall plant vigor.
Reduced Susceptibility to Pests and Diseases
The elevated position of trellised hydrangeas reduces their contact with the soil, where many pests and diseases lurk. This isolation provides a protective barrier, making them less susceptible to soil-borne pathogens and insects that thrive in moist environments.
Increased Blooming
Trellising hydrangeas encourages increased blooming by exposing them to ample sunlight. By training the stems to climb vertically, more leaf surface is exposed to the sun, maximizing photosynthesis and the production of flower buds. The result? A profusion of vibrant blooms that will captivate your senses.
Additional Advantages
Beyond these primary benefits, trellising hydrangeas offers additional advantages:
- Aesthetic Enhancement: Trellises create a stunning visual display, transforming hydrangeas into elegant living tapestries.
- Space Optimization: Trellising hydrangeas upward allows for vertical gardening, maximizing space utilization in smaller gardens.
- Support for Heavy Blooms: Trellises provide essential support for the weight of heavy hydrangea blooms, preventing the stems from bending or breaking.
