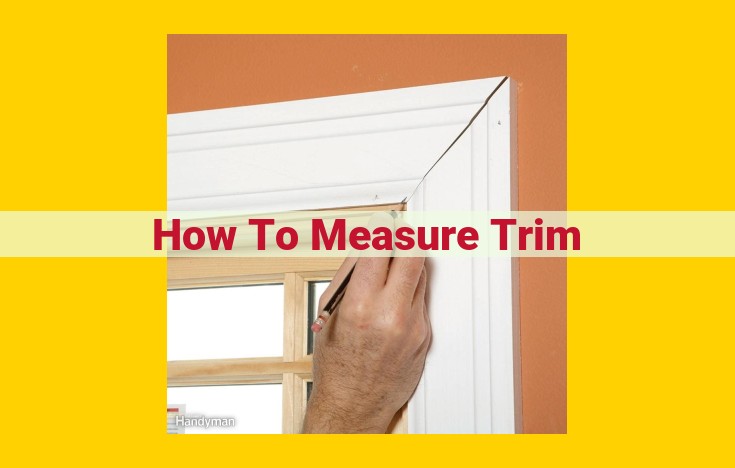
How to Measure Trim:
- Determine the Length: Measure the perimeter of the area where the trim will be installed, including any corners or angles.
- Calculate the Width: Use a tape measure to determine the desired width of the trim and subtract this value from the total perimeter. This will give you the total length of trim needed.
- Account for Overhang: If the trim will overhang the wall, add the overhang distance to the total length calculated in step 2.
Materials for Trim: The Foundation of a Perfect Finish
- Emphasize the significance of choosing appropriate materials based on durability, aesthetics, and intended use.
Materials for Trim: The Foundation of a Perfect Finish
Trim is the unsung hero of home aesthetics, transforming ordinary rooms into polished masterpieces. Choosing the right materials for your trim is crucial as it sets the tone for the entire space.
Durability: Stand the Test of Time
Durability is paramount for areas with heavy traffic or moisture exposure. Solid woods, such as oak or mahogany, boast exceptional strength and longevity. Consider medium-density fiberboard (MDF) for its affordability and resistance to warping or cracking.
Aesthetics: Beauty that Endures
The right material can elevate your trim’s aesthetic appeal. Hardwoods offer rich, natural textures, adding warmth and character to any space. Paintable MDF provides a blank canvas for customized finishes, allowing you to match any color scheme.
Intended Use: Purposeful Selection
Consider the intended use of your trim when choosing materials. Moisture-resistant plastics are ideal for bathrooms or kitchens, while vinyl is an excellent choice for budget-friendly, water-resistant options. Metal trims add a modern, industrial touch to contemporary spaces.
Choosing the right trim materials is the foundation for a perfect finish. By considering these factors, you can create a beautiful, durable trim that enhances the aesthetics and functionality of your home.
Mastering Trim Installation Techniques: A Step-by-Step Guide
When it comes to home improvement projects, adding trim can elevate the aesthetics and functionality of any space. Installing trim can seem daunting, but with the right techniques and materials, you can achieve a professional-looking finish.
Tools and Materials You’ll Need:
- Measuring tape
- Miter saw
- Nail gun or hammer and nails
- Adhesive
- Caulk gun and caulk
- Sandpaper or sanding block
- Spackling compound
- Primer and paint (optional)
Choosing the Right Installation Method:
The installation method you choose depends on the type of trim you’re using and the desired look.
- Nailing: Nailing is the most common method for installing trim. Use a nail gun or hammer and nails to secure the trim to the wall or ceiling.
- Adhesive: Adhesive is a convenient option for lightweight trim, such as flexible molding or decorative trim. Apply a thin layer of adhesive to the back of the trim and press it into place.
- Mitered Cuts: Mitered cuts are used to create angled corners, such as where baseboards meet walls. Use a miter saw to cut the trim at a 45-degree angle on each end.
Specific Considerations for Different Trim Types:
- Wood Trim: Wood trim is a versatile option that can be stained or painted to match your décor. Use a nail gun or adhesive to install wood trim.
- MDF Trim: MDF trim (Medium Density Fiberboard) is a more budget-friendly option compared to wood. It’s typically installed using adhesive or nails.
- Decorative Trim: Decorative trim includes options like crown molding and chair rails. These trims are often used to add architectural interest. Adhesive is often the best choice for installing decorative trim.
Step-by-Step Process:
- Measure and Cut: Measure and mark the length of trim needed. Use a miter saw to cut the trim at the appropriate angles if required.
- Lay a Bead of Adhesive: If using adhesive, apply a thin bead to the back of the trim.
- Install the Trim: Position the trim in place and press it firmly. Use nails or a nail gun to secure the trim to the wall or ceiling.
- Get a Flawless Finish: Fill any gaps between the trim and the wall or ceiling with caulk. Sand any rough edges and apply spackling compound to fill nail holes and imperfections. Prime and paint the trim (if desired) to complete the look.
Exploring the World of Trim Types: Function and Form
When it comes to elevating the aesthetics and functionality of your home, trim takes center stage. Delving into the diverse world of trim options will empower you to create spaces that exude character and sophistication. From the humble baseboard to the ornate crown molding, each type of trim serves a unique purpose, adding both visual appeal and practical benefits.
Baseboards: The Unsung Hero of Walls
The unsung hero of any room, baseboards conceal the unsightly gap between walls and flooring. They play a vital role in preventing drafts, protecting walls from damage, and providing a smooth transition between surfaces. Whether you opt for simple, painted moldings or more elaborate profiles, baseboards complement the flooring and define the perimeter of your space.
Chair Rails: Adding Character and Elegance
Chair rails, once primarily used to protect walls from furniture damage, have evolved into a versatile decorative element. Installed at approximately one-third the height of the wall, they create a sophisticated division between the lower and upper portions. Chair rails can be adorned with intricate carvings or painted in contrasting hues to create visual interest and add depth to your walls.
Crown Moldings: The Jewel in the Architectural Crown
The epitome of architectural adornment, crown moldings crown the top of walls, gracing spaces with a sense of grandeur and opulence. These intricate moldings conceal imperfections, create visual height, and add a touch of timeless elegance. From intricate Victorian designs to sleek contemporary profiles, crown moldings transform ordinary rooms into extraordinary ones.
Casings and Architraves: Framing Doors and Windows
Casings and architraves are the stylish frames that surround doors and windows, enhancing their aesthetic appeal and accentuating their architectural presence. Casings form the inner layer closest to the opening, while architraves create the outer border, often featuring decorative elements that complement the style of the room.
Other Decorative Trim Options
The world of trim extends far beyond these essential types. Picture rails, wainscoting, panel moldings, and corbels add decorative flair and architectural interest to any space. Picture rails provide a discreet way to display artwork or photographs, while wainscoting adds a touch of classic charm to walls. Panel moldings create elegant accents on walls or ceilings, and corbels add a touch of whimsy or grandeur depending on their design.
By understanding the function and form of the various trim types, you can unleash your creativity and transform your home into a space that reflects your personal style and enhances your everyday living experience.
