To repot a ponytail palm, gently remove the plant from its current container and inspect the roots for any issues. Prepare a new pot with drainage holes and a well-draining potting mix. Place the plant in the center of the pot and fill it with soil, leaving some space at the top for watering. Compact the soil gently around the base of the plant and water thoroughly. Allow the excess water to drain away before placing the plant in a bright, indirect light location.
Essential Materials for Successful Repotting: A Foundation for Plant Health
Repotting is a crucial step in plant care, ensuring optimal growth and vitality. To achieve successful repotting, it’s essential to arm yourself with the right tools, containers, and potting mix. These components work together to provide the ideal environment for your plants to flourish.
Importance of Using the Right Containers:
The right container choice is paramount for healthy plant growth. Select containers with drainage holes to prevent root rot caused by waterlogging. The size of the container should be proportionate to the plant’s root system, allowing room for growth without becoming pot-bound.
Choosing the Ideal Potting Mix:
A suitable potting mix provides essential nutrients, drainage, and aeration for plant roots. Avoid using garden soil, as it can be too dense and retain too much moisture. Opt for well-draining mixes specifically formulated for container gardening.
Essential Tools for Repotting:
Having the right tools makes repotting easier and less stressful. Gather a trowel or scoop to remove the plant from its old container, a watering can or hose, and a pair of sharp pruning shears for trimming any dead or damaged roots.
Investing in Quality Materials:
Investing in high-quality materials will pay dividends in the long run. Choose durable containers that won’t crack or break easily. Use a potting mix that has good reviews and is tailored to your plant’s needs. Invest in sturdy tools that will make repotting efficient and enjoyable.
By using the right containers, potting mix, and tools, you lay the foundation for successful repotting. These materials create an optimal environment for your plants to grow and thrive, ensuring their health and beauty for years to come.
Essential Materials for Successful Repotting: A Comprehensive Guide
When it comes to repotting, using the right tools and materials can make all the difference. Think of it like baking: the right ingredients and equipment lead to a delicious cake, while the wrong ones can result in a disaster. So, let’s gather all the necessary items to ensure a smooth and successful repotting experience.
Containers
The container you choose should provide ample space for your plant’s root system to grow comfortably. Terracotta and plastic containers are popular options, but consider your plant’s specific needs. For instance, if you have a moisture-loving plant, a porous terracotta pot will allow excess water to evaporate, while a non-porous plastic pot will retain moisture better.
Potting Mix
The potting mix is the foundation of your plant’s home, so choose wisely. Select a mix that is well-draining, aerated, and tailored to your plant’s type. Avoid garden soil, as it can be too dense and compact for most container plants. Peat-based, compost-based, and coir-based potting mixes are commonly used and can be customized with additional amendments, such as perlite or vermiculite.
Tools
Repotting requires a few essential tools. A potting trowel is used to scoop up soil and loosen roots. Pruning shears or a sharp knife are handy for removing dead or overgrown roots. A watering can is a must for hydrating your newly repotted plant. If you’re repotting a large plant, you may need a helping hand or a stable surface to lift the plant safely.
The Optimal Repotting Schedule for Plants: A Journey Towards Plant Harmony
Every plant has its own unique growth cycle and needs, and understanding these is crucial for successful repotting. Young plants generally require more frequent repotting, as they are actively growing and expanding their root systems. Aim to repot young plants every 1-2 years, or when their roots start to circle the pot.
Mature plants, on the other hand, may only need to be repotted every 3-5 years, or even less frequently. This is porque their growth slows down with age, and their root systems become more established. However, the condition of your plant should always be the ultimate guide.
Signs that your plant may need repotting include:
- Roots growing out of the drainage holes
- Soil lifting away from the edges of the pot
- Water draining too quickly or pooling on the surface
- Stunted growth or yellowing leaves
Remember, repotting is a delicate process, so it’s best to err on the side of caution. If you’re unsure whether your plant needs a new home, it’s usually better to wait a little longer.
Guide to the Art of Repotting: A Step-by-Step Guide
Repotting, the act of transplanting a plant into a new container, is an essential task for plant health and longevity. Whether you’re a seasoned plant enthusiast or a newbie gardener, understanding the proper repotting techniques will ensure your plants thrive.
Preparing the Soil
The foundation of a successful repot is choosing the right soil. Select a potting mix that suits your plant’s specific needs, considering its drainage requirements and pH. Use a clean container to mix the soil, adding any necessary amendments such as perlite or vermiculite to improve aeration.
Removing the Plant
Gently loosen the soil around the edges of the current container and carefully slide the plant out. If the roots are circling or matted, use a sharp knife to cut them free, encouraging them to grow outward in the new pot.
Transplanting
Fill the new container with about one-third of the prepared soil. Center the plant in the pot, spreading out the roots. Fill the remaining space with soil, gently firming it around the base of the plant. Avoid overpacking the soil.
Watering and Care
Water the newly repotted plant thoroughly, but allow excess water to drain away. Place it in a location that provides appropriate light conditions for its species. Monitor the plant closely for signs of transplant shock, such as wilting or leaf drop, and provide support if needed.
Additional Tips
- Repot during the plant’s growing season, when it is actively growing and less likely to be stressed.
- Choose a container that is one to two inches larger than the current one, allowing room for root growth.
- Don’t overwater or fertilize immediately after repotting, as this can damage the roots.
- Repot regularly to prevent overcrowding and nutrient depletion, which can lead to stunted growth and poor health.
Discuss Proper Watering Techniques and How to Prevent Transplant Shock
Watering Techniques:
- Water thoroughly immediately after repotting to settle the soil around the roots.
- Allow excess water to drain completely to avoid drowning the plant.
- Avoid frequent watering; let the top inch or two of soil dry out before watering again.
- Use lukewarm water; cold water can shock the plant’s roots.
Preventing Transplant Shock:
- Disturb the roots as little as possible during repotting.
- Gently loosen any tightly bound roots without pruning.
- Handle the plant with care to avoid any damage.
- Reduce watering slightly in the first few days after repotting to allow the plant to adjust.
- Provide adequate light and keep the plant in a warm location to promote recovery.
Signs of Transplant Shock:
- Wilting
- Yellowing or browning of leaves
- Dropping of leaves
- Failure to grow or produce new growth
Tips to Reduce Transplant Shock:
- Use a stress-reducing solution when watering the plant after repotting.
- Mist the plant’s leaves regularly to increase humidity.
- Avoid fertilizing the plant for several weeks after repotting.
- Provide partial shade initially to reduce stress on the plant.
By following these proper watering techniques and taking precautions to prevent transplant shock, you can ensure that your repotted plant has the best chance of thriving.
Understanding Plant Anatomy for Optimal Repotting
The Hidden World Beneath the Soil:
When you gently lift a plant from its pot, you unveil a hidden world beneath the surface – its root system. This intricate network anchors the plant, provides nutrients and water, and supports its overall health. Understanding its anatomy is crucial for successful repotting.
Types of Roots:
Plant roots come in two main types: primary roots and lateral roots. The primary root is the main anchor for the plant, growing deep into the soil to tap into water and nutrients. Lateral roots branch out from the primary root, forming a dense network near the surface. These lateral roots are responsible for absorbing most of the water and nutrients from the soil.
Signs of a Root-Bound Plant:
As plants grow, their root systems expand. If they become confined in a pot that’s too small, they can become root-bound. This can stunt the plant’s growth and make it more susceptible to stress and disease. Here are some signs to look for:
- Roots circling the inside of the pot
- Roots protruding from the drainage holes
- Slow growth or yellowing leaves
- Soil that dries out quickly due to poor root absorption
Repotting Root-Bound Plants:
When you identify a root-bound plant, it’s time to repot it into a larger container. Carefully loosen the roots and spread them out evenly in the new pot. Use a well-draining potting mix that is appropriate for the plant’s needs. This will give the roots room to breathe and absorb nutrients effectively, promoting healthy growth and overall well-being.
Understanding Plant Anatomy for Optimal Repotting
When repotting, understanding plant anatomy is crucial for selecting the appropriate container size and potting mix. It’s like building a house: you wouldn’t put a large family in a tiny cottage, and you wouldn’t use sand for a roof.
The root system is the foundation of a plant, absorbing water and nutrients from the soil. Different plants have different root systems: some are shallow and fibrous, while others are deep and taprooted.
Shallow-rooted plants, like spider plants and African violets, need containers that are wider than they are deep. This allows their roots to spread out horizontally.
Deep-rooted plants, such as roses and trees, require containers that are deeper than they are wide. This gives their roots plenty of space to grow downward, anchoring the plant and providing stability.
The potting mix you choose should also be tailored to the plant’s anatomy. Well-draining mixes are ideal for plants with shallow roots, as they prevent waterlogging. Moisture-retentive mixes are better for deep-rooted plants, as they hold water longer.
By understanding the anatomy of your plant, you can select the perfect container size and potting mix to ensure healthy growth and prevent future problems.
Understanding the Vital Role of Soil pH and Drainage in Preventing Root Rot
Repotting plants is a crucial part of plant care, ensuring their health and longevity. Proper soil pH and drainage are paramount factors that prevent root rot, a devastating condition that can lead to plant death.
Roots, the vital lifeline of plants, absorb water and nutrients from the soil. When soil conditions are not optimal, roots struggle to function effectively, making plants susceptible to diseases and other problems. Soil pH measures the acidity or alkalinity of the soil. Each plant species has an ideal pH range for optimal growth. Deviations from this range can hinder nutrient uptake and create an environment conducive to disease.
Drainage is equally important. Well-draining soil allows excess water to drain away, preventing waterlogging and root rot. Poor drainage creates stagnant water around the roots, depriving them of oxygen and causing them to suffocate. Over time, this can lead to root rot and ultimately the decline of the plant.
Therefore, when repotting, it is essential to use potting mix tailored to the specific plant’s pH requirements and ensure adequate drainage. This can be achieved by choosing containers with drainage holes and using soil amendments like perlite or pumice to improve drainage.
Warning signs of root rot include yellowing or wilting leaves, stunted growth, and foul-smelling soil. If you suspect root rot, remove the plant from its pot and inspect the roots. Healthy roots are white or cream-colored and firm. Black, mushy, or slimy roots indicate root rot.
Preventing root rot is far easier than treating it. By maintaining proper soil pH and drainage, you can provide your plants with the best conditions for healthy root development and overall well-being.
**Essential Considerations for Healthy Repotting**
Watering Frequency: Finding the Sweet Spot
Watering your repotted plant is crucial for its survival and growth. Overwatering can lead to root rot, a fatal condition caused by excess moisture suffocating the roots. Conversely, underwatering stresses the plant and inhibits its ability to take up nutrients.
The frequency of watering depends on several factors, including the plant’s species, container size, potting mix, and environmental conditions. As a general rule, allow the top inch of soil to dry between waterings. For large plants in large containers, you may need to water once or twice a week. For small plants in small containers, watering every few days may be necessary.
Indicators of Watering Needs
Observing your plant’s behavior can provide valuable clues about its watering needs. Wilting, yellowing leaves, or drooping stems indicate underwatering. If the soil is consistently damp or soggy, overwatering is likely. Additionally, leaf tips turning brown suggest a lack of moisture, while soft, mushy leaves can be a sign of excessive watering.
Preventing Overwatering: It’s All in the Technique
To avoid overwatering, use a watering can with a long, narrow spout to direct water directly to the base of the plant. Avoid splashing water on the leaves, as this can lead to disease. Water slowly, allowing the soil to absorb the moisture evenly.
Well-draining potting mix is essential to prevent sogginess. Choose a mix that contains perlite or vermiculite to improve drainage. You can also add pumice or gravel to the bottom of the container to create a reservoir that facilitates drainage.
By monitoring your plant’s condition and adjusting your watering schedule accordingly, you can ensure that your repotted plant thrives in its new home.
Essential Considerations for Healthy Repotting
When repotting your beloved plant companions, it’s not just about giving them a bigger home. Healthy repotting involves understanding their needs and ensuring their well-being. Two important factors to consider are soil pH and drainage to prevent root rot. The frequency of watering also plays a crucial role in keeping your plants thriving.
Signs of Plant Stress or Disease
It’s essential to be observant and identify any signs of stress or disease in your plants after repotting. These can manifest in various ways, but some common symptoms include:
- 黄叶: Yellowing leaves can indicate nutrient deficiencies or overwatering.
- 枯萎: Wilting may be a sign of underwatering or root damage.
- 枯萎: Browning or blackened leaves can be caused by overwatering or infection.
- 落叶: Leaf drop can be a response to stress, such as temperature changes or lack of light.
- 害虫: Pest infestations can weaken plants and cause damage to leaves and stems.
Addressing Plant Stress or Disease
If you notice any of these symptoms, it’s important to take prompt action to address the underlying cause. Here are some tips:
- Check soil moisture: Make sure the soil is not too wet or too dry. Repot if necessary.
- Adjust watering: Overwatering can be a common issue. Water only when the soil feels dry to the touch.
- Inspect for pests: If pests are present, isolate the plant and apply appropriate treatment.
- Fertilize as needed: Nutrient deficiencies can be addressed with a balanced fertilizer.
- Consider professional help: If you’re unable to resolve the issue on your own, consult with a professional horticulturalist.
By understanding the essential considerations for healthy repotting and being observant of your plants, you can ensure their continued vitality and prevent any potential problems.
Essential Considerations for Healthy Repotting
Aside from choosing the right materials, timing, and technique, there are other crucial considerations for successful repotting. One of the most important is soil health.
Soil pH and Drainage
The pH level of your soil affects nutrient availability and plant growth. Ideally, the pH should be within the optimal range for your specific plant. Improper pH levels can lead to root rot, a serious condition that can weaken or kill your plant.
Similarly, proper drainage is essential to prevent waterlogging, which can suffocate roots. Choose a potting mix that drains well and avoid overwatering.
Watering Frequency
Water is essential for plant growth, but too much water can be detrimental. Overwatering can lead to root rot, wilting, and stunted growth. Allow the top inch or two of soil to dry out before watering again.
Stress and Disease
Repotting can be stressful for plants, so it’s important to monitor them closely for signs of stress or disease. These signs may include yellowing leaves, wilting, or stunted growth. If you notice any of these symptoms, consult with a local garden center or horticulturalist for advice.
Repotting Plants: A Comprehensive Guide to Transplanting Success
Repotting plants is an essential task for maintaining their health and growth. Whether you’re an experienced gardener or a plant newbie, this guide will provide you with all the knowledge and step-by-step instructions you need to repot your plants like a pro.
Essential Materials for Repotting
Choosing the right materials is crucial for successful repotting. Start with a suitable container that offers adequate space for the plant’s root system. The ideal size will vary depending on the specific plant, but generally, the container should be about an inch or two larger than the previous one.
Use a high-quality potting mix tailored to the plant’s needs. Select a mix that provides good drainage, as stagnant water can lead to root rot. Finally, gather essential tools such as trowels, gloves, and watering cans.
Step-by-Step Repotting Process
-
Optimal Repotting Schedule: Determine when your plants need repotting based on their growth rate and root development. Most plants should be repotted every two to three years.
-
Soil Preparation: Prepare the new potting mix by loosening it up and adding any necessary amendments, such as perlite or vermiculite, to enhance drainage and aeration.
-
Plant Removal: Carefully loosen the soil around the base of the plant and gently remove it from its container. Avoid pulling or tugging on the stems.
-
Transplanting: Place the plant in the center of the new container and fill the remaining space with fresh potting mix. Gently firm the soil around the base of the plant without compacting it too much.
-
Watering: Water the plant thoroughly after repotting to settle the soil and hydrate the roots.
Understanding Plant Anatomy for Optimal Repotting
Knowing your plant’s anatomy is vital for proper repotting. The root system includes the roots, which absorb water and nutrients, and the root ball, which is the mass of roots surrounding the base of the plant. When roots become overgrown and tightly packed within the root ball, it’s a sign that the plant is root-bound and needs repotting.
Essential Considerations for Healthy Repotting
-
Soil pH and Drainage: Ensure that the soil pH and drainage capabilities are appropriate for the specific plant. Poor drainage can lead to root rot, while improper pH levels can hinder nutrient absorption.
-
Watering: Water your repotted plant regularly, especially during the first few weeks after repotting, to prevent transplant shock. However, avoid overwatering, as this can also damage the roots.
-
Signs of Stress or Disease: Observe your plant for signs of stress or disease, such as yellowing leaves, wilting, or stunted growth. Address these issues promptly to prevent further damage.
Resources for Further Support
-
Local Garden Centers and Nurseries: Many nurseries offer repotting services or consultations for a fee. Local horticulturalists or plant experts can also provide professional advice.
-
Online Resources: Numerous reputable websites and forums provide comprehensive information on plant repotting techniques, plant care guides, and troubleshooting tips.
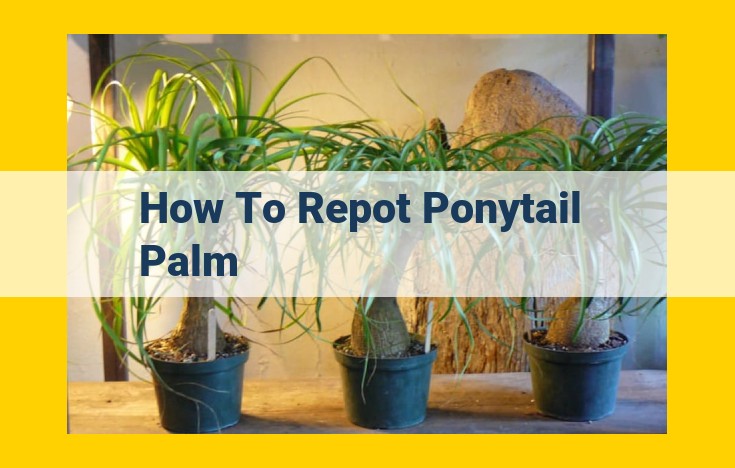
Plant Spotlight: Ponytail Palm
The ponytail palm (Beaucarnea recurvata) is a great example of a plant with a closeness score of 10, indicating its suitability for repotting. This unique plant has a swollen trunk that stores water and long, slender leaves. Its slow growth rate and adaptability make it a popular choice for both indoor and outdoor gardens.
Repotting Your Plants: A Step-by-Step Guide to Success
Repotting your plants is an essential part of their care, ensuring they have enough space to grow and thrive. Follow these steps for a successful repotting experience.
Essential Materials for a Smooth Repotting Process:
Gather the necessary items for effortless repotting:
- Container: Choose a container with adequate drainage holes to prevent waterlogging.
- Potting Mix: Select a well-draining mix that meets your plant’s specific needs.
- Tools: Prepare a sharp knife, trowel, and gloves to handle roots and soil with ease.
Step-by-Step Repotting Process:
- Identify Repotting Time: Observe if your plant’s roots are circling the pot or the soil appears compacted. This indicates it’s time for a repot.
- Prepare the Plant: Gently remove your plant from its old pot, loosen the root ball, and remove any dead or damaged roots.
- Prepare the Pot and Soil: Fill the new container with potting mix to about one-third of the pot’s height. Create a small hole in the center of the mix.
- Transplant the Plant: Position the plant in the hole and fill in the remaining potting mix, patting it down to secure the plant.
- Water Deeply: Water your newly repotted plant thoroughly to settle the soil and remove any air pockets.
- Prevent Transplant Shock: Place your plant in a warm, humid spot to help it adjust to its new environment.
Plant Anatomy for Optimal Repotting:
Understanding plant anatomy is crucial for selecting the appropriate container size and potting mix. Roots, which absorb nutrients and water, grow vertically and horizontally. Root-bound plants have crowded roots that restrict growth.
Essential Considerations for Healthy Repotting:
- Soil pH and Drainage: Ensure the soil pH is suitable for your plant and that the container has drainage holes to prevent root rot.
- Watering: Water regularly, but avoid overwatering. Check soil moisture before watering and allow excess water to drain off.
- Signs of Stress and Disease: Monitor your plant for signs of yellowing leaves, wilting, or pests. Address any issues promptly.
Resources for Further Support:
Plant Spotlight: Ponytail Palm
With a closeness score of 10, the ponytail palm is a popular plant for repotting. Its unique trunk resembles a ponytail, and it tolerates a wide range of conditions. Its care requirements include bright indirect light, well-draining soil, and infrequent watering.
Unveiling the Green Marvel: Repotting with Ease
Repotting, an art of nurturing, rejuvenates our beloved plant companions, providing them with ample space and nourishment to thrive. Join us on this comprehensive guide, where we’ll embark on a journey through the essential materials, step-by-step process, and crucial considerations for successful repotting.
Materials for a Thriving Haven
Every plant’s journey begins with the right tools and materials. Suitable containers provide ample drainage and root development, while nutrient-rich potting mix provides sustenance. Trustworthy tools like trowels and watering cans ensure precise handling.
A Step-by-Step Odyssey: Repotting with Grace
Timing is everything! Observe your plant’s growth pattern to determine the optimal repotting schedule. Then, follow our step-by-step guide:
- Prepare the soil: Fill the new container with well-draining potting mix.
- Gently extract the plant: Loosen the old soil and carefully remove the plant.
- Transplant with care: Place the plant in the new pot and fill in with potting mix, patting it down gently.
- Water wisely: Give your newly repotted plant a thorough drink, avoiding overwatering.
- Protect from transplant shock: Provide shade and humidity to ease the transition.
Understanding Plant Anatomy: The Key to Success
Unveiling the secrets of plant anatomy empowers us to make informed repotting decisions. Roots, the lifeblood of plants, determine the size of the container needed. Root-bound plants signal their discomfort with stunted growth.
Essential Considerations for Plant Harmony
Soil pH and drainage significantly impact root health. Watering frequency is crucial, as overwatering can lead to root rot. Observe your plants for signs of stress or disease and address them promptly with proper care.
A Plant Spotlight: The Ponytail Palm
Amidst the plant kingdom, the ponytail palm stands tall as an example of repotting success, earning a closeness score of 10. Its captivating appearance and resilience make it an ideal choice. With its striking sculptural form and minimal maintenance needs, the ponytail palm is a testament to the transformative power of repotting.
Resources for Your Green Adventures
Your repotting journey doesn’t end here. Local garden centers and nurseries offer expert advice and services. Consult reputable horticulturalists for personalized guidance. Explore online resources for a wealth of information at your fingertips.
As you embark on this botanical adventure, remember: repotting is a testament to our love for our plant companions. With the right materials, techniques, and understanding, you’ll witness your plants flourish, filling your home with vibrant greenery and a sense of tranquility.
Ponytail Palm: A Suitable Choice for Repotting
Introduction:
The ponytail palm, with its unique and graceful appearance, has captured the hearts of plant enthusiasts worldwide. Its peculiar trunk, resembling a ponytail, and its lush foliage make it an eye-catching addition to any indoor space. But beyond its aesthetics, the ponytail palm also offers several advantages when it comes to repotting.
Unique Characteristics:
The ponytail palm stands out from the crowd thanks to its unusual trunk. This bulbous structure, known as a caudex, acts as a water reservoir, allowing the plant to withstand periods of drought. Its slender and elegant leaves, arranged in a fan shape, create a cascading effect that adds a touch of drama to any room.
Care Requirements:
Easy to Care for: The ponytail palm is renowned for its low maintenance nature. It thrives in bright, indirect light and requires infrequent watering. Its drought tolerance makes it an excellent choice for those with busy schedules or a tendency to forget to water their plants.
Why it’s Suitable for Repotting:
Adaptable to Different Containers: The ponytail palm’s compact size and slow growth rate allow it to be repotted into a variety of containers. Whether you prefer a stylish ceramic pot or a rustic terracotta planter, the ponytail palm will adapt gracefully.
Tolerates Root-bound Conditions: Unlike many plants that struggle when their roots become constricted, the ponytail palm tolerates root-bound conditions rather well. This makes it less susceptible to transplant shock and allows you to enjoy your plant’s beauty for an extended period before the need for repotting arises.
Enhances Growth and Longevity: Repotting the ponytail palm into a larger container with fresh potting mix provides it with additional space for root development and nutrient absorption. This not only promotes healthy growth but also extends the plant’s lifespan, ensuring you can enjoy its beauty for years to come.
