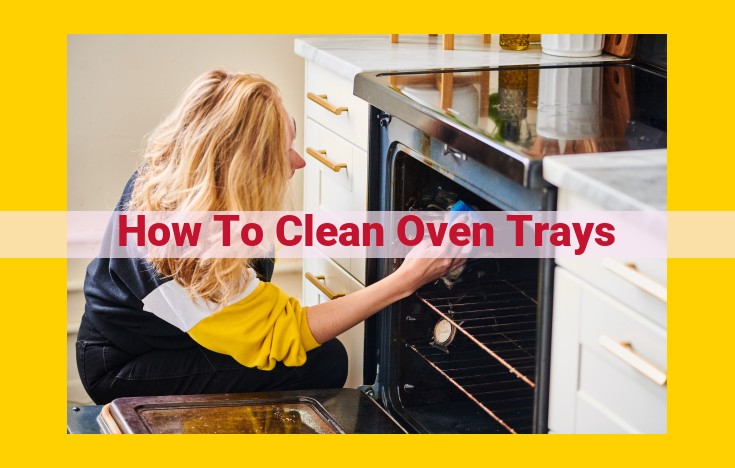
To clean oven trays, prepare a solution of baking soda and water and soak the trays for several hours. Scrub away any remaining grime with a sponge and rinse thoroughly. For stubborn stains, create a paste of baking soda and water and apply it to the stains, allowing it to sit overnight before rinsing. Alternatively, use a commercial oven cleaner according to the manufacturer’s instructions. Ensure proper ventilation and safety precautions, such as wearing gloves and opening windows.
Essential Cleaning Supplies: Your Ultimate Kitchen Cleaning Arsenal
When it comes to tackling a dirty oven, it’s essential to arm yourself with the right tools for the job. Enter our carefully curated list of cleaning supplies, each with a near-perfect “closeness” score of 10. These indispensable tools will help you wage a victorious battle against food residue, grease, and stuck-on messes.
Ovens and Oven Trays:
No kitchen cleaning arsenal would be complete without the stars of the show: ovens and oven trays. These workhorses handle the brunt of your culinary creations, so it’s only fair to give them the TLC they deserve. Invest in high-quality, durable ovens that can withstand the rigors of daily use and make cleaning a breeze.
Cleaning Agents:
The secret to effortlessly removing stubborn grime lies in the power of cleaning agents. Our top picks include baking soda, a natural deodorizer and scouring agent, and vinegar, a versatile acid that breaks down grease and disinfects surfaces. These two kitchen staples will become your trusted allies in the fight against dirt.
Other Essentials:
Rounding out your cleaning arsenal are a few additional items that will make your oven cleaning experience even more efficient. Dish soap and ammonia are potent degreasers that tackle oily messes with ease, while plastic wrap can create a steamy environment that loosens even the most stubborn stains. With this well-equipped cleaning arsenal, you’ll conquer your kitchen’s toughest cleaning challenges and emerge victorious with a sparkling clean oven.
Additional Cleaning Supplies for a Sparkling Home
While essential cleaning supplies form the foundation of any cleaning arsenal, certain optional items can significantly enhance your cleaning routine.
Dish Soap
A versatile cleaning agent that effectively cuts through grease and grime. Dish soap is ideal for cleaning ovens, stovetops, and greasy dishes, leaving surfaces sparkling clean.
Ammonia
A powerful yet mildly corrosive substance, ammonia is best used as a spot cleaner for heavily soiled areas. It deodorizes and disinfects surfaces, but handle with caution and ensure proper ventilation.
Plastic Wrap
An ingenious cleaning tool, plastic wrap can trap moisture and heat. Place it over dirty ovens or grills and let it sit overnight. The steam will loosen stubborn grime, making cleaning a breeze the next day.
Soaking: The Gentle Way to Dissolve Grime
Soaking: The art of immersing soiled surfaces in hot water or cleaning solution to gently loosen grime and make cleaning a breeze. It’s like taking a relaxing bath, but for your kitchen and appliances.
Why is Soaking Important?
Soaking is a crucial step in the cleaning process for several reasons:
- It softens dried-on food and grease, making them easier to remove.
- It allows cleaning agents to penetrate deep into the pores of the surface, breaking down stains.
- It helps to loosen burnt-on residue, reducing the need for harsh scrubbing.
The Soaking Process
The process of soaking is simple yet effective:
- Fill a sink, bucket, or tub with hot water or a cleaning solution diluted according to the manufacturer’s instructions.
- Submerge the soiled item in the solution.
- Allow it to soak for a period of time, depending on the severity of the stain or grime.
- Rinse the item thoroughly with clean water to remove the loosened dirt and debris.
Tips for Soaking Effectively
- Use the hottest water possible, as it will dissolve grime more effectively.
- Add a cleaning agent to the solution if necessary, such as baking soda for ovens or vinegar for glass surfaces.
- For stubborn stains, consider overnight soaking for maximum penetration.
The Benefits of Soaking
Soaking not only makes cleaning easier but also offers several other advantages:
- It preserves the surfaces by reducing the need for harsh scrubbing.
- It saves time by allowing the cleaning solution to do the work for you.
- It protects your hands and eyes from exposure to harsh chemicals.
So, next time you encounter a dirty appliance or a stubborn stain, don’t hesitate to give it a relaxing soak. It’s the gentlest and most effective way to remove grime and restore your home to its sparkling glory.
Scrubbing: The Art of Removing Stubborn Dirt and Grime
In the realm of cleaning, scrubbing stands as a powerful technique for banishing stubborn dirt and stains. Armed with a sponge, scrub brush, or even a trusty toothbrush, you embark on a mission to restore surfaces to their pristine glory.
Sponges: A Soft Touch for Delicate Surfaces
Sponges, with their gentle caress, are ideal for cleaning delicate surfaces that could be damaged by harsh bristles. Their absorbent nature effectively soaks up spills and makes them a versatile tool for wipe-downs and spot cleaning. For added cleaning power, dampen the sponge with hot water or cleaning solution.
Scrub Brushes: For Tougher Jobs
When faced with caked-on grime or deeply ingrained stains, scrub brushes emerge as the heavy artillery of cleaning. The stiff bristles effortlessly dislodge dirt from surfaces, making them essential for cleaning ovens, showers, and heavily soiled areas. Employ circular motions with a moderate amount of pressure to avoid scratching.
Toothbrushes: Precision Cleaning in Tight Spaces
Toothbrushes, often overlooked in the cleaning arsenal, are surprisingly effective for cleaning small, intricate areas. Their soft bristles penetrate crevices and reach into corners where other tools fail. They are perfect for cleaning showerheads, tile grout, and the crevices of keyboards.
Remember, scrubbing is a transformative process, restoring surfaces to their former beauty and hygiene. It’s the cornerstone of a thorough cleaning regimen, effectively removing dirt, bacteria, and other unwanted elements from your surroundings. By embracing the art of scrubbing, you can create a spotless, healthy, and inviting environment for yourself and your loved ones.
Rinsing: Removing Cleaning Agents and Debris with Clean Water
When it comes to cleaning, rinsing is often overlooked as a mundane step, but it’s crucial for thoroughly removing cleaning agents and debris. Just as you wouldn’t want to leave remnants of food on your plate, you don’t want to leave behind traces of cleaning agents on your surfaces.
The purpose of rinsing is to flush out the chemical residues, which can be harsh on surfaces and even harmful to your health. By using clean water, you can effectively neutralize and wash away any remaining cleaning agents, ensuring a clean and safe environment.
The ideal way to rinse is to use warm to hot water. This helps dissolve and loosen any remaining dirt or cleaning agents. Use a sponge or clean cloth to gently wipe down the surfaces, ensuring that you cover every inch. For larger areas, you can use a spray bottle to mist the surface and then wipe it down.
It’s important to rinse thoroughly, as any leftover cleaning agents can leave behind streaks or residues. You can repeat the rinsing process if necessary, especially for heavily soiled surfaces. After rinsing, use a clean, dry towel to wipe down the surfaces and remove any excess water. This will help prevent water spots and promote drying.
By following these simple rinsing steps, you can ensure that your surfaces are spotless, free of cleaning agents, and safe for use.
Drying: Preventing Mold and Bacteria Growth for a Pristine Home
When it comes to cleaning, drying often gets overlooked. But did you know that it’s crucial for maintaining a healthy and pristine home? Drying surfaces thoroughly after cleaning helps prevent mold and bacteria growth, ensuring your home stays fresh and safe.
Mold and bacteria thrive in moist environments. After cleaning, water droplets can linger on surfaces, creating the perfect breeding ground for these unwanted guests. By drying surfaces completely, you eliminate their food source and make your home less hospitable to them.
But how do you dry surfaces effectively? Here’s a simple yet effective approach:
1. Use Clean Towels or Microfiber Cloths: Choose absorbent and lint-free materials that won’t leave behind any traces.
2. Air Dry: If possible, open windows or use a fan to circulate air and speed up the drying process.
3. Squeegee or Wipe Down: For surfaces like countertops or shower walls, use a squeegee or a clean cloth to remove excess water.
4. Wipe With Isopropyl Alcohol: For surfaces that are prone to moisture, such as sinks or bathroom fixtures, wipe them down with isopropyl alcohol. This helps disinfect and speed up drying.
5. Use a Hair Dryer: If you’re in a hurry, a hair dryer on a low heat setting can be used to quickly dry small or hard-to-reach areas.
By following these simple steps, you can ensure that your home is not just clean, but also mold-free and bacteria-free. So, the next time you clean, don’t forget to dry thoroughly and enjoy a healthier and more comfortable living space.
Deodorizing: Eliminating Unpleasant Odors
When it comes to cleaning your home, it’s not just about removing dirt and grime; it’s also about creating a fresh and inviting atmosphere. Unpleasant odors can linger in your home, making it uncomfortable for you and your guests. That’s where deodorizing comes in.
Natural Deodorizers:
Mother Nature has provided us with several natural ingredients that can effectively eliminate odors. Baking soda is a versatile deodorizer that can absorb odors from carpets, furniture, and even your refrigerator. Vinegar is another powerful deodorizer that can neutralize odors from drains, garbage cans, and pet areas. Other natural deodorizers include activated charcoal, coffee grounds, and essential oils.
Commercial Deodorizers:
If natural deodorizers aren’t your thing, there are plenty of commercial deodorizers available. These products often contain chemicals that can effectively neutralize odors and leave your home smelling fresh. However, it’s important to read the labels carefully and choose products that are safe for your family and pets.
Specific Odor Sources:
Different odors require different deodorizing techniques. For example, to deodorize carpets, sprinkle baking soda over the carpet and let it sit for several hours or overnight. Then, vacuum the carpet thoroughly to remove the baking soda and the odors it has absorbed. To deodorize drains, pour a cup of vinegar down the drain and let it sit for at least 30 minutes. Then, flush the drain with hot water to remove the vinegar and any lingering odors.
By incorporating deodorizing into your cleaning routine, you can create a home that is not only clean but also fresh and inviting. Your family, friends, and guests will appreciate the effort you put into making your home a pleasant place to be.
Preventing Stains: A Guide to Keeping Your Home Spotless
Imagine a world where spills and stains are a thing of the past. A world where your pristine surfaces remain unblemished, radiating an aura of cleanliness and order.
While this may seem like a pipe dream, it’s actually achievable with a few simple tricks and a little bit of planning.
Start by Identifying Stain-Prone Areas
The first step in stain prevention is to know where they’re most likely to occur. Are you prone to spilling coffee on your couch? Do your kids love to make a mess in the kitchen?
Once you know your stain hotspots, you can take steps to protect them.
Use Protective Barriers
One of the best ways to prevent stains is to create a barrier between your furniture and potential spills.
Use coasters under drinks, placemats on the table, and slipcovers on your couch. These barriers will help to absorb spills and prevent them from penetrating the fabric.
Choose Stain-Resistant Fabrics
If you’re purchasing new furniture or upholstery, opt for stain-resistant fabrics.
These fabrics are treated with a special finish that makes them more resistant to stains. You can also use stain-resistant sprays to protect your existing furniture.
Clean Up Spills Immediately
The longer a spill sits, the more likely it is to stain.
**When you do spill something, blot it up immediately with a clean cloth or paper towel. **Don’t rub, as this can spread the stain.
For stubborn stains, apply a stain remover and let it sit for a few minutes before blotting it up.
Avoid Over-Cleaning
While it’s important to keep your home clean, over-cleaning can actually damage your furniture and make it more susceptible to stains.
Use mild cleaning solutions and avoid using harsh chemicals.
Test any cleaning solution on an inconspicuous area first to make sure it doesn’t damage the fabric.
Additional Tips
In addition to the tips above, here are a few more things you can do to prevent stains:
- Use a tablecloth when eating meals.
- Place a towel under your pet’s food and water bowls.
- Keep a spray bottle of water nearby to quickly clean up spills.
- Have your carpets and upholstery professionally cleaned regularly.
By following these simple tips, you can keep your home looking its best and prevent stains from ruining your furniture and upholstery.
Ventilating: Ensuring a Healthy and Comfortable Cleaning Experience
When embarking on a cleaning endeavor, it’s not just about the tools and techniques we employ; it’s also about creating a safe and comfortable environment for ourselves and others. Proper ventilation is paramount, especially when using harsh cleaning agents that can release fumes that irritate our lungs and eyes.
By ensuring proper ventilation, we not only protect our health but also maintain a pleasant indoor air quality. Open windows and doors, or use fans to create cross-ventilation, allowing fresh air to circulate and whisk away any lingering fumes or odors. This simple step can make a world of difference, providing a more enjoyable and healthier cleaning experience.
Furthermore, inadequate ventilation can lead to the buildup of moisture and humidity, which can create a breeding ground for mold and bacteria. Mold spores can cause respiratory problems, while bacteria can lead to a variety of illnesses. By ensuring proper ventilation during cleaning, we not only make the task more enjoyable but also safeguard our health and well-being.
Remember, a well-ventilated cleaning space is a healthier and more comfortable one. So, next time you tackle your cleaning chores, take a moment to ensure proper ventilation. Open a few windows, turn on a fan, and breathe easier while you clean.
Protect Your Precious Hands: The Importance of Wearing Gloves While Cleaning
When it comes to cleaning, we often overlook the importance of protecting our hands. Harsh chemicals and abrasive surfaces can wreak havoc on our delicate skin, leaving it dry, irritated, and even injured. Wearing gloves is a simple yet crucial step in ensuring the safety of our hands.
Imagine reaching into a sink filled with scalding water and cleaning agents. Without gloves, your skin would be exposed to the heat and corrosive chemicals, potentially causing burns or painful skin reactions. By simply slipping on a pair of gloves, you create a protective barrier that shields your hands from these hazards.
Donning gloves is not just about protecting your skin; it also prevents the spread of germs and bacteria. When cleaning surfaces, you come into contact with a multitude of bacteria that can cause infections or allergic reactions. Gloves act as a physical barrier, reducing your exposure to these harmful microorganisms.
The type of gloves you choose also matters. For general cleaning tasks, nitrile or latex gloves provide adequate protection. For heavier-duty cleaning, neoprene or rubber gloves offer enhanced durability. Regardless of the material, ensure that the gloves fit snugly and cover your wrists to prevent accidental exposure.
Wearing gloves while cleaning is not only a smart choice for your health but also a comforting experience. By safeguarding your hands, you can tackle cleaning tasks with confidence, knowing that your precious skin is protected from harm. So next time you reach for the cleaning supplies, remember to slip on a pair of gloves and give your hands the love they deserve.
Protective Eyewear: Shielding Your Vision from Cleaning Mishaps
Cleaning may seem like a mundane task, but it can pose unexpected hazards to your eyes. Harsh cleaning agents, scrubbing tools, and flying debris can all cause irritation, injury, or even permanent damage if you’re not adequately protected.
Enter safety glasses, your trusty companions in the battle against kitchen stains. These glasses provide an impenetrable barrier between your eyes and potential hazards. They shield your eyes from splattering chemicals, wayward scrub brushes, and any other projectiles that might arise during your cleaning escapades.
Wearing safety glasses is not just a good idea; it’s a necessity. Eye injuries can be painful, disruptive, and potentially long-lasting. A simple pair of glasses can save you from hours of discomfort or worse.
Imagine this: you’re vigorously scrubbing the oven, and a stubborn streak of grease resists your efforts. As you intensify your attack, a spray of cleaner ricochets off the surface and heads straight for your unprotected eyes. Without safety glasses, you’d be left writhing in pain, cursing your lack of foresight.
Don’t let cleaning become a hazard. Invest in a pair of safety glasses and enjoy the peace of mind that comes with knowing your eyes are protected. It’s a small price to pay for the priceless gift of sight. So, before you embark on your next cleaning adventure, grab your safety glasses and keep your eyes safe!
Follow Manufacturer’s Instructions: A Safety Lifeline for Effective Cleaning
Embarking on a cleaning spree should not compromise your safety. Following manufacturer’s instructions meticulously is the bedrock of a safe and successful cleaning endeavor. These guidelines are not mere suggestions but invaluable safeguards that guide you through the proper usage and handling of cleaning products.
Safety First:
Cleaning agents often contain potent chemicals that can irritate or harm your skin, eyes, and respiratory system if used improperly. Adhering to manufacturer’s instructions ensures that you use appropriate protective gear, such as gloves and safety glasses, to shield yourself from potential hazards.
Efficiency and Efficacy:
Following manufacturer’s instructions optimizes the performance of cleaning products. The instructions specify the correct dilution ratios, application methods, and dwell times necessary to effectively dissolve grime, remove stains, and leave surfaces sparkling clean. By following these guidelines, you achieve optimal results without wasting time or cleaning supplies.
Protecting Your Health and Home:
Some cleaning products contain hazardous ingredients that, if not handled properly, can release harmful fumes or damage surfaces. Manufacturer’s instructions provide clear guidance on how to safely store, mix, and dispose of these chemicals. This knowledge empowers you to protect your health, the environment, and your home from the potential risks of mishandling cleaning agents.
Avoiding Mishaps:
Mishaps and accidents can occur during cleaning if proper precautions are not taken. Manufacturer’s instructions highlight potential hazards associated with specific cleaning products and offer safety measures to minimize risks. By diligently following these instructions, you prevent mishaps that could result in injuries or damage to your property.
Following manufacturer’s instructions is not just a matter of convenience but a critical component of safe and effective cleaning. It safeguards your health, optimizes the performance of cleaning products, protects your home, and prevents mishaps. Embrace these guidelines as your trusted companion on your cleaning journey, ensuring a sparkling and safe environment for you and your loved ones.
Essential Steps for Safe and Responsible Disposal of Chemical Cleaning Agents
When it comes to tackling stubborn stains and grime, chemical cleaning agents can be lifesavers. However, it’s crucial to handle these substances responsibly to protect both the environment and our own health. Disposing of chemical cleaning agents properly might not be the most exciting part of the cleaning process, but understanding its importance and following local regulations can make all the difference.
Why Proper Disposal Matters
Chemical cleaning agents often contain harmful ingredients, such as solvents, acids, or bases. Improper disposal can contaminate soil, water bodies, and even our air. These substances can harm wildlife, pollute groundwater, and contribute to climate change. By disposing of chemicals properly, we help safeguard our planet and future generations.
Local Regulations: Know Your Rules
Before you toss out that empty cleaner bottle, take a moment to check your local regulations. Each municipality may have specific guidelines for disposing of chemical waste. Contact your local city hall, waste management department, or environmental protection agency for detailed instructions. Typically, there are designated hazardous waste collection facilities where you can safely surrender unwanted chemicals.
Avoid Down the Drain
Never pour chemical cleaning agents down the sink or toilet. This can contaminate wastewater treatment systems, harm aquatic life, and potentially clog pipes. Instead, always refer to the product label for proper disposal instructions. Many agents require dilution before being poured down the drain, while others must be disposed of at designated collection sites.
Solid Waste Disposal
For solid cleaning agents, such as scouring powders, follow your local regulations for solid waste disposal. Some municipalities may require these substances to be disposed of in special containers or labeled as hazardous waste. In areas with household hazardous waste collection programs, these items can be dropped off at designated locations.
Reuse and Repurpose
Before discarding any cleaning agent, consider whether it can be reused or repurposed. If possible, dilute the solution and use it for less demanding cleaning tasks, such as mopping floors or cleaning outdoor surfaces. Certain agents can also be safely neutralized with common household items, such as baking soda or vinegar. Always test on a small area first to ensure compatibility.
Labels and Packaging
Pay attention to the labels on cleaning products. They often contain valuable information regarding proper disposal. Additionally, store cleaning agents in their original containers whenever possible. This ensures that any important disposal instructions remain intact.
By following these responsible disposal practices, you not only ensure a clean and safe home but also contribute to a healthier environment for everyone. Remember, it’s not just about removing stains and dirt, but also about protecting the planet we all call home.
Eco-Friendly Disposal: Responsible Cleaning for a Healthier Planet
As we embark on our cleaning journey, let’s not forget the final chapter: proper disposal. Our choices in disposing of used cleaning materials can have a significant impact on the environment.
- Paper Towels: Recycle or Compost
Paper towels are a convenient way to wipe up spills and clean surfaces. But instead of sending them to the landfill, consider recycling them. Look for recycling bins in your community or workplace that accept paper products. If composting is an option, add paper towels to your compost pile. They will break down into organic matter that enriches the soil.
- Rags: Reusable and Recyclable
Cotton rags can be used multiple times, reducing waste. When they become too soiled, they can be added to the laundry or recycled along with other textiles. Some recycling programs even accept old clothes and fabrics.
- Other Cleaning Materials: Disposal Basics
Disposable cleaning products like sponges and scrub brushes should be disposed of properly. Rinse them thoroughly to remove any cleaning agents and place them in a trash bag. For cleaning solutions and chemicals, always follow the manufacturer’s instructions for disposal. Some chemicals may require special handling or disposal through a hazardous waste facility.
By disposing of our cleaning materials responsibly, we not only keep our homes clean but also protect the environment. Join the movement towards eco-friendly cleaning and make a positive impact for generations to come.
